In this guide, we will learn how to install and configure BackupPC as a backup server on Ubuntu 18.04.
BackupPC is a free, high-performance enterprise-grade backup software suite with a web-based frontend that can be used for backing up Linux, Windows and Mac OS PCs and laptops to a server’s disk. BackupPC is highly configurable, easy to install and maintain. BackupPC requires no client as it is itself a client for several protocols that are handled by other services native to the client OS.
Install and Configure BackupPC on Ubuntu 18.04
Update and upgrade your system packages.
apt update
apt upgrade
BackupPC can be install from Ubuntu repos using the package manager.
apt install -y backuppcDuring installation you will be prompted to choose the type of web server to be configured. In our case, we will select option 1 to have Apache2 installed and configured for use with BackupPC. See the screenshot below.
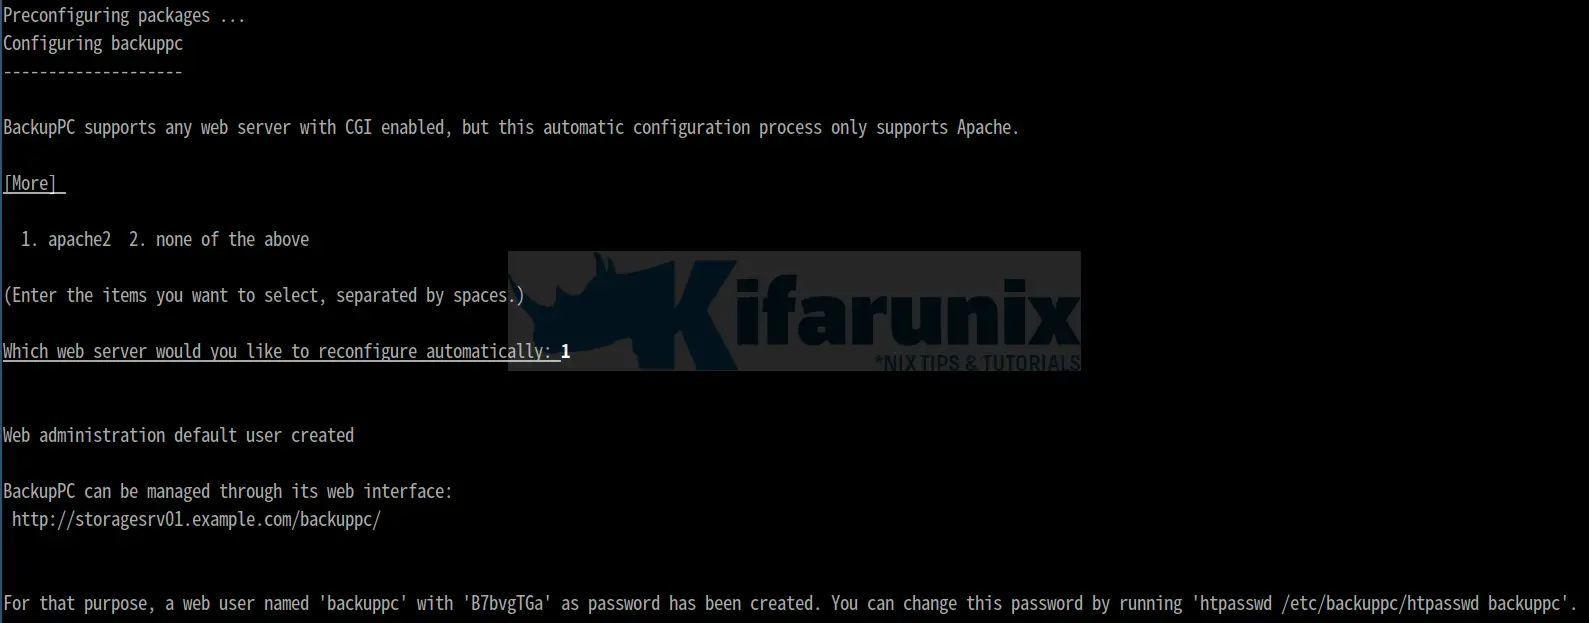
During installation, BackupPC will set up an administrative user, backuppc. This user is used to administer various tasks such as access the BackupPC web dashboard, carry out backups…A default password is also generated for this user for logging into web interface. As a security measure, this password has to be changed. Run the following command to change the password:
htpasswd /etc/backuppc/htpasswd backuppcBackupPC uses different methods to get backup data from clients:
- smb – used for backing up windows machines
- tar – used for backing up Linux/Unix/MacOSX systems
- rsync – used for backing up Linux/Unix/MacOSX systems
In this tutorial we will be using rsync protocol as a backup method. For rsync to work, BackupPC requires passwordless SSH login for backuppc user to every client it will be getting backup data from. As a result, switch to backuppc user on BackupPC server and generate passwordless ssh keys and copy them to clients.
su - backuppcThis will opens up the sh shell. You can run bash command to launch bash shell.
Generate SSH key pair by running the following command;
ssh-keygen
Generating public/private rsa key pair.
Enter file in which to save the key (/var/lib/backuppc/.ssh/id_rsa): ENTER
Created directory '/var/lib/backuppc/.ssh'.
Enter passphrase (empty for no passphrase): ENTER
Enter same passphrase again: ENTER
Your identification has been saved in /var/lib/backuppc/.ssh/id_rsa.
Your public key has been saved in /var/lib/backuppc/.ssh/id_rsa.pub.
The key fingerprint is:
SHA256:qZUR/Aohas/rqkqp2ME1RHOA7D7vMiBvqXgGxr2RMoc [email protected]
The key's randomart image is:
+---[RSA 2048]----+
| . .+.... |
| o..o. .. |
| . ... ... |
| +. . +. |
|.ooo+ .S. |
|+E+*o. o. |
|o**+o.. |
|=.Ooo |
|O*o*o |
+----[SHA256]-----+
Copy the SSH public to root user on each client from which the BackupPC will collect backup data. Or more conveniently, create an account on the client dedicated for backup purposes for example, create a backuppc user account on remote client and copy the public key to that user.
useradd -m backuppc
passwd backuppc
Now logout from client host and copy the SSH public key to backuppc user on the client.
ssh-copy-id [email protected]Where 192.168.43.214 is my client IP address. Once you copy the key, you should be able to login without being prompted for a password.
NOTE: By default, BackupPC is using root user for backup. So if you happen to change the backup user, edit BackupPC configuration file, /etc/backuppc/config.pl and edit the following lines by changing the root user to a user you are using for backup.
Since we will be using rsync protocol as a backup method, we will make changes under Rsync/Rsyncd Configuration.
vim /etc/backuppc/config.pl###########################################################################
# Rsync/Rsyncd Configuration
# (can be overwritten in the per-PC log file)
###########################################################################
...
# This setting only matters if $Conf{XferMethod} = 'rsync'.
# Comment this line and add the same line with root user changed to backuppc
#$Conf{RsyncClientCmd} = '$sshPath -q -x -l root $host $rsyncPath $argList+';
$Conf{RsyncClientCmd} = '$sshPath -q -x -l backuppc $host $rsyncPath $argList+';
...
# Comment out these line and add the same line with root user changed to backuppc
#$Conf{RsyncClientRestoreCmd} = '$sshPath -q -x -l root $host $rsyncPath $argList+';
$Conf{RsyncClientRestoreCmd} = '$sshPath -q -x -l backuppc $host $rsyncPath $argList+';
...Restart backuppc service to apply the changes.
systemctl restart backuppcNow, test the login to client with the backup user to ensure user can successfully login to client. You can use root user if you didnt make the changes above.
ssh -l backuppc client_IP whoami
backuppc
or
ssh -l root client_IP whoami
root
If you changed you backup user to non-root user, Login to the client host and allow the non-user to run the rsync command without being prompted for password by adding the user to sudoers list. backuppc for our case.
ssh backuppc@client_IP
su -
echo "backuppc ALL=NOPASSWD: /usr/bin/rsync" > /etc/sudoers.d/backuppc
You can run the command, which rsync to find the absolute path of rsync.
If rsync command is not installed, run the following commands to install it.
apt install rsync -y
yum install rsync -y
You may also want to disable ssh agent-forwarding, port-forwarding or even the pty for backuppc user logging in to the client from BackupPC. To do this, login to client, edit the ssh authorized key file and add the line, from=”backuppc_server_ip”,no-agent-forwarding,no-port-forwarding,no-pty, before the ssh-rsa keyword.
vim /home/backuppc/.ssh/authorized_keysfrom="192.168.43.154",no-agent-forwarding,no-port-forwarding,no-pty ssh-rsa AAAAB3NzaC1yc2EAAAADAQABAAABAQCeetRD5TDVQV7wZ9K7k2D2LvPWi5+h6rP8TDRxMhYuG1oA3uS4S0GpZYMOcMRjW+gaeMzBVNZ6qK/g3TyPx7fNsQipXYp0RaJvS/M/k9QChYkzvxFad/WXDkx5Wsqzf1CfT/eGBMaFICTYePKQTnsPn5Vd2zS/7t/XfYLJCXTz8EANn02xz+rrRAHzAwB4ZJ1jOYh/LnWUfezJrlZssV1XmZ5E/Gw8+YSdYwvf5gn3asBnwbmTAOxBKmSgff14s61LPcPX/cRjeBC2QmWTmWKTk5zxsnrUQA3eRJ5KL3yYLZrxxSeTc1dMMTVq1q9ra+nmkiTtINCi/XXhO3Qu7YAT [email protected]If all that is okay, login to BackupPC via browser using the link, http://backuppc_server_IP/backuppc and proceed with configuration. To access the dashboard, login the web credentials created above.
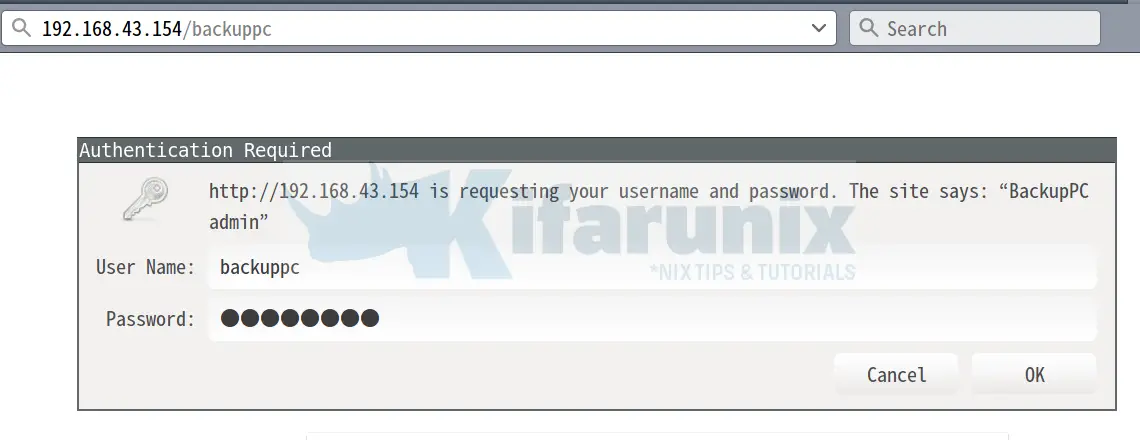
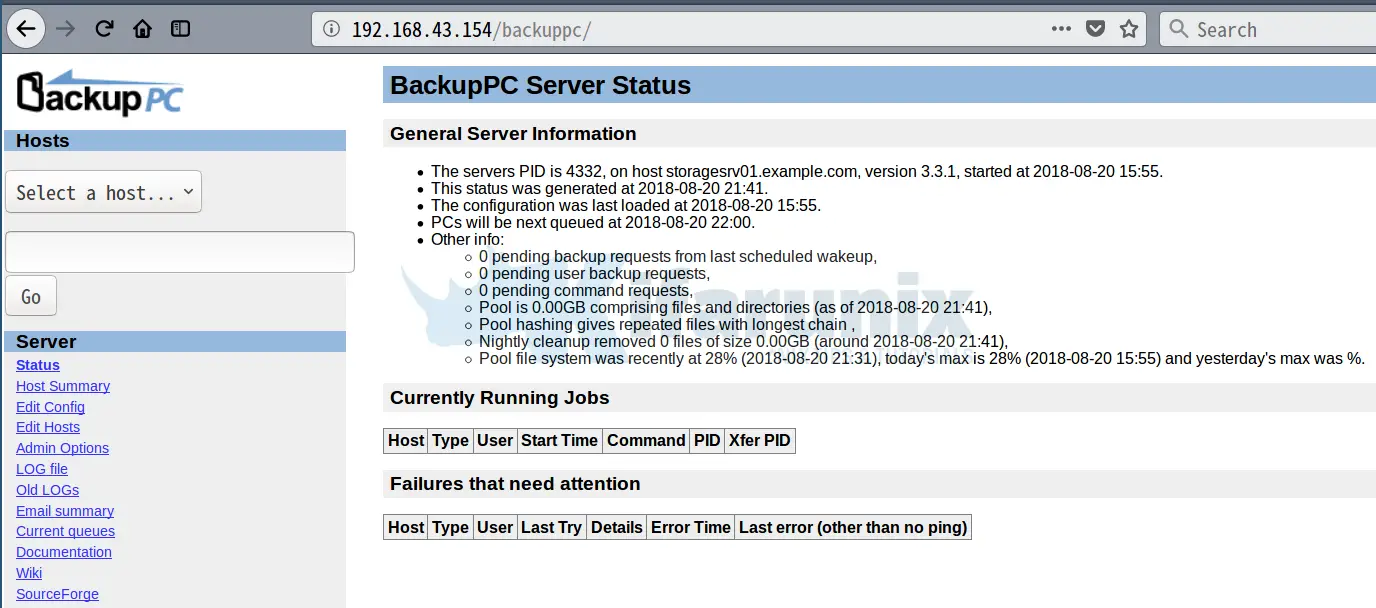
When you login, the dashboard below welcomes you.
Once you are logged in, you can now add the clients to backup. To add a client host, click on Edit Hosts on the left panel. This opens up a hosts configuration editor. Localhost is already added as the client but since we are only backing up remote clients, delete local hosts by clicking the delete button and click add to add you client hosts. For user, enter backuppc.
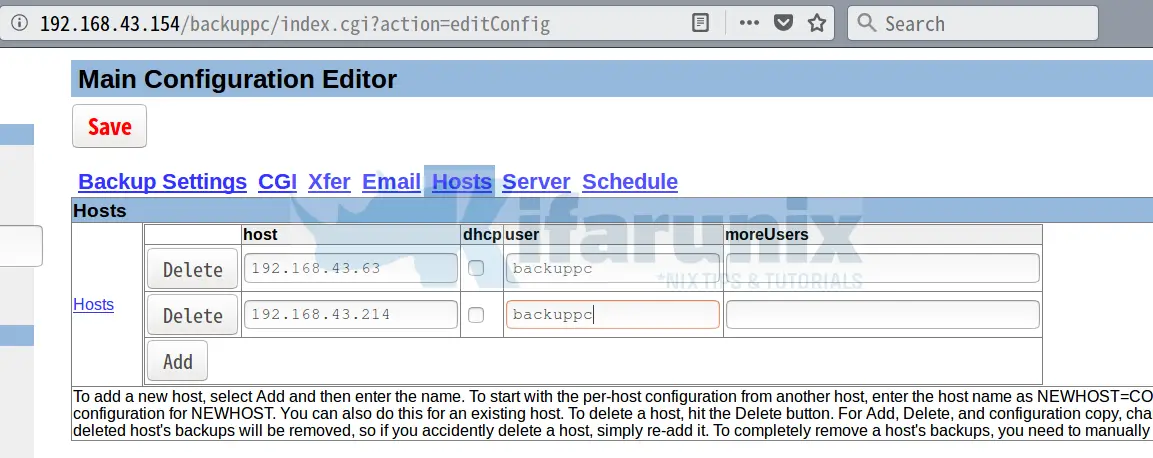
When done adding hosts, click the save button to apply the changes.
Once the changes are saved, Configure backup data transfer settings, ie the protocol for backup method, In this case, we are using rsync. So still on the configuration editor, Click Xfer tab. Under Xfer Settings, click the dropdown and select rsync.
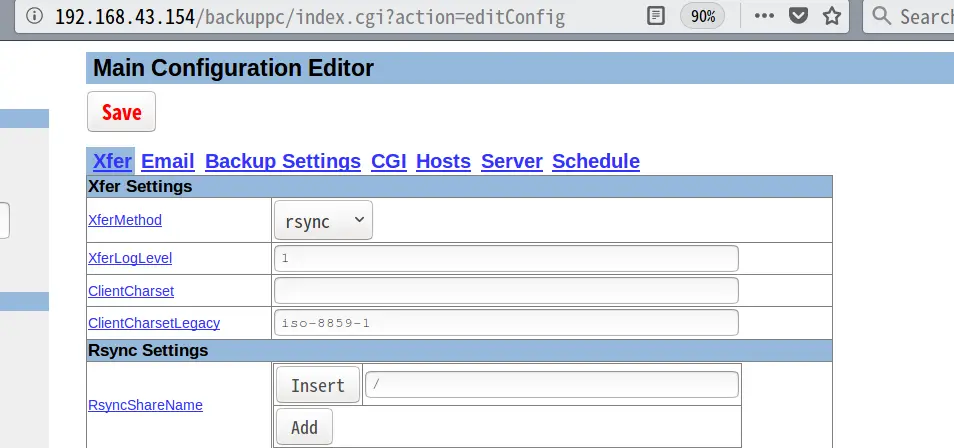
Click Save to apply the changes.
Next, we need to configure the paths to backup for the clients.
On the left pane, under Hosts, click on the dropdown button and select a client host.
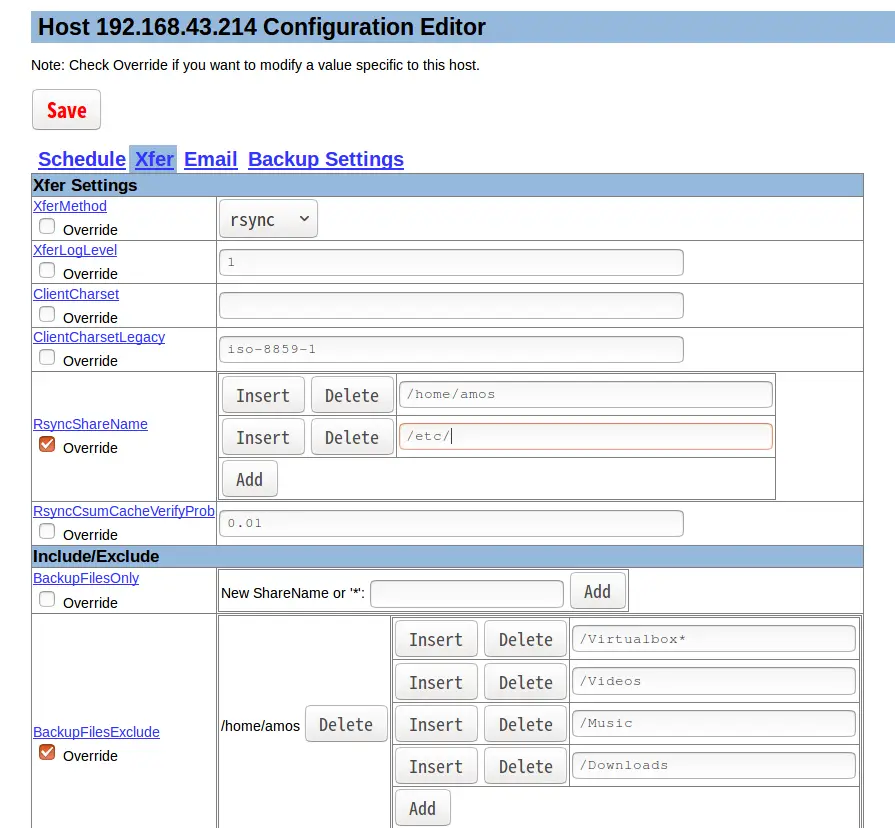
Click on Edit Config. Then on the configuration editor, click Xfer.
Under Xfer Settings, check the overide box under RsyncShareName and add specific path to back up on client. For instance the home directory of a user. To exclude some path from backing up, check the box under under BackupFilesExclude on Include/Exclude settings and add the parent path then paths to exclude. See the screenshot below.
Once done with settings, click save to apply changes.
In our next step, we will be configuring backup schedule, There are two types of backing up data, Incremental backup and full backup. Incremental backup is done daily and only 6 most recent backupps are kept while full backup happens every 7 days and only newest copy of data is backed up.
On the left pane, under Server settings, click Edit Config and navigate to Schedule tab.

You can make any changes as you see fit.
Now that we have done most configurations, let us run a manual backup on the two clients.
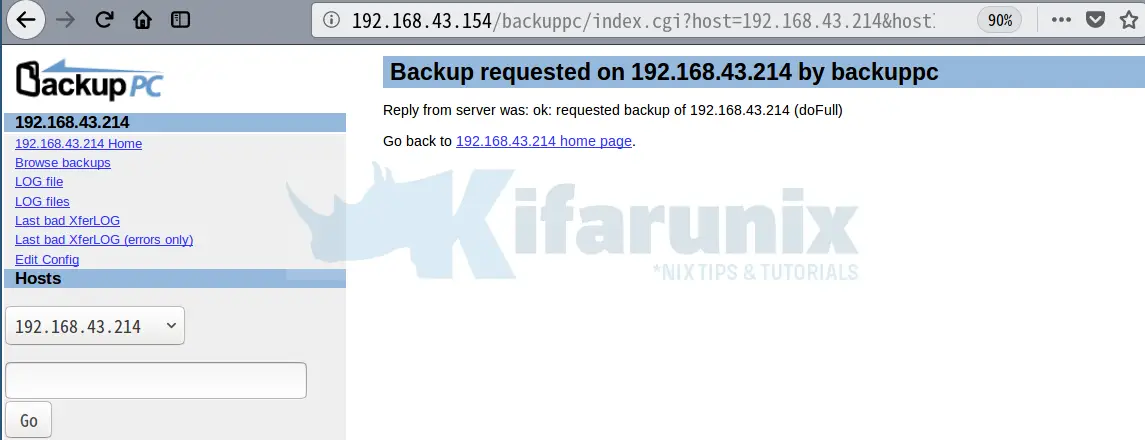
Under Hosts on the top left panel, select the two hosts one by one and under Backup Summary > User Actions, click Start Full Backup and if everything is okay, you should see Reply from server ok.
To check the backup logs, click the LOG file link on the left panel. You can also check under following path on the server:
/var/lib/backuppc/pc/ip_address_of_client/To check the backup summary, click the Host Summary link on the left pane, under Server.

To have an overview of what is backedup, click the host IP as shown in the summary above, then click Browse Backups > Backup number.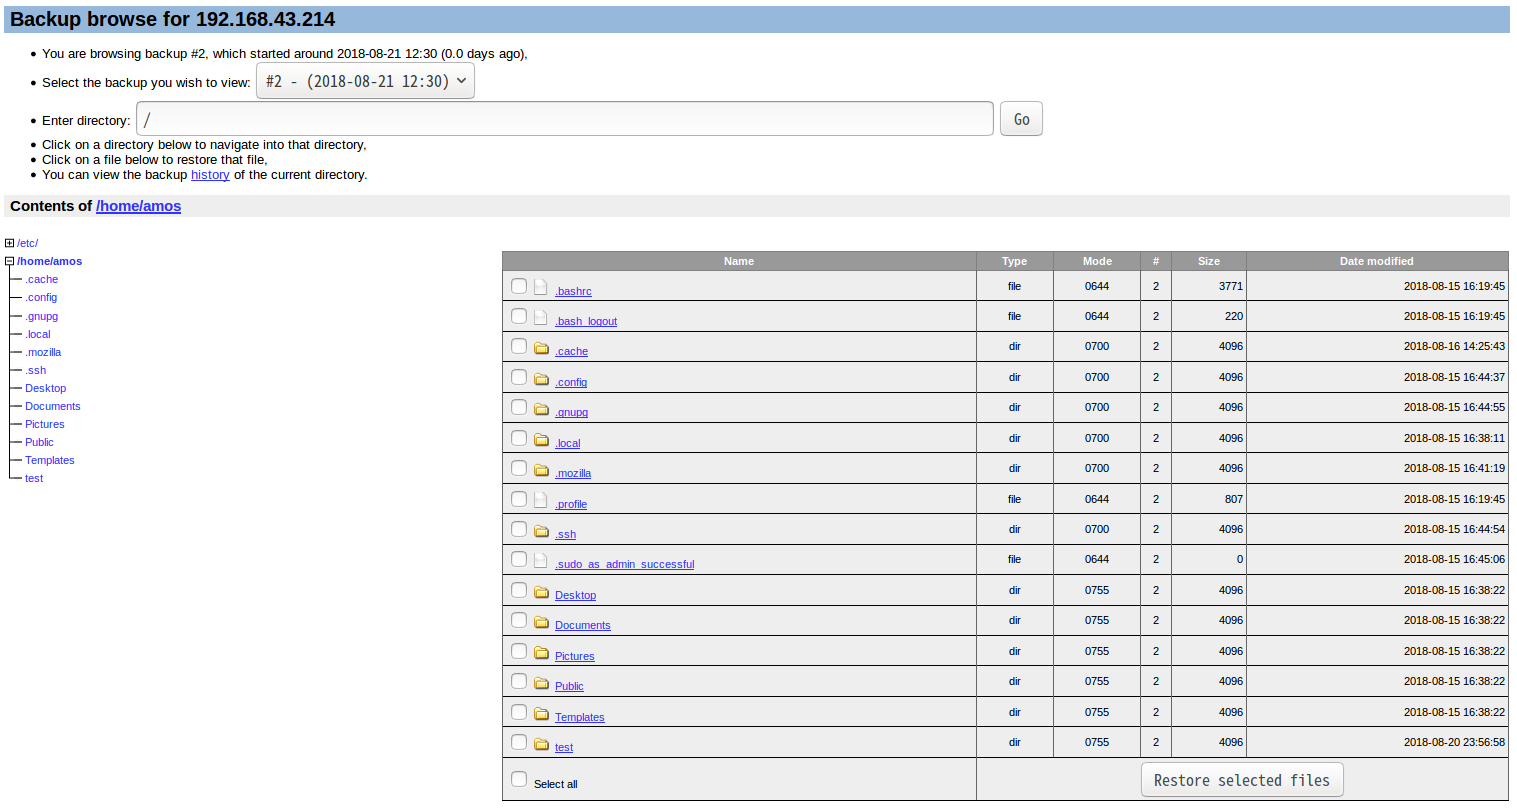
There you go. That is basically what it takes to install and configure BackupPC and upto there, you have successfully configure a BackupPC server on Ubuntu 18.04 server.
Learn how to backup windows systems using BackupPC by following the link below;
Backup Windows System via SMB Using BackupPC
You can also install BackupPC on Debian 10. Follow the link below;


Amos, have you used SSH ProxyCommands to backup via a ssh hop?
For example, on my backkuppc ubuntu box, I have set up in the ~./ssh/config the following hosts;
Host intserver1
User backuppc
ProxyCommand ssh -q externa.dns.tld -q0 192.168.1.xxx
This means on the server I can type
ssh intserver1 and it SSH’s through the one server I have exposed to this boxes firewall rules, then to the internal server. This works.
In backuppc, if I use rsync and enter intserver1 as the host, it fails:
no ping (no ping response)
Any ideas?
Hi Sheldon.
I haven’t tried backup via a jump server. I will check on this and update real soon.
Thanks
BackupPC is such a great product. It’s truly open-source, and it just works. I’m running Ubuntu 14.04 and have wanted to update the OS for sometime now. Thanks for a great article.