Welcome to our guide on how to backup Windows system via SMB using BackupPC server. There are three methods in which BackupPC can use to backup data. These include the use of SMB protocol for backing up Windows systems, Rsync and Tar for backing up Linux/Unix/MacOSX systems. In this guide, we are going to learn how to backup Windows system using SMB method.
As a prerequisite, ensure that you have setup BackupPC server. You can check our guide on setting up BackuPC on Ubuntu 18.04 by following the link below;
You can also setup BackupPC on Debian 10.
Install and Configure BackupPC on Debian 10
Backup Windows System via SMB Using BackupPC
Once you have a BackupPC server up and running, proceed to backup a windows system as follows. In this guide, we are going to use Windows 7 for demonstration.
Create Windows SMB Share
In order to backup any given folder on your Windows system, you need to create an SMB share for it. You also need to have a user and password for SMB share authentication. Hence, in this guide, we have added a standard user called backuppc to our Windows 7 system for backup purposes.
Let us take for exampleyou want to backup Documents folder for the user mibeyki. Then navigate to C:\Users\mibeyki. Right click on the Documents folder > Properties > Sharing.

Next, click on Share to share the folder with backup user, backuppc. Type the name or click on the drop down to select the user. Set the permission level to read only.
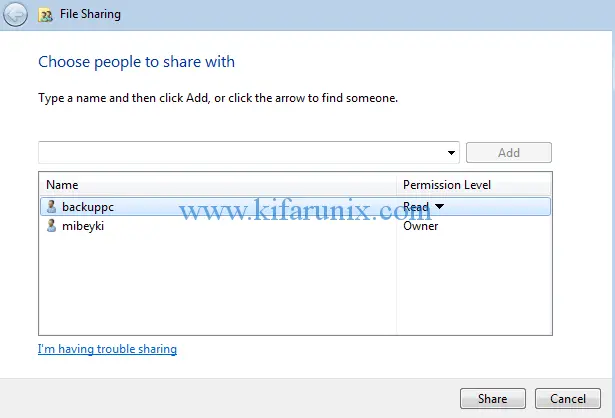
Click Share > Done to enable folder sharing with specified user.
Under Advanced Sharing, check the Share this folder and set the share name.

Click Apply to save the changes.
Configure Network Profile
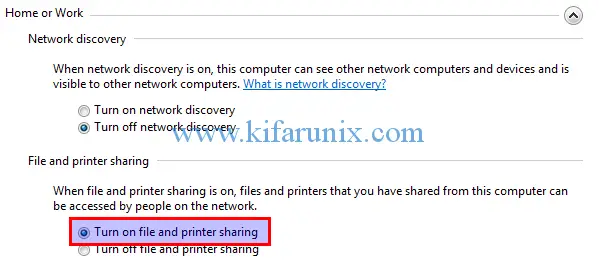
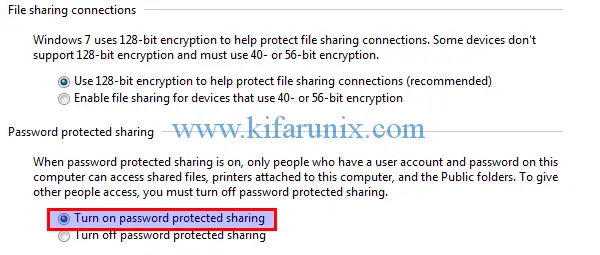
Navigate to Control Panel > Network and Internet > Network and Sharing Center > Advanced sharing settings and configure the sharing options for your specific network profile. In my example, am using work network profile. Turn on File and Printer sharing as well as password protected sharing.
Adding Host to BackupPC server
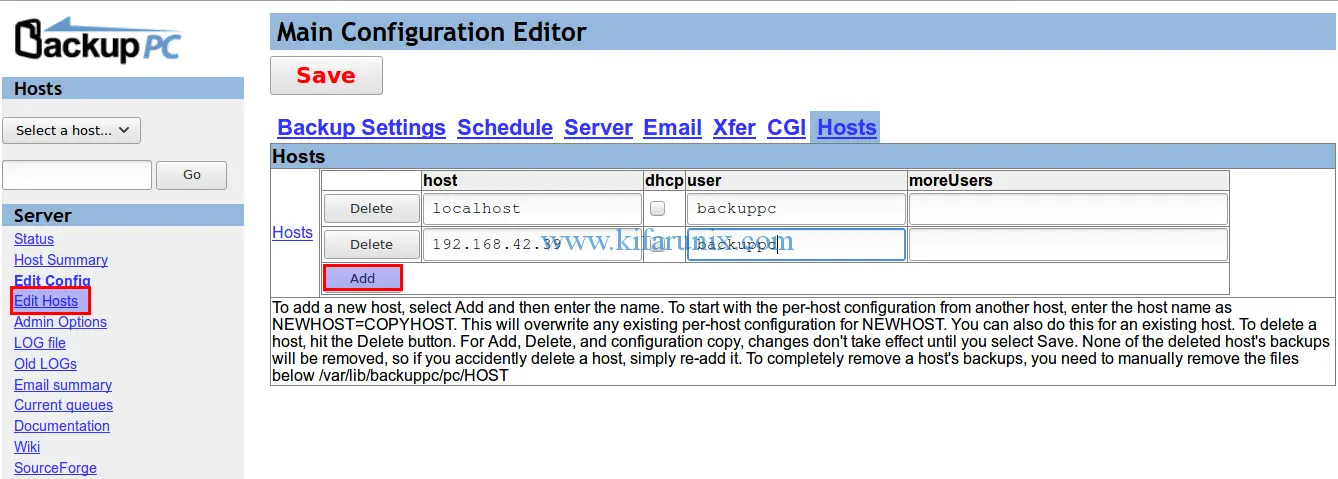
Before you can start to backup a system, you need to add it to BackupPC server. Navigate to BackupPC web user interface and under Server configuration shortcuts, click Edit Hosts. On the configuration editor, click Add to add a new host.
Under the host, you can use hostname if you have a working DNS server otherwise use the IP address. Set the backuppc as the user (or whatever user you defined for backup while setting up your BackuPPC server).
Backup Windows Host via SMB share
Select the host to configure from the Hosts drop down and click Edit Config.

On the configuration editor, click Xfer;
- Under Xfer Settings, set smb as the XferMethod.
- On Smb settings, set the smb share name, smb share username and smb share password.
- Under the Include/Exclude settings, you can set specific files to backup or files to exlude from backup in the smb share. For example, we have excluded all INI files.
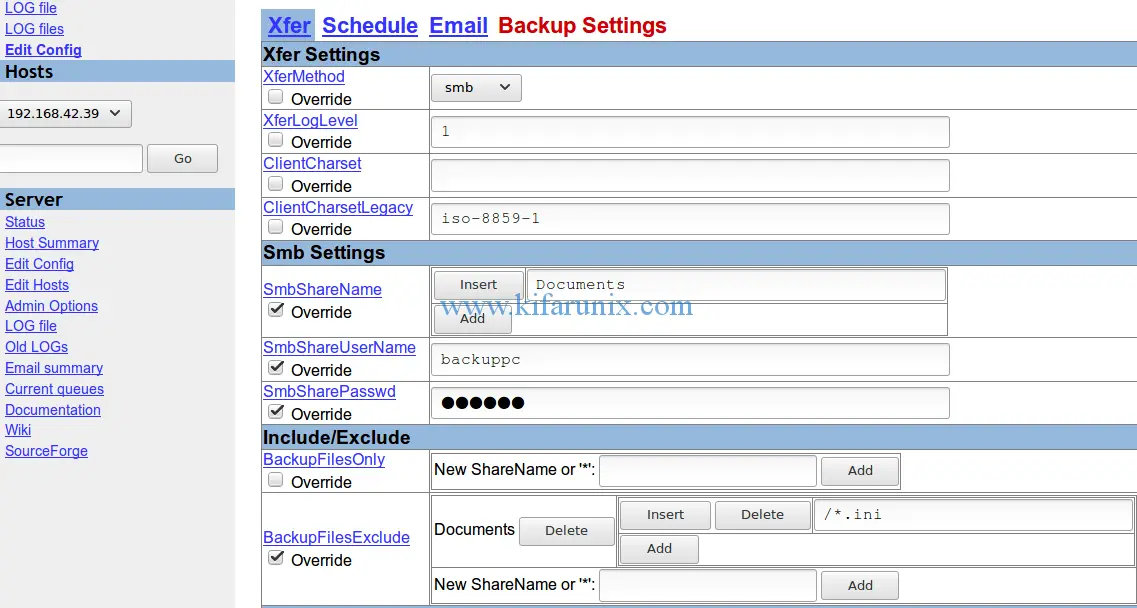
Once done with configurations, click Save to apply the configs.
To run backups, click on host Home or Hosts summary.
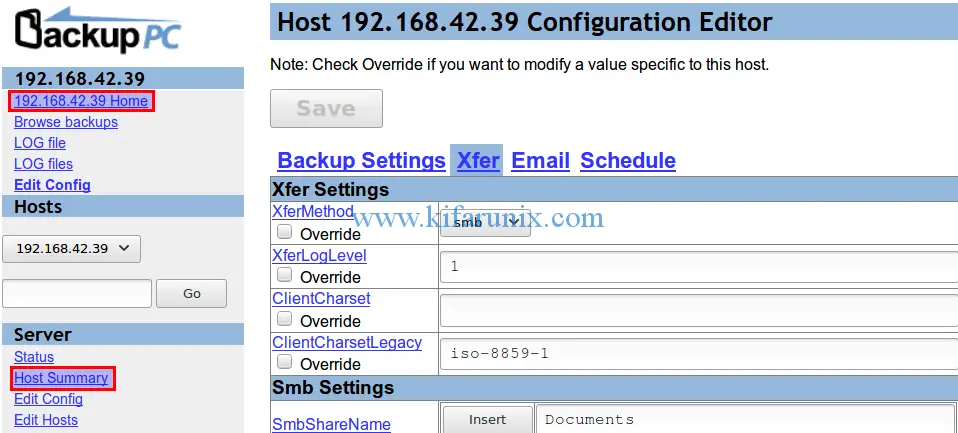
This opens the backup summary page. Under the user actions, click Start Full Backup.
To check backup progress, click Host summary.

You can as well check backup logs by clicking on LOG file as shown in the screenshot below.


Well, you have successfully backed up your windows system. That is all about how to backup Windows system via SMB using BackupPC.
Want to use Rsync protocol instead of SMB for backup? See our guide on how to backup Windows system with BackupPC using rsyncd by following the link below;

