In this tutorial, we will provide you with a step-by-step guide on deploying an application on Kubernetes cluster. Kubernetes is the de facto container orchestration tool that helps to deploy and manage applications in an efficient and scalable way. In this tutorial, we’ll walk you through the steps of deploying an application on Kubernetes cluster from beginning to end including creating a container image to configuring a Kubernetes service. Let’s get started!
Table of Contents
Deploying an Application on Kubernetes Cluster
Getting Started with Kubernetes
Before you can proceed, you can check out our other tutorials on getting started with Kubernetes;
Introduction to Kubernetes: What is it and why do you need it?
Kubernetes Architecture: A High-level Overview of Kubernetes Cluster Components
What are the core concepts in Kubernetes?
Setup Kubernetes Cluster
Ensure you have a running Kubernetes cluster. You can check this guide below on how to deploy a Kubernetes cluster using kubeadm command.
Setup Kubernetes Cluster on Ubuntu 22.04/20.04
Create a Docker Container Image
Kubernetes is a container orchestration tool. Therefore before you can deploy your application in Kubernetes, you need to have packaged it in a container image.
You can create your own custom image or simply just use already existing images on Docker hub to deploy your application.
In this guide, we will demonstrate how to deploy an application on Kubernetes cluster using a Nagios core container image that we created before while demonstrating how to deploy Nagios core as Docker container.
The image was created and pushed to local image registry configured with self-signed SSL/TLS certificates.
For example, let’s get a list of images on the local registry created using the command below (executed on K8s master node);
sudo apt install jq -ycurl -sk https://registry.kifarunix-demo.com/v2/_catalog | jqsample output;
{
  "repositories": [
    "nagios-core"
  ]
}
Check image tags;
curl -sk https://registry.kifarunix-demo.com/v2/nagios-core/tags/list | jq{
"name": "nagios-core",
"tags": [
"4.4.9"
]
}Our image is named as nagios-core:4.4.9.
Create Kubernetes Deployment and Service Manifests
A manifest is a Kubernetes application resource file either in YAML or JSON file which contains the configurations for creating, managing, and running an application in a Kubernetes cluster. Some of the resource defitions include deployments, services, ConfigMaps, Secrets, etc.
Deployment manifestdefines the desired state of an application, the number of replicas and any other settings required to deploy an app in Kubernetes.Service manifestdefines how an application is exposed and how other services or external clients can access it.Secrets: can be used to store credentials.
Configure Kubernetes Cluster to Trust Local Docker Registry with Self Signed SSL Certs
Are you using your local Docker registry to store your own Docker images?
It is a yes for me. In fact, with self signed SSL/TLS certs since it is a demo environment.
Thus, if this is the case for you as well, then you need to begin by ensuring that your Kubernetes cluster can be able to pull your application Docker images from your local registry. Since Kubernetes can only connect to a secured registry, I will have to configure Kubernetes itself to to trust my local registry with self-signed SSL certificates.
If you are using Docker registries secured with publicly trusted CAs, this step is not necessary for you!
To configure Kubernetes cluster to trust local Docker registry configured with self signed SSL/TLS certs, then;
- On Master node, download SSL/TLS certificates from the local registry (and let’s store them in our demo directory);
mkdir ~/k8s-app-demoopenssl s_client -showcerts -connect \
registry.kifarunix-demo.com:443 </dev/null 2>/dev/null \
| openssl x509 -outform PEM > ~/k8s-app-demo/registry-ca-cert.crt- Create Kubernetes Secret to use it to store the SSL/TLS certificate. You can create this secret store from a local certificate file just downloaded above;
cd ~/k8s-app-demokubectl create secret generic registry-ca-certs --from-file=registry-ca-cert.crtcd ../You can list secrets using;
kubectl get secretsSample output;
NAME                TYPE     DATA   AGE
registry-ca-certs   Opaque   1      13s
We will configure our K8s app deployment to use this certificate secret to establish a trust with the local Docker registry while pulling the image required to deploy our application.
- Install the Local Registry CA Certificate on all Kubernetes cluster nodes
On each and every node in the cluster, including the master node, download and install the local Docker image registry CA. This ensures a trust is established between the nodes and the local registry.
You need to store this certificate on the CA certificates directory, which is /usr/local/share/ca-certificates for Ubuntu systems and /etc/pki/ca-trust/source/anchors on CentOS and similar derivatives.
Thus, on Debian/Ubuntu
openssl s_client -showcerts -connect \
registry.kifarunix-demo.com:443 </dev/null 2>/dev/null \
| openssl x509 -outform PEM | sudo tee /usr/local/share/ca-certificates/registry-ca-cert.crt
Update the CA certificates store;
sudo update-ca-certificatesOn CentOS/RHEL;
openssl s_client -showcerts -connect \
registry.kifarunix-demo.com:443 </dev/null 2>/dev/null \
| openssl x509 -outform PEM | sudo tee /etc/pki/ca-trust/source/anchors/registry-ca-cert.crt
Update the CA certificates store;
sudo update-ca-trust- Restart the Container runtime, which in this setup is
containerd.
sudo systemctl restart containerdKubernetes should now be able to pull images from the local registry with no issues!
Create Kubernetes Application Deployment Manifest on Master Node
Next, create deployment manifest for your application. This is our sample deployment for deploying Nagios core application on Kubernetes.
vim ~/k8s-app-demo/nagios-deployment.yaml
apiVersion: apps/v1
kind: Deployment
metadata:
  name: nagios-core-deployment
spec:
  replicas: 3
  selector:
    matchLabels:
      app: nagios-core
  template:
    metadata:
      labels:
        app: nagios-core
    spec:
      imagePullSecrets:
        - name: registry-ca-certs
      containers:
        - name: nagios-core
          image: registry.kifarunix-demo.com/nagios-core:4.4.9
          imagePullPolicy: Always
          ports:
            - containerPort: 80
          env:
            - name: NAGIOSADMIN_USER_OVERRIDE
              value: "nagiosadmin"
            - name: NAGIOSADMIN_PASSWORD_OVERRIDE
              value: "password"
Update the file accordingly, save and exit.
So, what are some of the fields mean? Read more on Kubernetes API Reference.
When you feel like all is good to go, proceed to apply the application deployment manifest.
kubectl apply -f ~/k8s-app-demo/nagios-deployment.yamlYou can display information about the Deployment using the commands:
List deployments;
kubectl get deploymentsNAME READY UP-TO-DATE AVAILABLE AGE
nagios-core-deployment 3/3 3 3 15sOr specific deployment;
kubectl get deployments <name>kubectl describe deployments nagios-core-deployment
Name:                   nagios-core-deployment
Namespace:              default
CreationTimestamp:      Sun, 21 May 2023 10:30:21 +0000
Labels:
Annotations:            deployment.kubernetes.io/revision: 1
Selector:               app=nagios-core
Replicas:               3 desired | 3 updated | 3 total | 0 available | 3 unavailable
StrategyType:           RollingUpdate
MinReadySeconds:        0
RollingUpdateStrategy:  25% max unavailable, 25% max surge
Pod Template:
  Labels:  app=nagios-core
  Containers:
   nagios-core:
    Image:      registry.kifarunix-demo.com/nagios-core:4.4.9
    Port:       80/TCP
    Host Port:  0/TCP
    Environment:
      NAGIOSADMIN_USER_OVERRIDE:      nagiosadmin
      NAGIOSADMIN_PASSWORD_OVERRIDE:  password
    Mounts:
  Volumes:
Conditions:
  Type           Status  Reason
  ----           ------  ------
  Available      False   MinimumReplicasUnavailable
  Progressing    True    ReplicaSetUpdated
OldReplicaSets:
NewReplicaSet:   nagios-core-deployment-694b75b55b (3/3 replicas created)
Events:
  Type    Reason             Age   From                   Message
  ----    ------             ----  ----                   -------
  Normal  ScalingReplicaSet  20s   deployment-controller  Scaled up replica set nagios-core-deployment-694b75b55b to 3
List the Pods;
kubectl get pods
NAME                                      READY   STATUS    RESTARTS   AGE
nagios-core-deployment-77c4b8ddd5-jqtb9   1/1     Running   0          110s
nagios-core-deployment-77c4b8ddd5-xklk4   1/1     Running   0          110s
nagios-core-deployment-77c4b8ddd5-xsbhg   1/1     Running   0          110s
You can get more information about each pod using the kubectl describe pod command;
kubectl describe pod nagios-core-deployment-694b75b55b-845mhThis gives you quite information about the Pods and containers in it;
Name:             nagios-core-deployment-694b75b55b-845mh
Namespace:        default
Priority:         0
Service Account:  default
Node:             node02/192.168.56.130
Start Time:       Sun, 21 May 2023 10:30:22 +0000
Labels:           app=nagios-core
                  pod-template-hash=694b75b55b
Annotations:      cni.projectcalico.org/containerID: e5b22e41af92435bd1fb95aae196a4374502052479705954c07e5a54b02c6ec3
                  cni.projectcalico.org/podIP: 10.100.140.67/32
                  cni.projectcalico.org/podIPs: 10.100.140.67/32
Status:           Running
IP:               10.100.140.67
IPs:
  IP:           10.100.140.67
Controlled By:  ReplicaSet/nagios-core-deployment-694b75b55b
Containers:
  nagios-core:
    Container ID:   containerd://d31c41d4df5f8c84b8d5a77c4b92b40918d42b0ea48fc538ac581c6069c92396
    Image:          registry.kifarunix-demo.com/nagios-core:4.4.9
    Image ID:       registry.kifarunix-demo.com/nagios-core@sha256:fbd31bf11ab746de4437c93c2ce5e99b7acaa39d49a169a78616675c62de8d70
    Port:           80/TCP
    Host Port:      0/TCP
    State:          Running
      Started:      Sun, 21 May 2023 10:30:53 +0000
    Ready:          True
    Restart Count:  0
    Environment:
      NAGIOSADMIN_USER_OVERRIDE:      nagiosadmin
      NAGIOSADMIN_PASSWORD_OVERRIDE:  password
    Mounts:
      /var/run/secrets/kubernetes.io/serviceaccount from kube-api-access-hbw4f (ro)
Conditions:
  Type              Status
  Initialized       True
  Ready             True
  ContainersReady   True
  PodScheduled      True
Volumes:
  kube-api-access-hbw4f:
    Type:                    Projected (a volume that contains injected data from multiple sources)
    TokenExpirationSeconds:  3607
    ConfigMapName:           kube-root-ca.crt
    ConfigMapOptional:
    DownwardAPI:             true
QoS Class:                   BestEffort
Node-Selectors:
Tolerations:                 node.kubernetes.io/not-ready:NoExecute op=Exists for 300s
                             node.kubernetes.io/unreachable:NoExecute op=Exists for 300s
Events:
  Type    Reason     Age   From               Message
  ----    ------     ----  ----               -------
  Normal  Scheduled  73s   default-scheduler  Successfully assigned default/nagios-core-deployment-694b75b55b-845mh to node02
  Normal  Pulling    72s   kubelet            Pulling image "registry.kifarunix-demo.com/nagios-core:4.4.9"
  Normal  Pulled     42s   kubelet            Successfully pulled image "registry.kifarunix-demo.com/nagios-core:4.4.9" in 29.83093282s (29.830957408s including waiting)
  Normal  Created    42s   kubelet            Created container nagios-core
  Normal  Started    42s   kubelet            Started container nagios-core
Create Kubernetes Application Service Manifest on Master Node
As already mentioned, service manifest defines how an application is exposed and how other services or external clients can access it.
There are different ways in which an application can be exposed. Some of these include;
ClusterIP– This is the default type of service and exposes the application on an internal IP address in the cluster. This type of service is only reachable from within the cluster.NodePort– This type of service exposes the application on the same port of each selected Node in the cluster using NAT. This makes the service accessible from outside the cluster using<NodeIP>:<NodePort>. The default NodePort range is 30000-32767.LoadBalancer– This type of service creates an external load balancer in the current cloud (if supported) and assigns a fixed, external IP to the service. This makes the service accessible from outside the cluster using the external IP address. The external IP address is assigned by the cloud provider and is not managed by Kubernetes.
Here is our sample application service manifest;
vim ~/k8s-app-demo/nagios-service.yaml
apiVersion: v1
kind: Service
metadata:
  name: nagios-core-service
spec:
  type: NodePort
  selector:
    app: nagios-core
  ports:
    - name: http
      port: 80
      targetPort: 80
      nodePort: 30000  # Choose an available port number
This means Service named “nagios-core-service” selects Pods with the label “app: nagios-core” and exposes it on port 80 (port: 80). This service will be access via any cluster node IP on port 30000/tcp.
Update the file, save and exit and apply it as follows;
kubectl apply -f ~/k8s-app-demo/nagios-service.yamlList services;
kubectl get servicesOr simply;
kubectl get svc
NAME                  TYPE        CLUSTER-IP       EXTERNAL-IP   PORT(S)        AGE
kubernetes            ClusterIP   10.96.0.1        <none>        443/TCP        15h
nagios-core-service   NodePort    10.101.213.238   <none>        80:30000/TCP   6s
Get more details about the service;
kubectl describe service nagios-core-service
Name:                     nagios-core-service
Namespace:                default
Labels:
Annotations:
Selector:                 app=nagios-core
Type:                     NodePort
IP Family Policy:         SingleStack
IP Families:              IPv4
IP:                       10.101.213.238
IPs:                      10.101.213.238
Port:                     http  80/TCP
TargetPort:               80/TCP
NodePort:                 http  30000/TCP
Endpoints:                10.100.140.67:80,10.100.186.195:80,10.100.196.131:80
Session Affinity:         None
External Traffic Policy:  Cluster
Events:
You should now be able to access the service via any cluster node;
kubectl get nodes -o wide
NAME     STATUS   ROLES           AGE   VERSION   INTERNAL-IP      EXTERNAL-IP   OS-IMAGE           KERNEL-VERSION      CONTAINER-RUNTIME
master   Ready    control-plane   15h   v1.27.2   192.168.56.110           Ubuntu 22.04 LTS   5.15.0-27-generic   containerd://1.6.21
node01   Ready              15h   v1.27.2   192.168.56.120           Ubuntu 22.04 LTS   5.15.0-27-generic   containerd://1.6.21
node02   Ready              15h   v1.27.2   192.168.56.130           Ubuntu 22.04 LTS   5.15.0-27-generic   containerd://1.6.21
node03   Ready              15h   v1.27.2   192.168.56.140           Ubuntu 22.04 LTS   5.15.0-27-generic   containerd://1.6.21
Checking Kubernetes Pods/Containers Logs
If you want to check your Kubernetes Pods/container logs;
- Run the command below to get the Pods names;
kubectl get pods- Check the logs of the pod using
kubectl logs <pod-name>.
kubectl logs nagios-core-deployment-694b75b55b-845mh- Check logs for specific container in a Pod
First get a list of containers in a pod using the command;
kubectl get pods <pod-name> -o jsonpath='{range .spec.containers[*]}{.name}{"\n"}{end}'.kubectl get pods nagios-core-deployment-694b75b55b-845mh -o jsonpath='{range .spec.containers[*]}{.name}{"\n"}{end}'.Thus, to check logs for specific container in a Pod, use the command kubectl logs <pod-name> -c <container-name>.
kubectl logs nagios-core-deployment-694b75b55b-845mh -c nagios-coreRead more on;
kubectl logs --helpLogin to Specific Kubernetes Pod or Container in a Pod
Just like how you do docker exec -it <container> [sh|bash] in Docker, you can also login as;
kubectl exec -it <pod-name> -- bashTo login to specific Kubernetes Pod container;
kubectl exec -it <pod-name> -c <container-name> -- bashAccessing Kubernetes Application
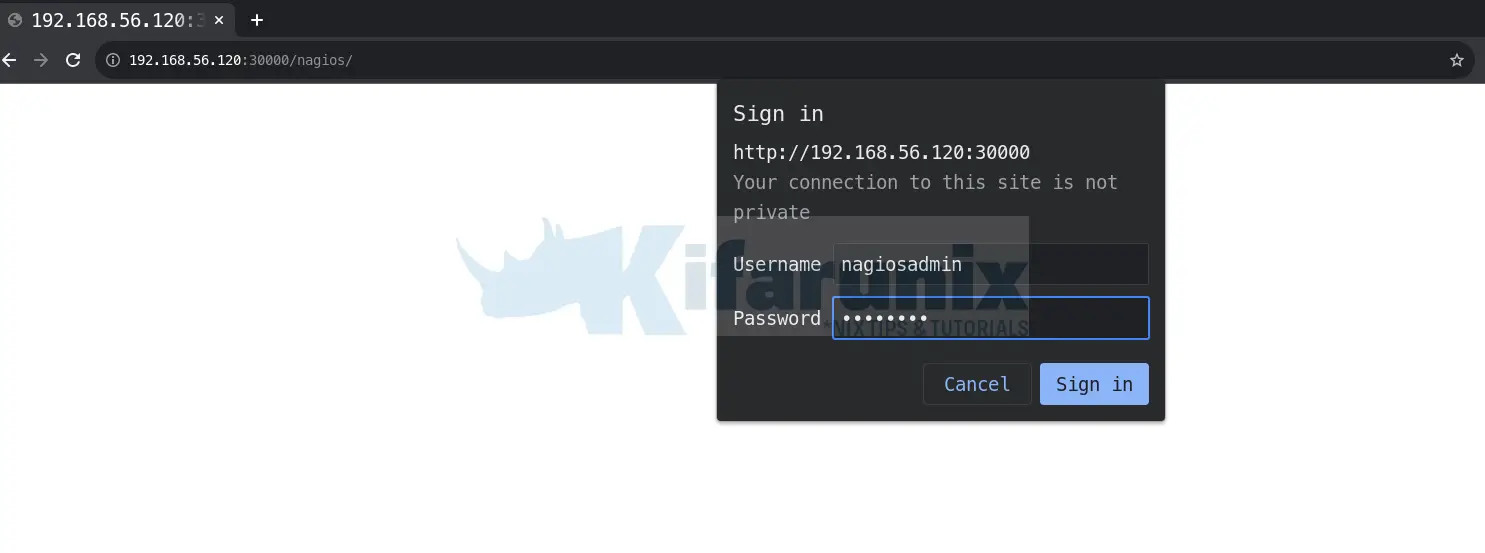
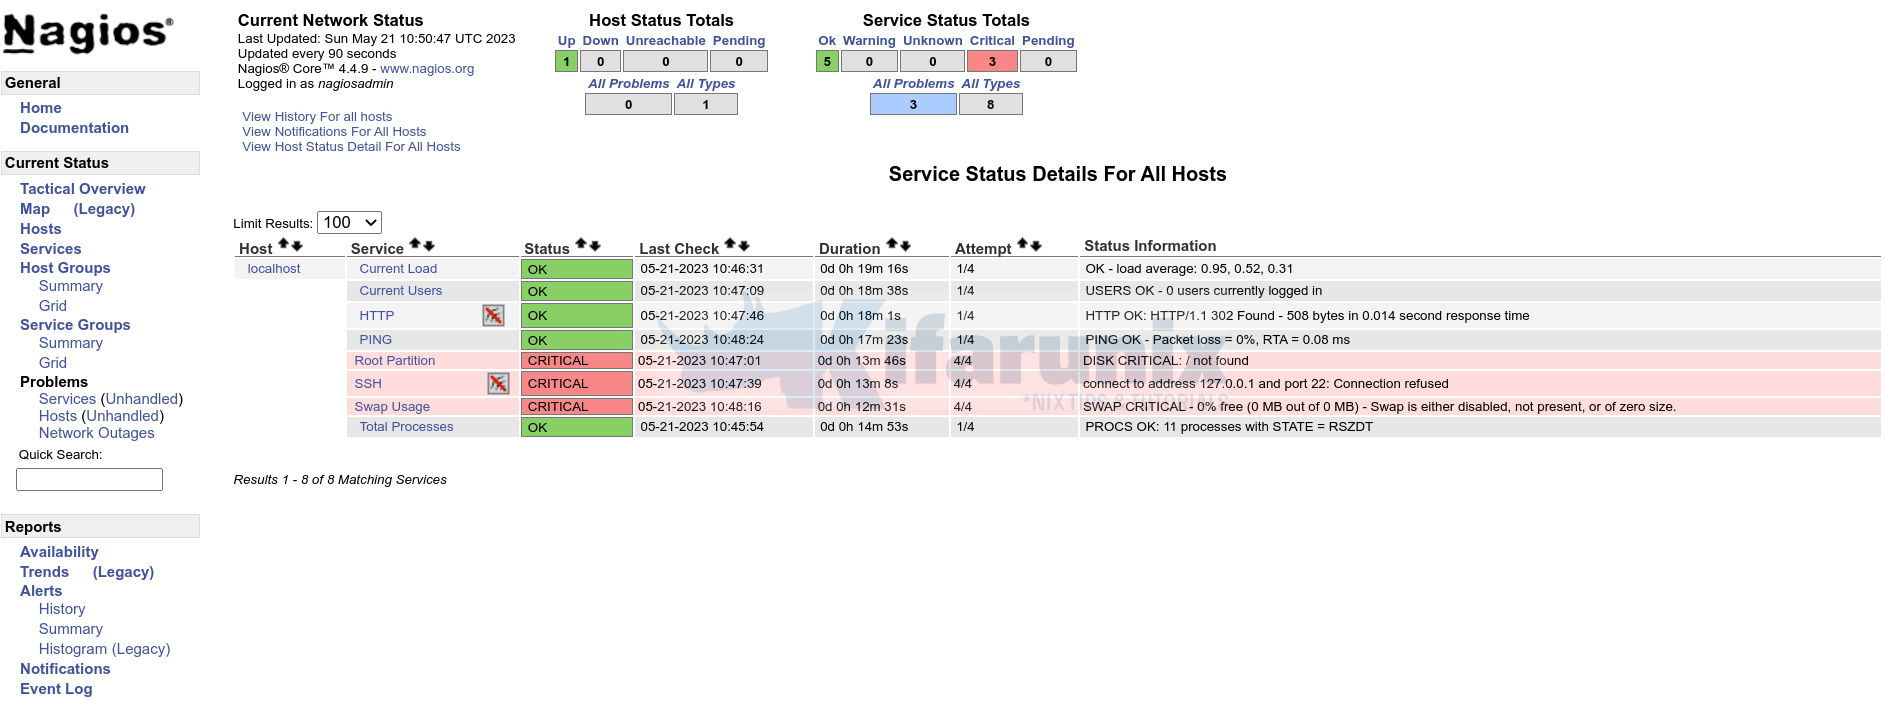
Now that our application is running on the Kubernetes cluster, you should now be able to access outside the cluster via any cluster node on port 30000. e.g http://<node01>:3000
And our Nagios Core app is now running on Kubernetes cluster.
And that is pretty much it on deploying an Application on Kubernetes Cluster.
Conclusion
You have so far learnt how to;
- Create a Kubernetes application declarative deployment manifest
- Configure Kubernetes cluster to trust local Docker registry configured with self signed SSL certs.
- Expose Kubernetes Cluster for external access via service manifest.
- Check Kubernetes Pods/Container logs


