In this tutorial, we are going to learn how to install Icinga 2 and Icinga Web 2 on Ubuntu 18.04 LTS. Icinga 2 is an open source monitoring system which checks the availability of your network resources (CPU load, uptime, free disk space, memory consumption), notifies users of outages and generates performance data for reporting. It is scalable and therefore it can be used to monitor large, complex environments across multiple locations.
It has a lightweight and extensible web interface called Icinga Web 2 that enables you to visualize and keep an eye on your environment.
Installing Icinga 2 and Icinga Web 2 on Ubuntu
Installing Icinga Package Repositories
You need to install Icinga package repository;
apt -y install apt-transport-httpswget -O - https://packages.icinga.com/icinga.key | apt-key add -echo "deb http://packages.icinga.com/ubuntu icinga-bionic main" > /etc/apt/sources.list.d/icinga2.list
echo "deb-src http://packages.icinga.com/ubuntu icinga-bionic main" >> /etc/apt/sources.list.d/icinga2.listNext, run system update.
apt updateInstall Icinga 2 on Ubuntu 18.04 LTS
Now that the repositories are ready, run the command below to install Icinga 2.
apt install icinga2 -yThe basic installation of icinga 2 enables the following features;
checkerfor executing checksmainlogfor writing theicinga2.logfilenotificationfor sending notifications
You can verify that these features are enabled by running the command:
icinga2 feature list | grep -i enabledInstall Icinga 2 Monitoring Plugins
In order for Icinga 2 to monitor system metrics such as load averages, processes, or disk space usage or any other system remote checks, it requires the check plugins. Run the command below to install the check plugins.
apt install monitoring-plugins -yRun Icinga 2
Now that you have installed icinga 2 and its monitoring plugins, set icinga2 service to start on system reboot. Note that by default, icinga2 starts automatically after installation.
You can check the status using the command below;
systemctl status icinga2If for some reason it is not running, start by running the command below;
systemctl start icinga2Enable it to start on system reboot
systemctl enable icinga2Install Icinga Web 2 ob Ubuntu 18.04
Icinga 2 can be used with Icinga Web 2, a powerful PHP framework for web applications that comes in a clean and reduced design. It’s fast, responsive, accessible and easily extensible with modules.
In order to install and setup Icinga Web 2, ensure that the following prerequisites are met.
- IDO (Icinga Data Output) database backend (MySQL or PostgreSQL)
- A web server, e.g. Apache or Nginx
- PHP version >= 5.6.0
- PHP modules must be installed: cURL, gettext, intl, mbstring, OpenSSL and xml
- Default time zone configured for PHP in the php.ini file
- MySQL or PostgreSQL PHP libraries
Configure DB IDO MySQL
The DB IDO module for Icinga 2 takes care of exporting all the configuration and status information to the database. The supported database backends include MySQL/MariaDB and PostgreSQL.
In this tutorial, we will be using MariaDB as our database backend.
Installing MySQL database server on Ubuntu 18.04
In this tutorial, we are going to use MariaDB. To install MariaDB, run the command below.
apt install mariadb-server mariadb-client -yOnce the installation is done, run the following command to improve the security of your MySQL/MariaDB installation by maybe setting root password and removing test databases, anonymous-user accounts, disallowing remote root login.
mysql_secure_installationInstalling the IDO modules for MySQL
Since we have enabled Icinga 2 repositories above, run the command below to install IDO modules.
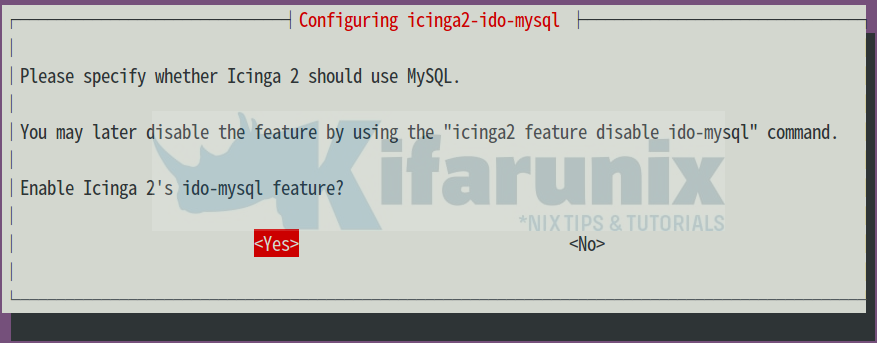
apt install icinga2-ido-mysql -yDuring installation, the database configuration wizard will prompt you to set some configurations.
- The first prompt asks you whether to enable Icinga 2’s ido-mysql feature. Select Yes to enable this feature.
- The second prompt asks you whether to Configure database for icinga2-ido-mysql with dbconfig-common. Select Yes to accept this.

- The third prompt asks you to set Icinga database password. Set a secured password and save it for later use.
Enable the IDO MySQL Feature
To enable ido-mysql feature in the backend, run the command below. ou can also enable a command feature that enables you to manual health checks from the Icinga 2 Web Interface.
icinga2 feature enable ido-mysql commandThe ido-mysql configuration file is /etc/icinga2/features-available/ido-mysql.conf. You can view the contents of this file by running the command below;
less /etc/icinga2/features-available/ido-mysql.conf
/**
 * The db_ido_mysql library implements IDO functionality
 * for MySQL.
 */

library "db_ido_mysql"

object IdoMysqlConnection "ido-mysql" {
  user = "icinga2",
  password = "SECUREDPASS",
  host = "localhost",
  database = "icinga2"
}
Restart Icinga 2 for these changes to take effect.
systemctl restart icinga2Install Icinga Web 2 on Ubuntu 18.04
Run the command below to install Icinga 2 and its command utility, icingacli. Note that Icinga will install and set up Apache web server by default as well as PHP all the PHP modules required for Icinga Web 2 to run.
apt install icingaweb2 icingacli -yOnce the installation is done, you need set a timezone to be set for the PHP environment, so edit the PHP config file, /etc/php/7.2/apache2/php.ini and set timezone as follows
vim /etc/php/7.2/apache2/php.ini
...
[Date]
; Defines the default timezone used by the date functions
; http://php.net/date.timezone
;date.timezone =
date.timezone = Africa/Nairobi
...
Restart the Apache service to effect the changes.
systemctl restart apache2Create Icinga Web 2 Database
Login to MariaDB and create a database and database user for Icinga Web 2;
mysql -u root -pcreate database icingawebusers;grant all privileges on icingawebusers.* to icingaadmin@localhost identified by 'SECUREDPASS';flush privileges
quitSetup Icinga Web 2 on Ubuntu 18.04
Most of the Icinga Web 2 configurations will be done from the User Interface but before we get there, set up the Icinga authentication token.
To generate the token, run the following command.
icingacli setup token createSample output
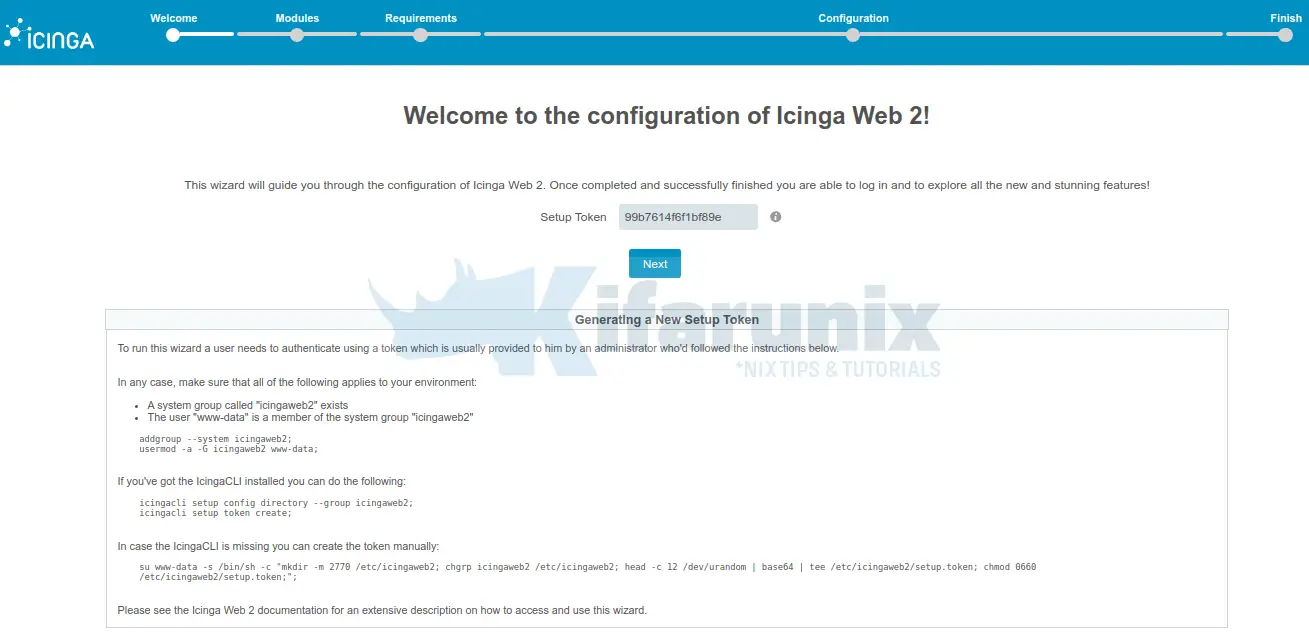
The newly generated setup token is: 99b7614f6f1bf89eOnce you have the authentication token, navigate to the browser and access Icinga web 2 using the url, http://<ip-of-icinga-server>/icingaweb2/setup so as to finalize the configurations.
Enter your authentication token generated and click next to proceed.
Choose Icinga 2 modules to enable. In this tutorial, we go with the defaults with monitoring modules only enabled.

On the next page, the setup wizards verifies if all the required PHP modules are in place.
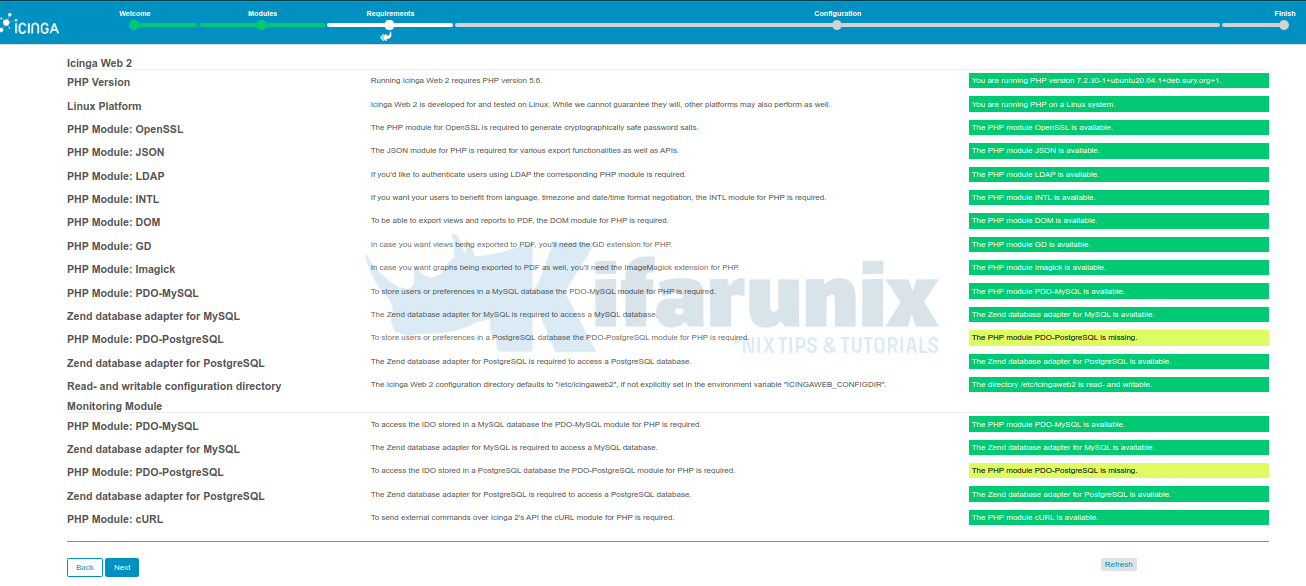
If all is well, click Next to proceed, otherwise install any missing PHP extensions and proceed with setup.
Choose the mode of authentication. We use database authentication in this demo.

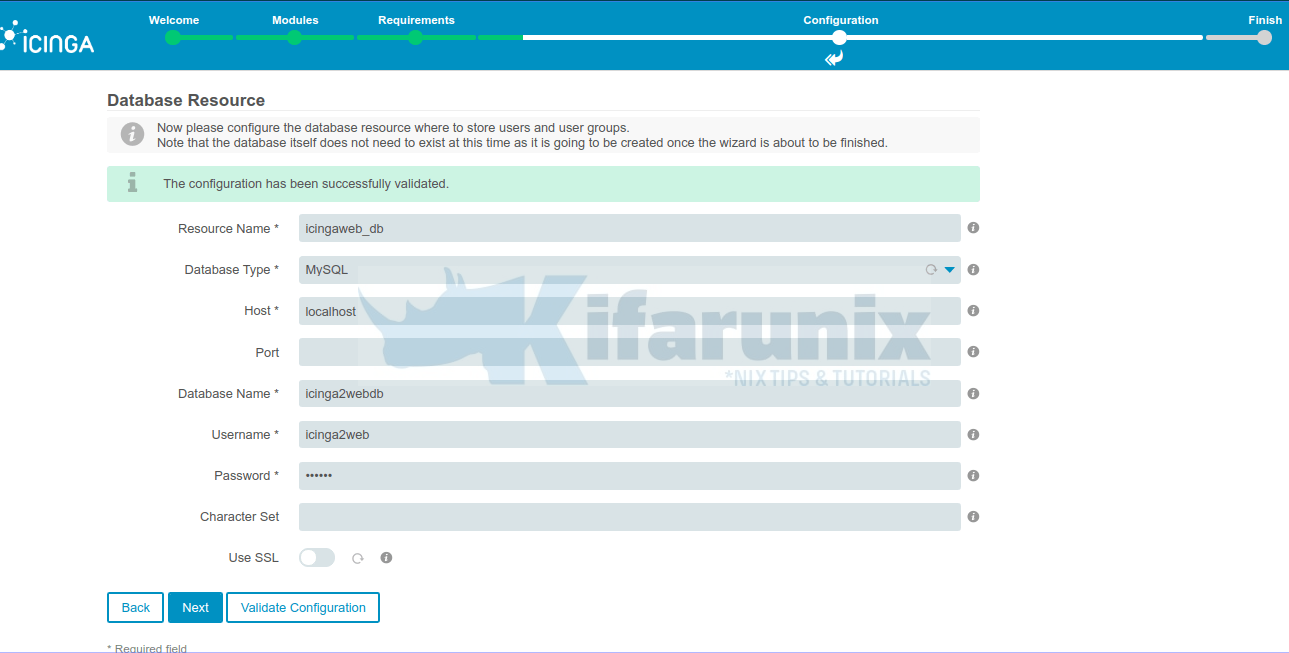
Configure Icinga 2 Web database connection settings. Click Validate Configuration to test connection to database.
Choose authentication backend database.

Create Icinga Web 2 administrative user.

Choose your application configuration settings.
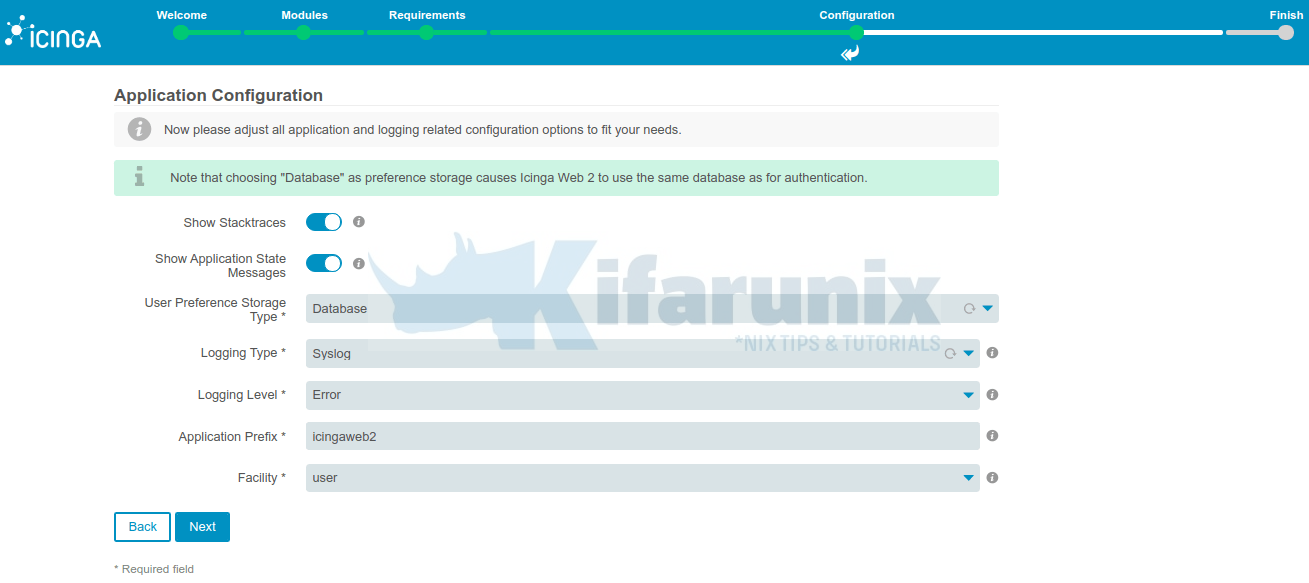
Icinga Web 2 application configuration summary.

Click Next,Next to proceed. Configure Icinga Web 2 monitoring module.

Configure Icinga 2 Database connection settings.
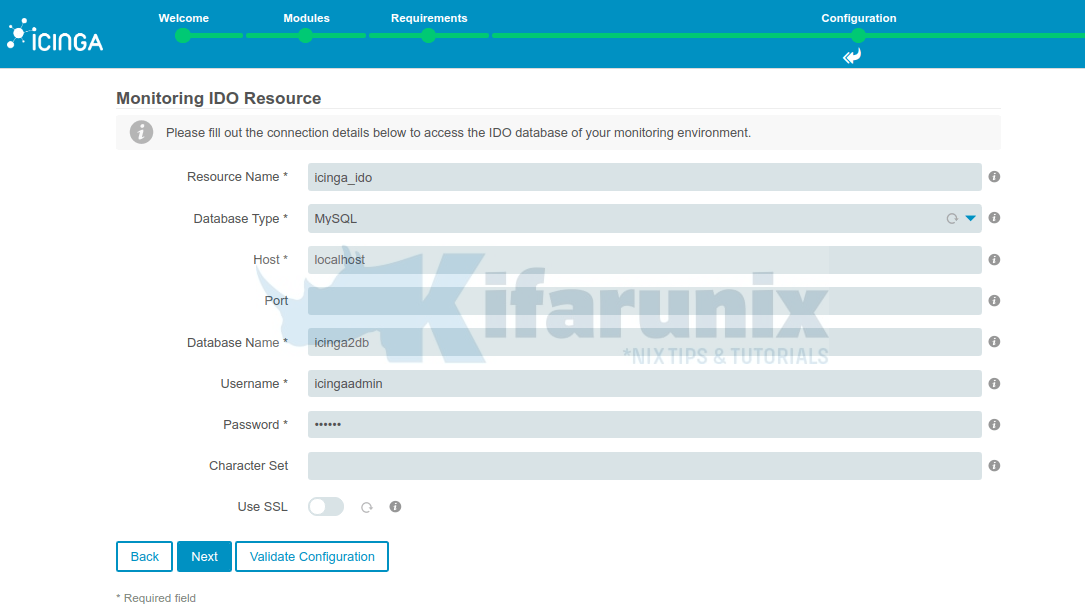
If upon validating the configuration you get the error, There is currently no icinga instance writing to the IDO. Make sure that a icinga instance is configured and able to write to the IDO., it simply means ido-mysql feature is not enabled. Enable it and restart Icinga 2.
Configure Icinga Transport commands. Read more on Icinga web 2 command transport. Provide the API credentials set before.
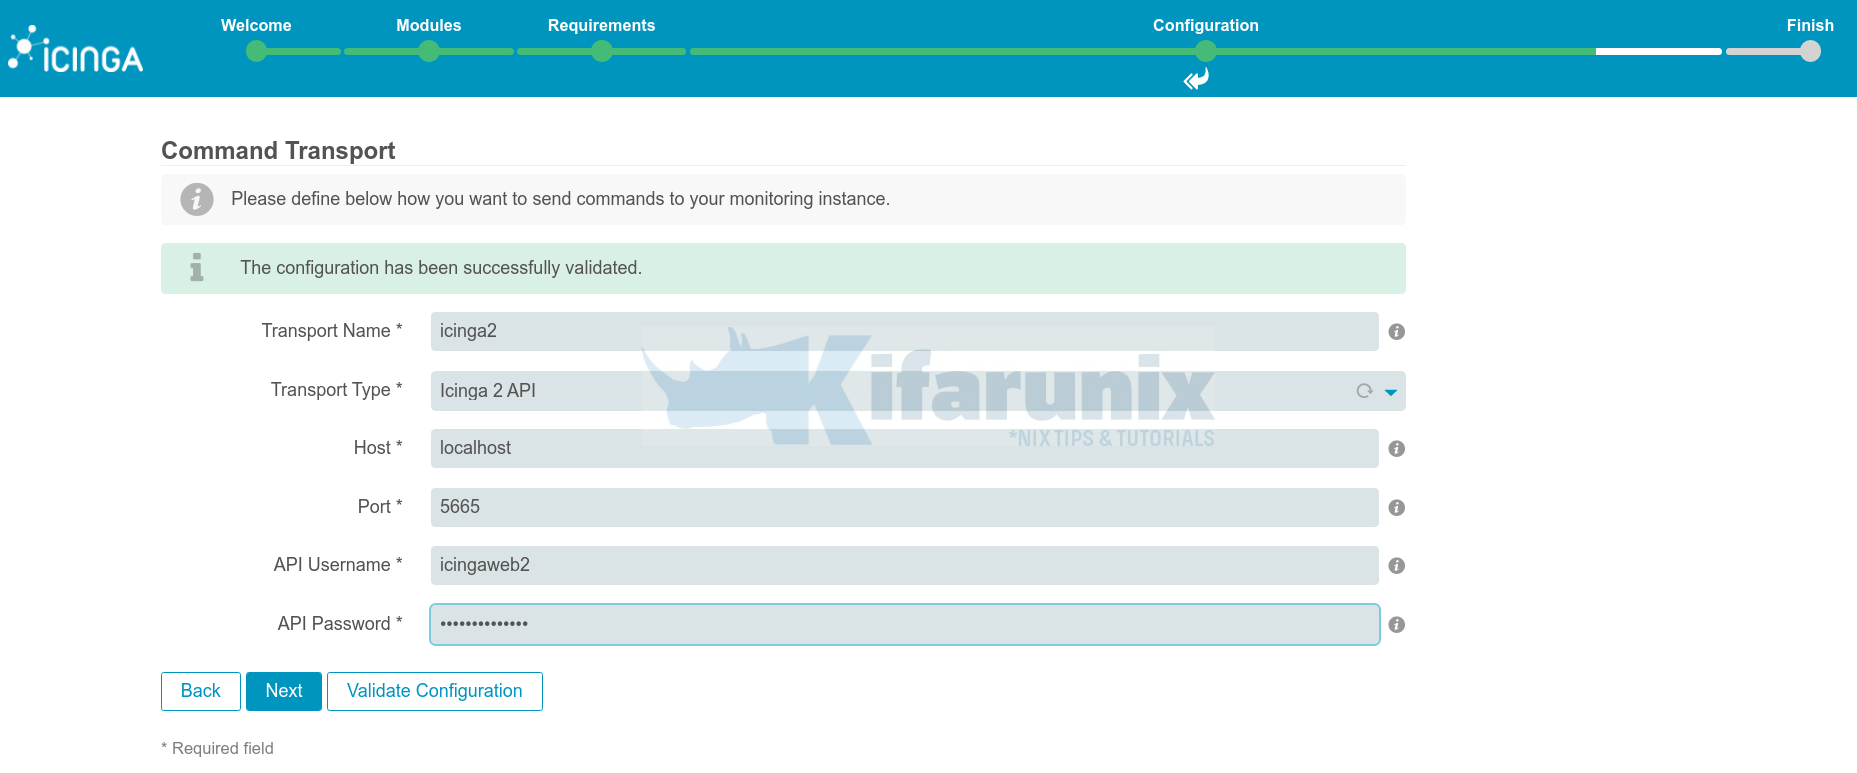
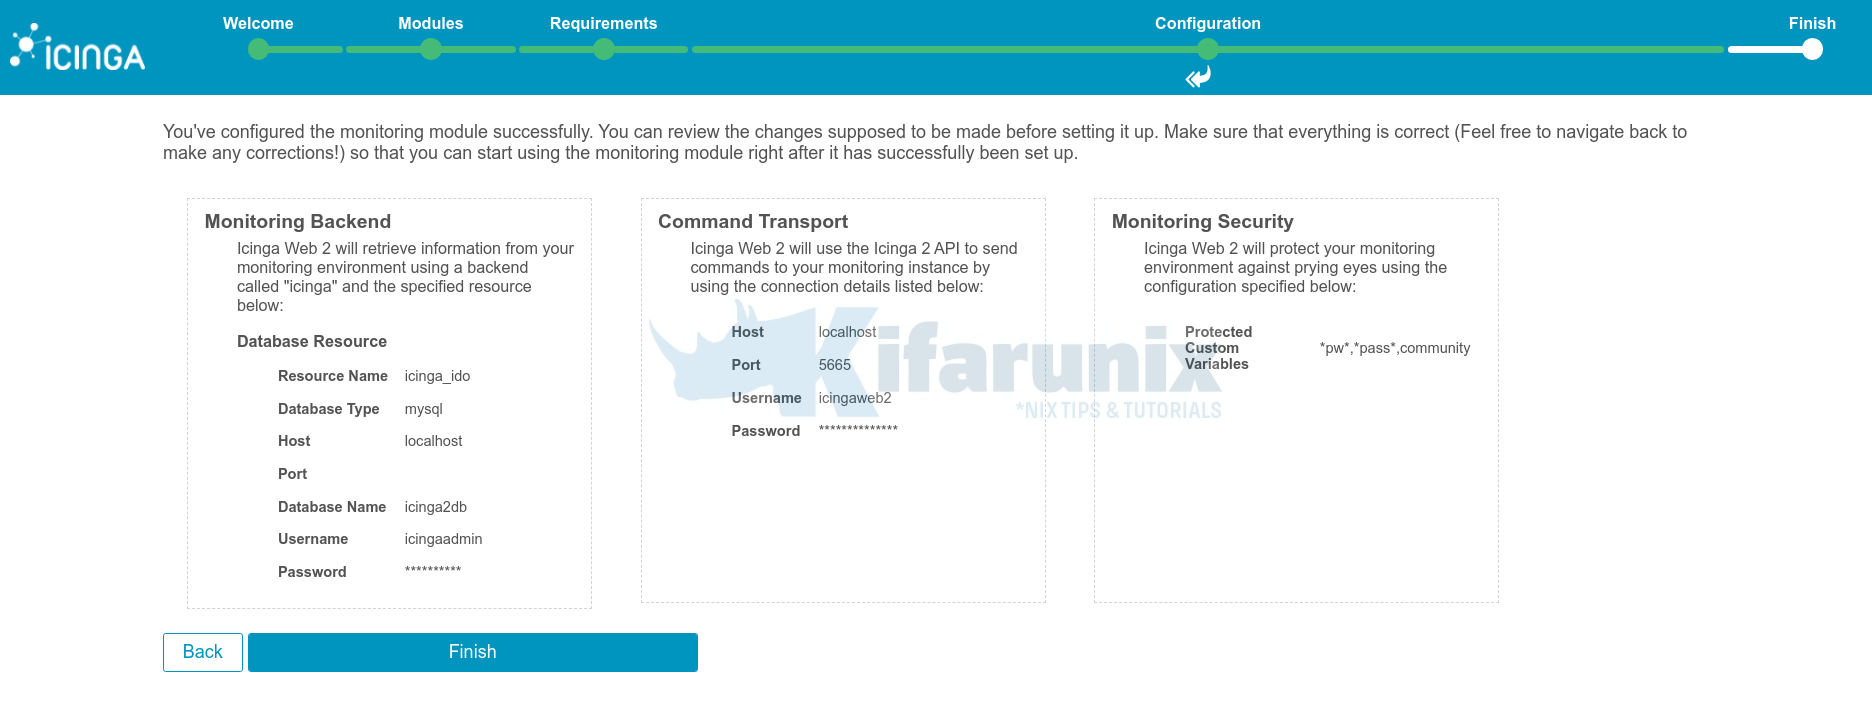
Configure your protected Custom Variables and click next then finish Icinga web 2 setup.

Check the summary and click Finish the setup.
Icinga Web 2 is now setup. Click Login to Icinga Web 2 and login using the admin credentials created during the installation.

Icinga 2 monitoring dashboard.
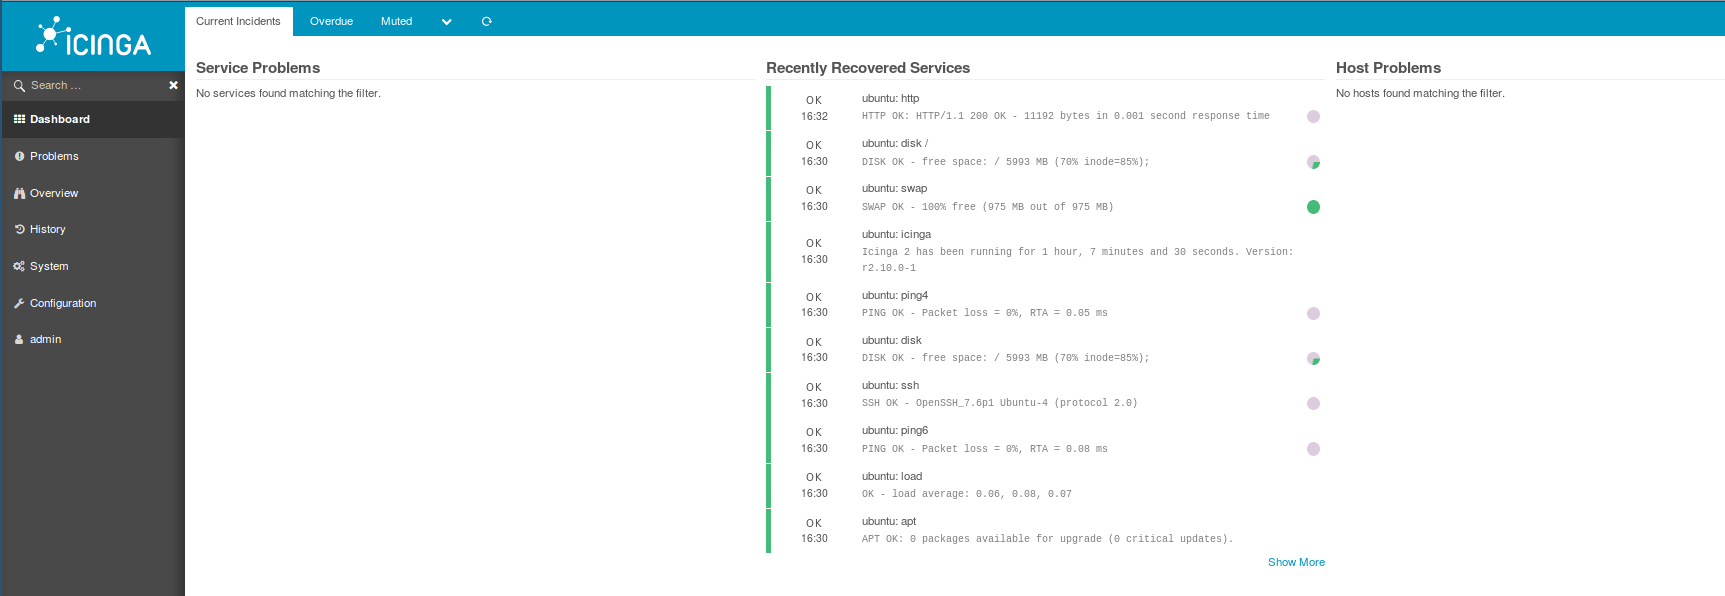
Magnificent!! You have made it. Icinga Web 2 Dashboard is now all yours for exploration.
In our next tutorial, we will learn how to monitor hosts and services with Icinga2. Stay connected.
How to Monitor Remote Linux Hosts and Services with Icinga 2


Thx a lot for this working tutorial.
I tried 2 other Tutorials found on the internet but they didn’t worked.
02-2020
We are glad the tutorial helped you friend. Enjoy 🙂
Great tutorial, thank you! I also tried another tutorial that didn’t work.
It’d be great if you could create tutorials for graphite and director as well! 😀