Hello folks, today we are going to learn how to install NoMachine remote desktop tool on Ubuntu 18.04. NoMachine is a remote desktop tool just like VNC, TeamViewer. It is designed to work across several platforms such as Windows, Mac and Linux to give users access to the physical desktop of the remote computer.
You can learn more about the features that comes with NoMachine here.
You may also want to check our previous tutorial on how to install Apache Guacamole Web based remote access tool.
Install NoMachine On Ubuntu 18.04
Download NoMachine Installation Package
NoMachine is not available on Ubuntu default repositories. Therefore, you need to download the Package from NoMachine Downloads page.
On the Download page, select the version for Linux and click the download button. This takes you to a page where you can choose to download the specific package for your system architecture.
In our case, we will download the .DEB package for the 64-bit Ubuntu system. In short, you can navigate to this page to download your package or simply run the command below;
wget https://download.nomachine.com/download/6.3/Linux/nomachine_6.3.6_1_amd64.deb
This will however, strickly download version 6.3.6_1. You can verify the versions and replace accordingly.
Install NoMachine
Once the download is done, run the commands below to install the package.
Navigate to your download directory, for example in my case ~/Downloads
cd ~/Downloads
Install the package with dpkg package manager as shown below;
dpkg -i nomachine_6.3.6_1_amd64.deb
Selecting previously unselected package nomachine.
(Reading database ... 130362 files and directories currently installed.)
Preparing to unpack nomachine_6.3.6_1_amd64.deb ...
Unpacking nomachine (6.3.6-1) ...
Setting up nomachine (6.3.6-1) ...
NX> 700 Starting install at: Wix Onk 29 14:07:29 2018.
NX> 700 Installing: nxclient version: 6.3.6.
NX> 700 Using installation profile: Ubuntu.
NX> 700 Install log is: /usr/NX/var/log/nxinstall.log.
NX> 700 Compiling the USB module.
NX> 700 Installing: nxplayer version: 6.3.6.
NX> 700 Using installation profile: Ubuntu.
NX> 700 Install log is: /usr/NX/var/log/nxinstall.log.
NX> 700 To connect the remote printer to the local desktop,
NX> 700 the user account must be a member of the CUPS System Group: lpadmin.
NX> 700 Installing: nxnode version: 6.3.6.
NX> 700 Using installation profile: Ubuntu.
NX> 700 Install log is: /usr/NX/var/log/nxinstall.log.
NX> 700 Creating configuration in: /usr/NX/etc/node.cfg.
NX> 700 Installing: nxserver version: 6.3.6.
NX> 700 Using installation profile: Ubuntu.
NX> 700 Install log is: /usr/NX/var/log/nxinstall.log.
NX> 700 Creating configuration in: /usr/NX/etc/server.cfg.
NX> 700 Install completed at: Wix Onk 29 14:10:22 2018.
NX> 700 NoMachine was configured to run the following services:
NX> 700 NX service on port: 4000
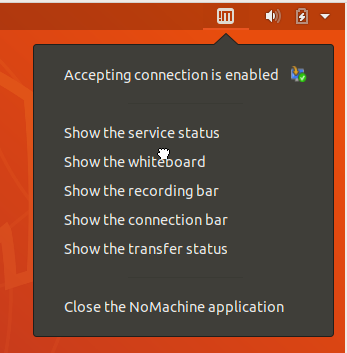
Once the installation is done, you should be able to see the NoMachine Monitor icon in your system tray. NoMachine Monitor is a small application which gives you access to server management tools and User Interface and advises you when someone is requesting to connect. You can click on the icon to check its menu.
To access the NoMachine functionality, click “Show the service status” as shown above.
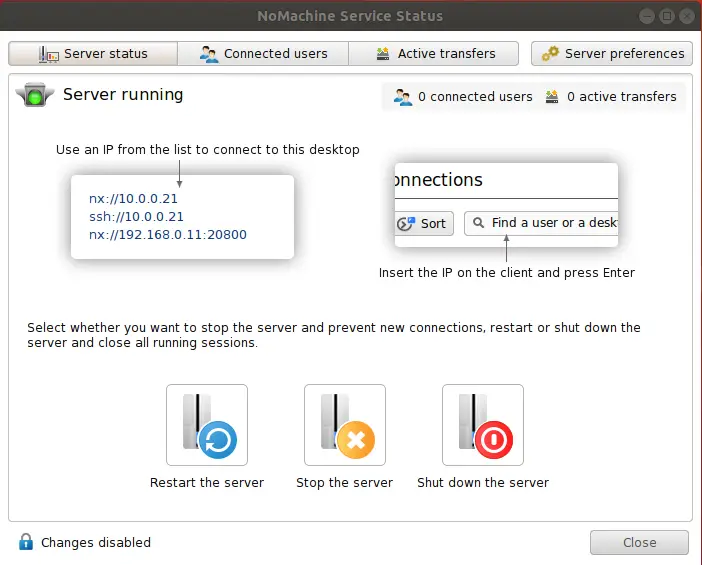
If UFW is running, you must allow incoming connections to ports 4000 (TCP) and ports from 4011 to 4999 (UDP) as shown below;
ufw allow 4000/tcp
ufw allow 4011:4999/udp
ufw reload
Connecting to Remote Desktop Computer
Note that for NoMachine remote connections to happen, both computers must have NoMachine software installed. Therefore, follow the above procedures to install NoMachine on a remote Ubuntu or Debian based machine.
Assuming your remote computer has NoMachine already installed and running, proceed as follows;
Click on the NoMachine Monitor Icon and Navigate to Show the connection bar > New connection. This launches the new connection setup wizard.
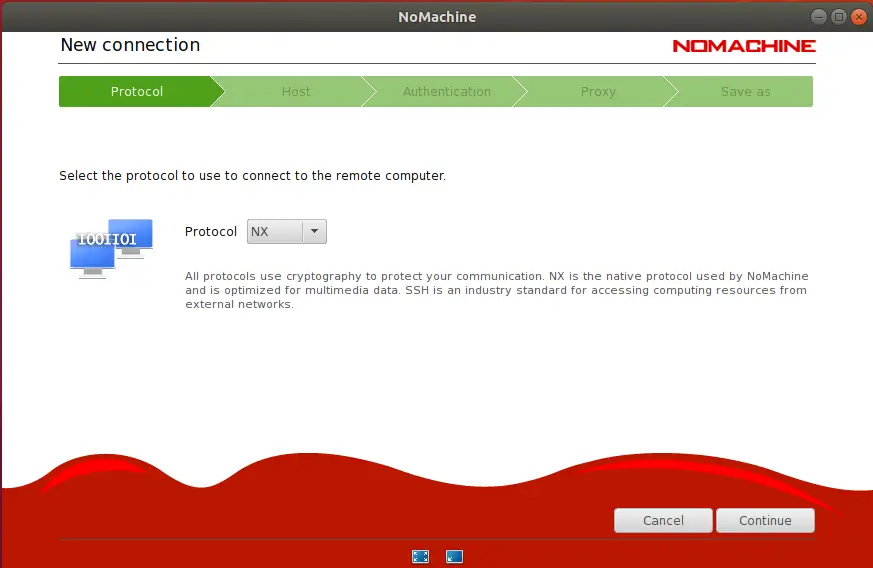
Click Continue to use the default NX protocol.
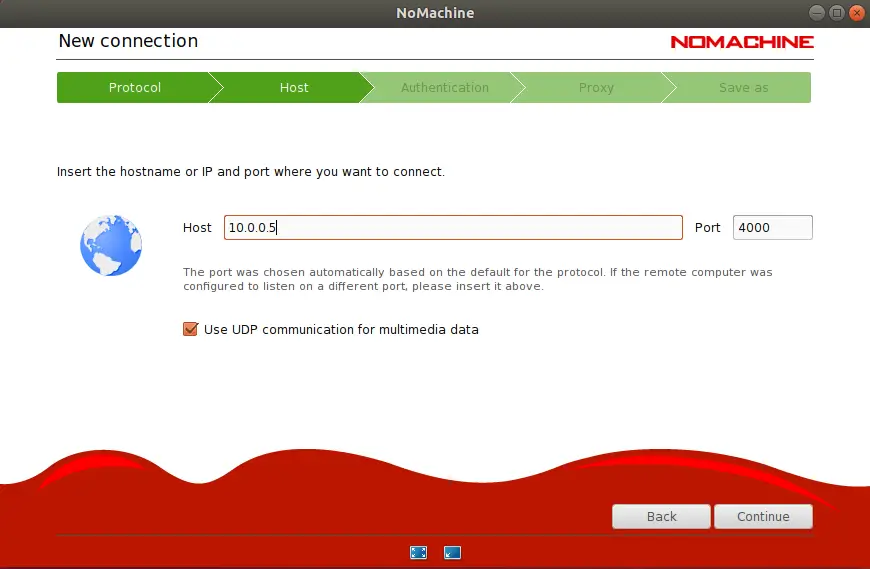
On the Host settings, enter the IP address of your remote computer.
On the Authentication settings page. In this case, we are using Password based authentication.
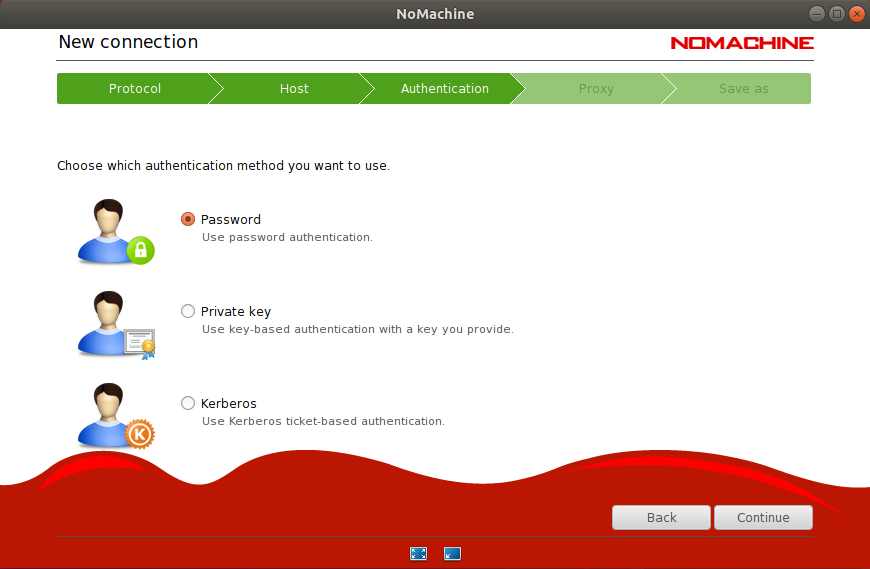
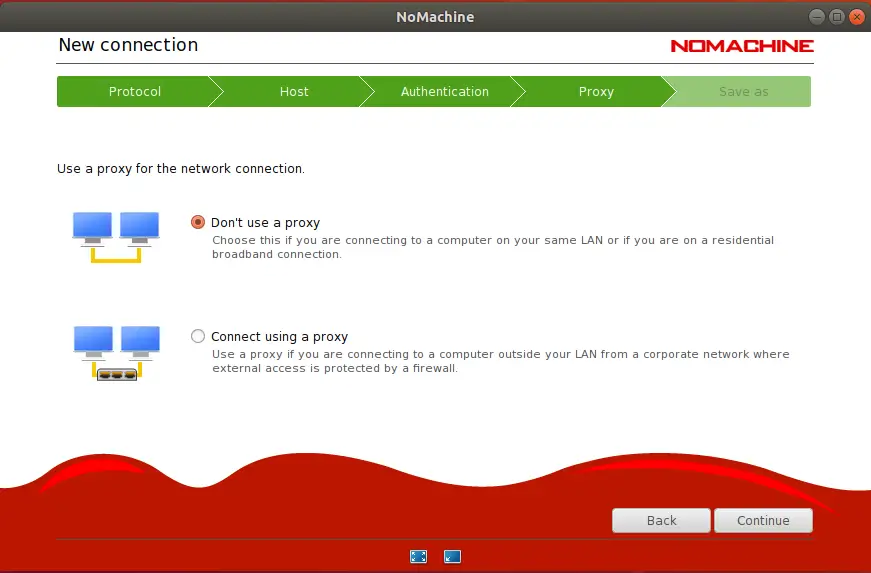
On the Proxy settings, since i am not logging in via proxy server, then i will select “Don’t use proxy”.
Click Continue to save connection details. You can also choose to create a connection link on the desktop.
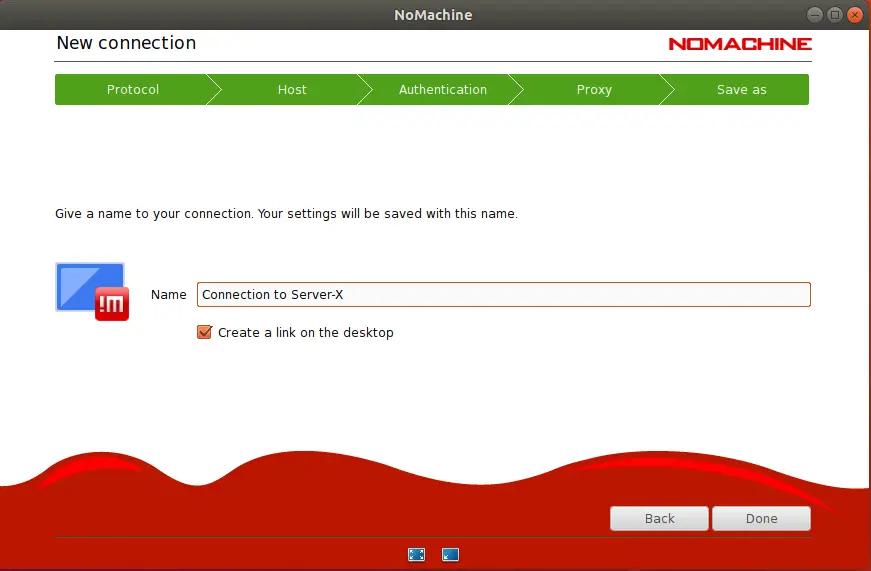
Click Done to finalize the connection setup. This will take you back to the Recent Connections panel.
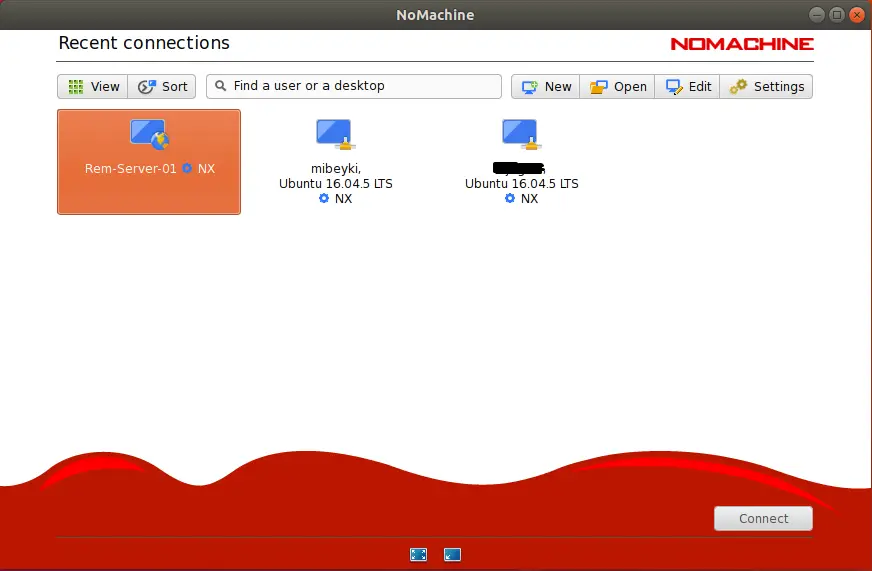
To connect to remote system, click on it on Recent Connections Panel and click connect. When prompted for the authenticity, click yes. Enter the login credentials of the remote user.
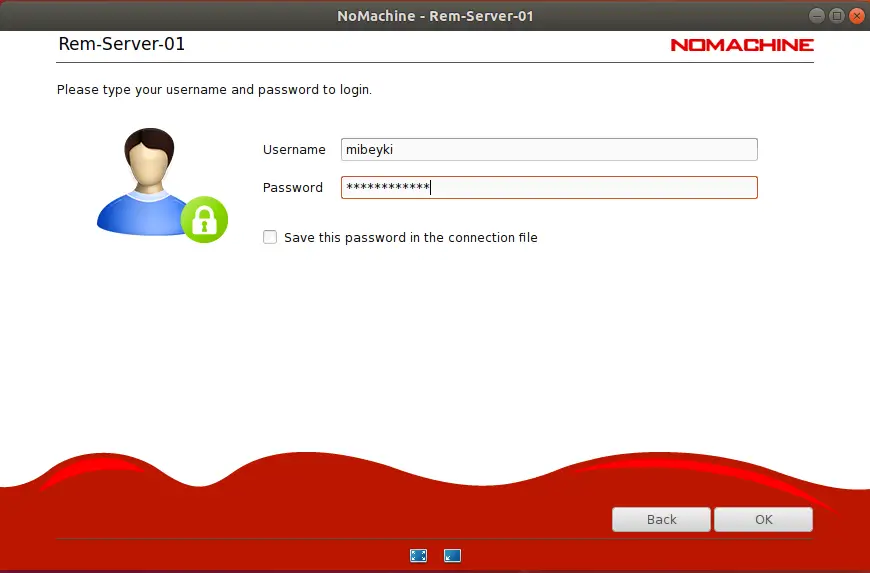
Click Ok and wait for few seconds while NoMachine connects you to your remote desktop.
Note that before connection can be established, remote computer should be set to accept connections.
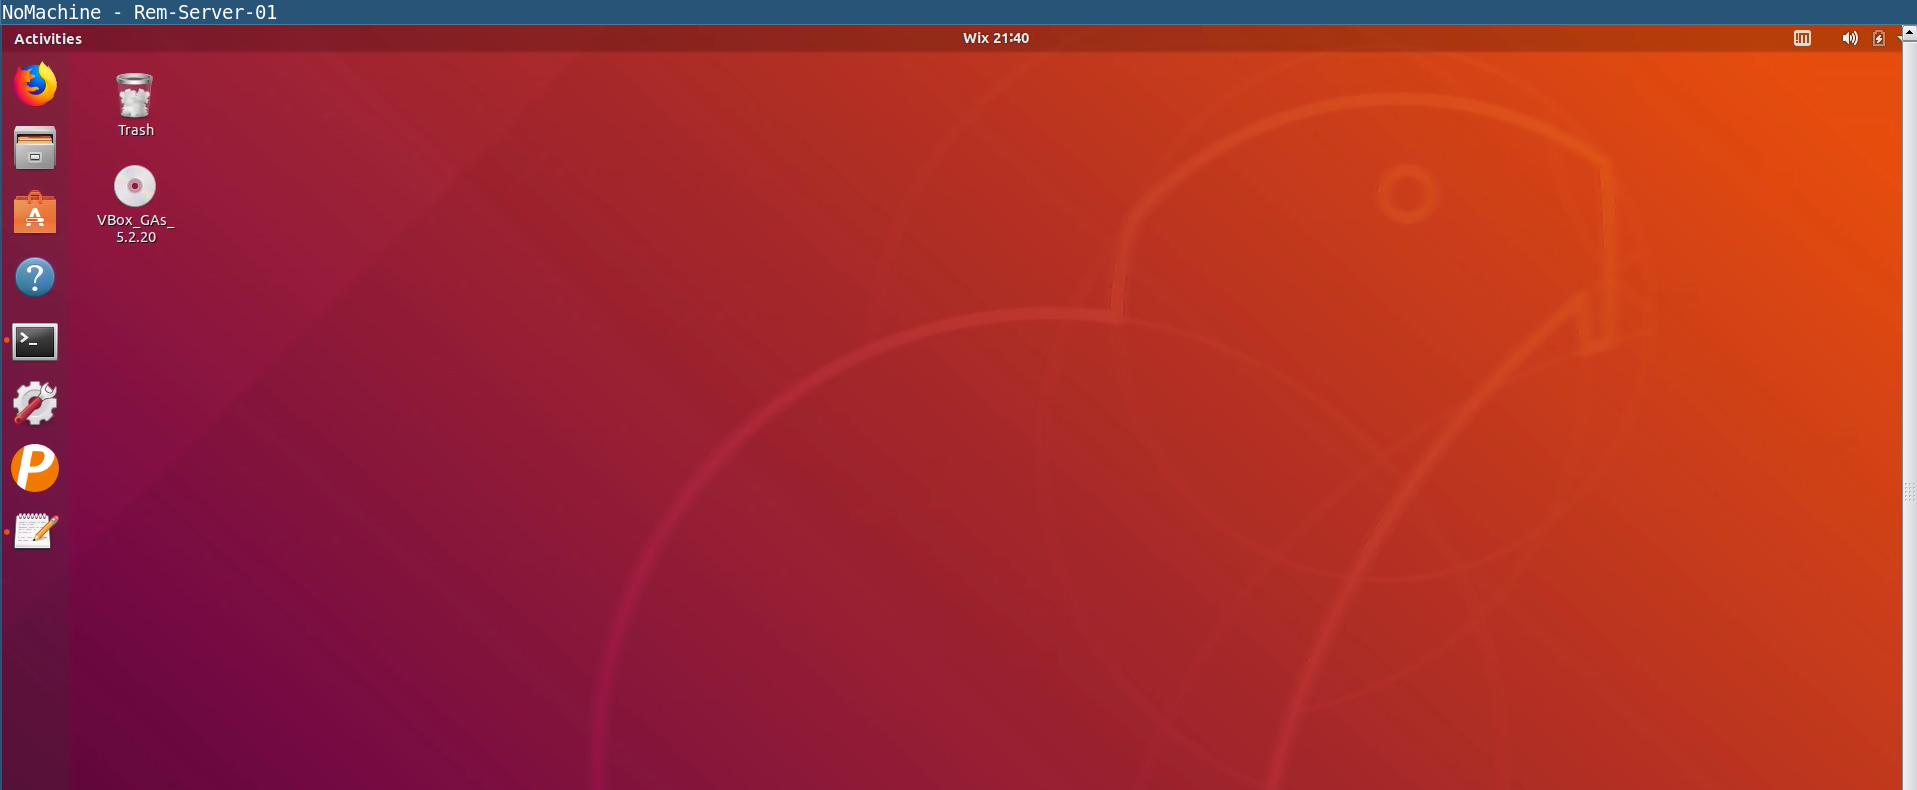
Beautiful!! You now have your remote desktop. We hope you enjoyed this.
Related Tutorials
Install and Setup NoMachine on CentOS 8
Install AnyDesk on Ubuntu 20.04

