In this guide, you will learn how to install GVM Vulnerability Scanner on Ubuntu 24.04. Greenbone Vulnerability Management (GVM), previously known as OpenVAS, is a network security scanner which provides a set of network vulnerability tests (NVTs) to detect security loopholes in systems and applications.
Table of Contents
Installing GVM on Ubuntu 24.04
System Hardware Requirements
Below are the system requirements I would personally recommend.
- At least 8 GB RAM
- At least 4 vCPUs
- More than 8 GB disk space (We have 40+ GB in this demo)
These requirements will vary depending on your use cases, however. Just be sure to provide “enough”.
Run System Update
To begin with, update and upgrade your system packages;
sudo apt updatesudo apt upgradeRun system reboot is necessary;
[ -f /run/reboot-required ] && sudo systemctl reboot -iInstall Required Build Tools
In order to successfully build GVM Vulnerability Scanner on Ubuntu 24.04, you need to install a number of required dependencies and build tools.
sudo apt install gcc \
	g++ \
	make \
	bison \
	flex \
	libksba-dev \
	curl \
	redis \
	libpcap-dev \
	cmake \
	git \
	pkg-config \
	libglib2.0-dev \
	libgpgme-dev \
	nmap \
	libgnutls28-dev \
	uuid-dev \
	libssh-gcrypt-dev \
	libldap2-dev \
	gnutls-bin \
	libmicrohttpd-dev \
	libhiredis-dev \
	zlib1g-dev \
	libxml2-dev \
	libnet-dev \
	libradcli-dev \
	clang-format \
	libldap2-dev \
	doxygen \
	gcc-mingw-w64 \
	xml-twig-tools \
	libical-dev \
	perl-base \
	heimdal-dev \
	libpopt-dev \
	libunistring-dev \
	graphviz \
	libsnmp-dev \
	python3-setuptools \
	python3-paramiko \
	python3-lxml \
	python3-defusedxml \
	python3-dev \
	gettext \
	python3-polib \
	xmltoman \
	python3-pip \
	texlive-fonts-recommended \
	texlive-latex-extra \
	xsltproc \
	rsync \
        libpaho-mqtt-dev \
        libbsd-dev \
        libjson-glib-dev \
	python3-packaging \
	python3-wrapt \
	python3-cffi \
	python3-psutil \
	python3-redis \
	python3-gnupg \
	python3-paho-mqtt \
        mosquitto \
        libgcrypt20-dev \
        redis-server \
        libcurl4-gnutls-dev \
	--no-install-recommends -y
Install NodeJS on Ubuntu 24.04
Next, install NodeJS required to build Greeborne Security Assistant. NodeJS >= 18 is required.
curl -fsSL https://deb.nodesource.com/gpgkey/nodesource-repo.gpg.key | \
sudo gpg --dearmor -o /etc/apt/trusted.gpg.d/node.gpg
echo "deb https://deb.nodesource.com/node_18.x nodistro main" | sudo tee /etc/apt/sources.list.d/node.listsudo apt updatesudo apt install nodejs -yInstall PostgreSQL on Ubuntu 24.04
GVM uses PostgreSQL as the backend database. We use version 17 in this setup, which is the default version available on Ubuntu 24.04 Bookworm repos as of this writing.
Run the command below to install PostgreSQL;
sudo apt install postgresql postgresql-contrib postgresql-server-dev-all -yCreate PostgreSQL User and Database
Once the installation is done, create the PostgreSQL user and database for Greenbone Vulnerability Management Daemon (gvmd).
Note that the database and user should be created as PostgreSQL user, postgres.
sudo -Hiu postgres createuser gvmsudo -Hiu postgres createdb -O gvm gvmdGrant PostgreSQL User DBA Roles
sudo -Hiu postgres psql gvmd -c "create role dba with superuser noinherit;"sudo -Hiu postgres psql gvmd -c "grant dba to gvm;"Once that is done, restart PostgreSQL;
sudo systemctl restart postgresqlsudo systemctl enable postgresqlYou can check status;
systemctl status postgresqlCreate GVM User on Ubuntu
In this demo, we will run GVM as a non privileged system user. Thus, create gvm system user account.
sudo useradd -r -d /opt/gvm -c "GVM User" -s /bin/bash gvmCreate the GVM user directory as specified by option -d in the command above and set the user and group ownership to gvm.
sudo mkdir /opt/gvm && sudo chown gvm: /opt/gvmAllow the user to run the installation with sudo rights;
echo "gvm ALL = NOPASSWD: $(which make) install, $(which python3)" | sudo tee /etc/sudoers.d/gvmConfirm validity of this command;
visudo -c -f /etc/sudoers.d/gvmOutput should be Okay.
Building GVM from Source Code
There are different tools required to install and setup GVM Vulnerability Scanner on Ubuntu 24.04. These include;
- GVM Libraries
- OpenVAS Scanner
- OSPD OpenVAS
- Greenbone Vulnerability Manager
- Greenbone Security Assistant
- Python-GVM
- Notus Scanner
- GVM-Tools
- OpenVAS SMB
Every component has README.md and a INSTALL.md file that explains how to build and install it.
Switch to GVM user created above;
sudo su - gvmCreate a directory where to download the source files to;
mkdir gvm-sourceNote that we will install all GVM files and libraries to the default location, /usr/local.
Build and Install GVM Libraries
GVM-libs is a set of shared libraries that provide common functionality for the GVM Vulnerability Scanner suite. It includes libraries for network communication, database access, and data parsing. GVM-libs is used by all GVM components, including the vulnerability scanner, the web-based management interface, and the database.
whoamigvmFrom within the source directory, /opt/gvm/gvm-source, download, extract the GVM libraries source code and install them as follows.
Replace the version numbers with the stable release versions/tags.
cd ~/gvm-sourceGVM_LIBS=22.9.1
wget https://github.com/greenbone/gvm-libs/archive/refs/tags/v${GVM_LIBS}.tar.gz \
-O gvm-libs-v${GVM_LIBS}.tar.gztar xzf gvm-libs-v${GVM_LIBS}.tar.gz;cd gvm-libs-${GVM_LIBS}mkdir build && cd buildcmake ..Compile and install GVM libraries
make && sudo make installBuild and Install Greenbone Vulnerability Manager
GVM daemon serves as the central manager for scans, tasks, and the overall vulnerability management process. It communicates with other GVM components, such as the Greenbone Security Assistant (GSA) web interface, the OpenVAS Scanner, and the various databases used for storing vulnerability data and scan results.
cd ~/gvm-sourceGVMD=23.6.2
wget https://github.com/greenbone/gvmd/archive/refs/tags/v${GVMD}.tar.gz \
-O gvmd-v${GVMD}.tar.gztar xzf gvmd-v${GVMD}.tar.gz;cd gvmd-${GVMD}mkdir build && cd build
cmake ..
make
sudo make installBuild and Install GVM PostgreSQL Extension
pg-gvm is a PostgreSQL extension that adds several functions used by gvmd, e.g., iCalendar and host range evaluation. In previous versions of GVM, these functions were managed directly by gvmd while pg-gvm uses the extension management built into PostgreSQL.
cd ~/gvm-sourcePG_GVM=22.6.5
wget https://github.com/greenbone/pg-gvm/archive/refs/tags/v${PG_GVM}.tar.gz \
-O pg-gvm-v${PG_GVM}.tar.gztar xzf pg-gvm-v${PG_GVM}.tar.gz;cd pg-gvm-${PG_GVM}mkdir build && cd build
cmake ..
make
sudo make installBuild and Install Greenbone Security Assistant
The Greenbone Security Assistant is the web interface developed for the Greenbone Security Manager
cd ~/gvm-sourceGSA=23.0.0
wget https://github.com/greenbone/gsa/archive/refs/tags/v${GSA}.tar.gz \
-O gsa-v${GSA}.tar.gztar xzf gsa-v${GSA}.tar.gz;cd gsa-${GSA}rm -rf buildnpm installnpm run buildAll content of the production build can be shipped with every web server. For providing GSA via gsad web server, the files need to be copied into the /usr/local/share/gvm/gsad/web/.
- Also:
- build/img: directory contain images like logos and banners.
- build/static directory will contain generated JavaScript and CSS files.
- build/static/media directory contains SVG files for all icon.
Build and Install Greenbone Security Assistant HTTP server
The Greenbone Security Assistant HTTP Server is the server developed for the communication with the Greenbone Security Manager appliances. It connects to the Greenbone Vulnerability Manager Daemon gvmd to provide a full-featured user interface for vulnerability management.
cd ~/gvm-sourceGSAD=22.9.1
wget https://github.com/greenbone/gsad/archive/refs/tags/v${GSAD}.tar.gz \
-O gsad-v${GSAD}.tar.gztar xzf gsad-v${GSAD}.tar.gz;cd gsad-${GSAD}mkdir build && cd build
cmake ..
make
sudo make installNext, copy the web interface configs. Replace kifarunix user with your privileged system user.
[[ -d /usr/local/share/gvm/gsad/web ]] || su -c "sudo mkdir -p /usr/local/share/gvm/gsad/web" kifarunixsu -c "sudo chown -R gvm: /usr/local/share/gvm/gsad/web" kifarunixGSA=23.0.0
cp -rp /opt/gvm/gvm-source/gsa-${GSA}/build/* /usr/local/share/gvm/gsad/webls -1 /usr/local/share/gvm/gsad/webimg
index.html
locales
robots.txt
static
Build and Install OpenVAS scanner and OpenVAS SMB
Open Vulnerability Assessment Scanner (OpenVAS) is a full-featured scan engine that executes a continuously updated and extended feed of Network Vulnerability Tests (NVTs).
OpenVAS SMB provides modules for the OpenVAS Scanner to interface with Microsoft Windows Systems through the Windows Management Instrumentation API and a winexe binary to execute processes remotely on that system.
Build and install openvas-smb;
cd ~/gvm-sourceOPENVAS_SMB=22.5.6
wget https://github.com/greenbone/openvas-smb/archive/refs/tags/v${OPENVAS_SMB}.tar.gz -O openvas-smb-v${OPENVAS_SMB}.tar.gztar xzf openvas-smb-v${OPENVAS_SMB}.tar.gz;cd openvas-smb-${OPENVAS_SMB}mkdir build && cd build
cmake ..
make
sudo make installBuild and install OpenVAS scanner;
cd ~/gvm-sourceOPENVAS_SCANNER=23.2.0
wget https://github.com/greenbone/openvas-scanner/archive/refs/tags/v${OPENVAS_SCANNER}.tar.gz \
-O openvas-scanner-v${OPENVAS_SCANNER}.tar.gztar xzf openvas-scanner-v${OPENVAS_SCANNER}.tar.gz;cd openvas-scanner-${OPENVAS_SCANNER}mkdir build && cd build
cmake ..
make
sudo make installBuild and Install OSPD-OpenVAS
Open Scanner Protocol (OSP) creates a unified interface for different security scanners and makes their control flow and scan results consistently available under the central Greenbone Vulnerability Manager service.
cd ~/gvm-sourceOSPD_OPENVAS=22.7.1
wget https://github.com/greenbone/ospd-openvas/archive/refs/tags/v${OSPD_OPENVAS}.tar.gz \
-O ospd-openvas-v${OSPD_OPENVAS}.tar.gztar xzf ospd-openvas-v${OSPD_OPENVAS}.tar.gz;cd ospd-openvas-${OSPD_OPENVAS}mkdir build
python3 -m pip install --root=./build .su -c "sudo cp ./build/usr/local/bin/ospd-openvas /usr/local/bin/" kifarunixsu -c "sudo cp ./build/usr/local/lib/python3.12/* /usr/local/lib/python3.12/" kifarunixBuild and Install Notus Scanner
Notus scanner is a scanner that is integrated into the Greenbone Vulnerability Management framework and can be used to detect vulnerable products by evaluating internal system information, such as the installed software packages and their versions.
cd ~/gvm-sourceNOTUS_SCANNER=22.6.3
wget https://github.com/greenbone/notus-scanner/archive/refs/tags/v${NOTUS_SCANNER}.tar.gz \
-O notus-scanner-v${NOTUS_SCANNER}.tar.gztar xzf notus-scanner-v${NOTUS_SCANNER}.tar.gz;cd notus-scanner-${NOTUS_SCANNER}mkdir build
sudo python3 -m pip install --root=./build .su -c "sudo cp ./build/usr/local/bin/* /usr/local/bin/" kifarunixsu -c "sudo cp -r ./build/usr/local/lib/python3.12/dist-packages/* /usr/local/lib/python3.12/dist-packages/" kifarunixInstall GVM NVTs Feed Synchronization tool
greenbone-feed-sync is GVM python script that can be used to download the latest version of the Greenbone Community Feed, or to update an existing feed. It can be installed as follows;
cd ~/gvm-source && mkdir greenbone-feed-sync && cd greenbone-feed-syncsudo python3 -m pip install --root=. greenbone-feed-syncsu -c "sudo cp ./usr/local/bin/* /usr/local/bin/" kifarunixsu -c "sudo cp -r ./usr/local/lib/python3.12/dist-packages/* /usr/local/lib/python3.12/dist-packages/" kifarunixInstall GVM Tools
The Greenbone Vulnerability Management Tools are a collection of tools that help with remote controlling GVM installations. Such tools include;
- gvm-cli: This tool sends plain GMP/OSP commands and prints the result to the standard output.
- gvm-script: This tool has a lot more features than the simple gvm-cli client. It can be used to create scripts that automate tasks, such as scanning for vulnerabilities or creating reports.
- gvm-pyshell: This tool is for running gmp or osp scripts interactively. It provides the same API as gvm-script using the python-gvm library.
- gvm-api: This tool provides a Python API for accessing the GMP and OSP protocols. This API can be used to develop custom tools and applications that interact with GVM.
To install GVM tools;
cd ~/gvm-source && mkdir gvm-tools && cd gvm-toolssudo python3 -m pip install --root=. gvm-toolssu -c "sudo cp ./usr/local/bin/* /usr/local/bin/" kifarunixsu -c "sudo cp -r ./usr/local/lib/python3.12/dist-packages/* /usr/local/lib/python3.12/dist-packages/" kifarunixConfiguring OpenVAS Scanner Redis Data Store
Redis is used to store information about vulnerabilities, such as their severity, exploitability, and remediation steps.
To begin run the command below to create the cache to the installed shared libraries;
exitsudo ldconfigThe default configuration of Redis server is /etc/redis/redis.conf.
Next, copy OpenVAS scanner Redis configuration file from the OpenVAS source directory, redis-openvas.conf, to the Redis config directory;
OPENVAS_SCANNER=23.2.0
sudo cp /opt/gvm/gvm-source/openvas-scanner-${OPENVAS_SCANNER}/config/redis-openvas.conf /etc/redis/
Update the ownership of the configuration.
sudo chown redis:redis /etc/redis/redis-openvas.confUpdate the path to Redis unix socket on the /etc/openvas/openvas.conf using the db_address parameter.
To get the path to the Redis unix socket, run the command;
sudo grep unixsocket /etc/redis/redis-openvas.confSample output;
unixsocket /run/redis-openvas/redis.sock
unixsocketperm 770
Once you get the path to Redis unix socket, run the command;
echo "db_address = /run/redis-openvas/redis.sock" | sudo tee /etc/openvas/openvas.confAdd gvm user to redis group;
sudo usermod -aG redis gvmOptimize Redis Performance
You can also optimize Redis server itself improve the performance by making the following adjustments;
Increase the value of somaxconn in order to avoid slow clients connections issues.
echo "net.core.somaxconn = 1024" | sudo tee -a /etc/sysctl.confRedis background save may fail under low memory condition. To avoid this, enable memory overcommit (man 5 proc).
echo 'vm.overcommit_memory = 1' | sudo tee -a /etc/sysctl.confReload sysctl variables created above.
sudo sysctl -pTo avoid creation of latencies and memory usage issues with Redis, disable Linux Kernel’s support for Transparent Huge Pages (THP). To easily work around this, create a systemd service unit for this purpose.
sudo tee /etc/systemd/system/disable_thp.service << 'EOL'
[Unit]
Description=Disable Kernel Support for Transparent Huge Pages (THP)

[Service]
Type=simple
ExecStart=/bin/sh -c "echo 'never' > /sys/kernel/mm/transparent_hugepage/enabled && echo 'never' > /sys/kernel/mm/transparent_hugepage/defrag"

[Install]
WantedBy=multi-user.target
EOL
Reload systemd configurations;
sudo systemctl daemon-reloadStart and enable this service to run on system boot.
sudo systemctl enable --now disable_thpRestart OpenVAS Redis server
sudo systemctl enable --now redis-server@openvasConfirm the status;
systemctl status redis-server@openvas● [email protected] - Advanced key-value store (openvas)
Loaded: loaded (/usr/lib/systemd/system/[email protected]; enabled; preset: enabled)
Active: active (running) since Fri 2024-05-10 17:35:18 UTC; 12s ago
Docs: http://redis.io/documentation,
man:redis-server(1)
Main PID: 45475 (redis-server)
Status: "Ready to accept connections"
Tasks: 5 (limit: 9444)
Memory: 3.8M (peak: 4.3M)
CPU: 58ms
CGroup: /system.slice/system-redis\x2dserver.slice/[email protected]
└─45475 "/usr/bin/redis-server unixsocket:/run/redis-openvas/redis.sock"
May 10 17:35:18 gvm redis-server[45475]: `-._ `-._`-.__.-'_.-' _.-'
May 10 17:35:18 gvm redis-server[45475]: `-._ `-.__.-' _.-'
May 10 17:35:18 gvm redis-server[45475]: `-._ _.-'
May 10 17:35:18 gvm redis-server[45475]: `-.__.-'
May 10 17:35:18 gvm redis-server[45475]: 45475:M 10 May 2024 17:35:18.259 # Server initialized
May 10 17:35:18 gvm redis[45475]: _._
_.-``__ ''-._
_.-`` `. `_. ''-._ Redis 7.0.15 (00000000/0) 64 bit
.-`` .-```. ```\/ _.,_ ''-._
( ' , .-` | `, ) Running in standalone mode
|`-._`-...-` __...-.``-._|'` _.-'| Port: 0
| `-._ `._ / _.-' | PID: 45475
`-._ `-._ `-./ _.-' _.-'
|`-._`-._ `-.__.-' _.-'_.-'|
| `-._`-._ _.-'_.-' | https://redis.io
`-._ `-._`-.__.-'_.-' _.-'
|`-._`-._ `-.__.-' _.-'_.-'|
| `-._`-._ _.-'_.-' |
`-._ `-._`-.__.-'_.-' _.-'
`-._ `-.__.-' _.-'
`-._ _.-'
`-.__.-'
May 10 17:35:18 gvm redis-server[45475]: 45475:M 10 May 2024 17:35:18.259 * The server is now ready to accept connections at /run/redis-openvas/redis.sock
May 10 17:35:18 gvm redis[45475]: Server initialized
May 10 17:35:18 gvm redis[45475]: The server is now ready to accept connections at /run/redis-openvas/redis.sock
May 10 17:35:18 gvm systemd[1]: Started [email protected] - Advanced key-value store (openvas).
Configure Mosquitto MQTT Broker for GVM
MQTT Broker is used for communication between notus-scanner, openvas-scanner and ospd-openvas.
Configure OpenVAS scanner to use MQTT by defining the address to MQTT as well as the vulnerability scannig approach.
echo "mqtt_server_uri = localhost:1883
table_driven_lsc = yes" | sudo tee -a /etc/openvas/openvas.conf
Next, start and enable Mosquitto service to run on system boot;
sudo systemctl enable --now mosquittoCheck status;
systemctl status mosquitto● mosquitto.service - Mosquitto MQTT Broker
Loaded: loaded (/usr/lib/systemd/system/mosquitto.service; enabled; preset: enabled)
Active: active (running) since Wed 2024-05-08 20:53:38 UTC; 1 day 20h ago
Docs: man:mosquitto.conf(5)
man:mosquitto(8)
Main PID: 4816 (mosquitto)
Tasks: 1 (limit: 9444)
Memory: 1.0M (peak: 1.8M)
CPU: 1min 53.382s
CGroup: /system.slice/mosquitto.service
└─4816 /usr/sbin/mosquitto -c /etc/mosquitto/mosquitto.conf
May 08 20:53:38 gvm systemd[1]: Starting mosquitto.service - Mosquitto MQTT Broker...
May 08 20:53:38 gvm systemd[1]: Started mosquitto.service - Mosquitto MQTT Broker.
Check the ports;
sudo ss -antpl | grep :1883LISTEN 0 100 127.0.0.1:1883 0.0.0.0:* users:(("mosquitto",pid=4816,fd=5))
LISTEN 0 100 [::1]:1883 [::]:* users:(("mosquitto",pid=4816,fd=6))
Update GVM Directories Ownership and Permissions
Update GVM libraries ownership and permissions as follows;
sudo mkdir -p /var/lib/notus /run/gvmdsudo chown -R gvm:gvm /var/lib/gvm \
/var/lib/openvas \
/var/lib/notus \
/var/log/gvm \
/run/gvmd
Update Network Vulnerability Tests (NVTs)
Update Network Vulnerability Tests feed from Greenbone Security Feed/Community Feed using the greenbone-nvt-sync command. rsync tool is required for a successful synchronization.
Note that greenbone-nvt-sync must not be executed as privileged user root. For this reason, update the NVTs as gvm user created above.
Also, allow GVM user to run openvas with sudo rights.
echo "gvm ALL = NOPASSWD: $(which openvas)" | sudo tee -a /etc/sudoers.d/gvmNext, update the NVTs as GVM user;
sudo -Hiu gvm greenbone-nvt-syncThe command may take a while to complete.
Sample output;
Trying to acquire lock on /var/lib/openvas/feed-update.lock
Acquired lock on /var/lib/openvas/feed-update.lock
⠦ Downloading Notus files from rsync://feed.community.greenbone.net/community/vulnerability-feed/22.04/vt-data/notus/ to /var/lib/notus
⠇ Downloading NASL files from rsync://feed.community.greenbone.net/community/vulnerability-feed/22.04/vt-data/nasl/ to /var/lib/openvas/plugins
Releasing lock on /var/lib/openvas/feed-update.lock
If the command fails with:
rsync: [receiver] read error: Connection reset by peer (104)
rsync error: error in socket IO (code 10) at io.c(784) [receiver=3.2.3]
rsync: connection unexpectedly closed (1913648 bytes received so far) [generator]
rsync error: error in rsync protocol data stream (code 12) at io.c(228) [generator=3.2.3]
Then append --rsync option and rerun the command.
sudo -Hiu gvm greenbone-nvt-sync --rsyncOnce the update is done, you need to upload the plugins into Redis server;
sudo -Hiu gvm sudo openvas --update-vt-infoAgain , ensure the logs directory has proper ownership;
sudo chown -R gvm:gvm /var/log/gvmKeeping the feeds up-to-date
The gvmd Data, SCAP and CERT Feeds should be kept up-to-date by calling the greenbone-feed-sync script regularly (e.g. via a cron entry):
sudo -Hiu gvm greenbone-feed-sync --type GVMD_DATAsudo -Hiu gvm greenbone-feed-sync --type SCAPsudo -Hiu gvm greenbone-feed-sync --type CERTPlease note: The CERT feed sync depends on data provided by the SCAP feed and should be called after syncing the later.
Also, in case the commands fail with such an error;
rsync: read error: Connection reset by peer (104)
rsync error: error in socket IO (code 10) at io.c(794) [receiver=3.1.3]
rsync: connection unexpectedly closed (1047 bytes received so far) [generator]
rsync error: error in rsync protocol data stream (code 12) at io.c(235) [generator=3.1.3]
Try adding --rsync option to the command, for example;
sudo -Hiu gvm greenbone-feed-sync --type CERT --rsyncConsider setting cron jobs to run the nvts, cert and scap data update scripts at your preferred frequency to pull updates from the feed servers.
Configure GVM Feed Validation
Run the commands below install the GnuPG keychain with the Greenbone Community Feed integrity key for validating the feed content;
wget https://www.greenbone.net/GBCommunitySigningKey.ascsudo gpg --homedir=/etc/openvas/gnupg --import GBCommunitySigningKey.ascecho "8AE4BE429B60A59B311C2E739823FAA60ED1E580:6:" | \
sudo gpg --import-ownertrust --homedir=/etc/openvas/gnupgUpdate ownership of the keyrings file.
sudo chown gvm:gvm /etc/openvas/gnupgList the keys;
sudo -Hiu gvm gpg --homedir=/etc/openvas/gnupg --list-keysRunning OpenVAS Scanner, GSA and GVM services
In order to make the management of OpenVAS scanner, GSA (WebUI service) and GVM daemon, create systemd service unit files for each of them as follows.
Create Systemd Service unit for OpenVAS OSPD
You can copy the service unit file from the source directory to systemd service unit files directory and modify it accordingly. We use the service unit below in this setup.
sudo tee /etc/systemd/system/ospd-openvas.service << 'EOL'
[Unit]
Description=OSPd Wrapper for the OpenVAS Scanner (ospd-openvas)
Documentation=man:ospd-openvas(8) man:openvas(8)
After=network.target networking.service [email protected] mosquitto.service
[email protected] mosquitto.service
ConditionKernelCommandLine=!recovery

[Service]
Type=exec
User=gvm
Group=gvm
RuntimeDirectory=ospd
RuntimeDirectoryMode=2775
PIDFile=/run/ospd/ospd-openvas.pid
ExecStartPre=-rm -rf /run/ospd/ospd-openvas.pid /run/ospd/ospd-openvas.sock
ExecStart=/usr/local/bin/ospd-openvas --foreground \
	--unix-socket /run/ospd/ospd-openvas.sock \
	--pid-file /run/ospd/ospd-openvas.pid \
	--log-file /var/log/gvm/ospd-openvas.log \
	--lock-file-dir /var/lib/openvas \
	--socket-mode 0770 \
	--mqtt-broker-address localhost \
	--mqtt-broker-port 1883 \
	--notus-feed-dir /var/lib/notus/advisories
SuccessExitStatus=SIGKILL
Restart=always
RestartSec=60

[Install]
WantedBy=multi-user.target
EOL
Reload systemd configs;
sudo systemctl daemon-reloadStart and enable OSPD openvas wrapper service;
sudo systemctl enable --now ospd-openvasCheck the status;
systemctl status ospd-openvas.service● ospd-openvas.service - OSPd Wrapper for the OpenVAS Scanner (ospd-openvas)
Loaded: loaded (/etc/systemd/system/ospd-openvas.service; enabled; preset: enabled)
Active: active (running) since Fri 2024-05-10 19:28:14 UTC; 2min 57s ago
Docs: man:ospd-openvas(8)
man:openvas(8)
Process: 49371 ExecStartPre=rm -rf /run/ospd/ospd-openvas.pid /run/ospd/ospd-openvas.sock (code=exited, status=0/SUCCESS)
Main PID: 49373 (ospd-openvas)
Tasks: 5 (limit: 9444)
Memory: 90.2M (peak: 148.8M)
CPU: 55.327s
CGroup: /system.slice/ospd-openvas.service
├─49373 /usr/bin/python3 /usr/local/bin/ospd-openvas --foreground --unix-socket /run/ospd/ospd-openvas.sock --pid-file /run/ospd/ospd-openvas.pid --log-file /var/log/gvm/ospd-openvas.log --lock-fil>
└─49378 /usr/bin/python3 /usr/local/bin/ospd-openvas --foreground --unix-socket /run/ospd/ospd-openvas.sock --pid-file /run/ospd/ospd-openvas.pid --log-file /var/log/gvm/ospd-openvas.log --lock-fil>
May 10 19:28:14 gvm systemd[1]: Starting ospd-openvas.service - OSPd Wrapper for the OpenVAS Scanner (ospd-openvas)...
May 10 19:28:14 gvm systemd[1]: Started ospd-openvas.service - OSPd Wrapper for the OpenVAS Scanner (ospd-openvas).
May 10 19:28:14 gvm ospd-openvas[49373]: OSPD[49373] 2024-05-10 19:28:14,606: INFO: (ospd.main) Starting OSPd OpenVAS version 22.7.1.
May 10 19:28:14 gvm ospd-openvas[49373]: OSPD[49373] 2024-05-10 19:28:14,643: INFO: (ospd_openvas.messaging.mqtt) Successfully connected to MQTT broker
May 10 19:28:24 gvm ospd-openvas[49373]: OSPD[49373] 2024-05-10 19:28:24,642: INFO: (ospd_openvas.daemon) Loading VTs. Scans will be [requested|queued] until VTs are loaded. This may take a few minutes, please >
May 10 19:29:13 gvm ospd-openvas[49373]: OSPD[49373] 2024-05-10 19:29:13,255: INFO: (ospd_openvas.daemon) VTs were up to date. Feed version is 202405101636.
Be sure to also check the logs;
sudo tail -f /var/log/gvm/ospd-openvas.logSample logs;
...
OSPD[49373] 2024-05-10 19:28:14,606: INFO: (ospd.main) Starting OSPd OpenVAS version 22.7.1.
OSPD[49373] 2024-05-10 19:28:14,643: INFO: (ospd_openvas.messaging.mqtt) Successfully connected to MQTT broker
OSPD[49373] 2024-05-10 19:28:24,642: INFO: (ospd_openvas.daemon) Loading VTs. Scans will be [requested|queued] until VTs are loaded. This may take a few minutes, please wait...
OSPD[49373] 2024-05-10 19:29:13,255: INFO: (ospd_openvas.daemon) VTs were up to date. Feed version is 202405101636
Create Notus Scanner Systemd Service Unit
Execute the command below to install Notus scanner systemd service unit
sudo tee /etc/systemd/system/notus-scanner.service << 'EOL'
[Unit]
Description=Notus Scanner
After=mosquitto.service
Wants=mosquitto.service
ConditionKernelCommandLine=!recovery

[Service]
Type=exec
User=gvm
RuntimeDirectory=notus-scanner
RuntimeDirectoryMode=2775
PIDFile=/run/notus-scanner/notus-scanner.pid
ExecStart=/usr/local/bin/notus-scanner --foreground \
	--products-directory /var/lib/notus/products \
	--log-file /var/log/gvm/notus-scanner.log
SuccessExitStatus=SIGKILL
Restart=always
RestartSec=60

[Install]
WantedBy=multi-user.target
EOL
Reload systemd configs, start and enable the service.
sudo systemctl daemon-reloadsudo systemctl enable --now notus-scannerCheck the status;
systemctl status notus-scanner● notus-scanner.service - Notus Scanner
Loaded: loaded (/etc/systemd/system/notus-scanner.service; enabled; preset: enabled)
Active: active (running) since Fri 2024-05-10 19:33:30 UTC; 6s ago
Main PID: 49574 (notus-scanner)
Tasks: 1 (limit: 9444)
Memory: 14.9M (peak: 16.1M)
CPU: 95ms
CGroup: /system.slice/notus-scanner.service
└─49574 /usr/bin/python3 /usr/local/bin/notus-scanner --foreground --products-directory /var/lib/notus/products --log-file /var/log/gvm/notus-scanner.log
May 10 19:33:30 gvm systemd[1]: Starting notus-scanner.service - Notus Scanner...
May 10 19:33:30 gvm systemd[1]: Started notus-scanner.service - Notus Scanner.
May 10 19:33:30 gvm notus-scanner[49574]: 2024-05-10 19:33:30,724 notus-scanner: INFO: (notus.scanner.daemon) Starting notus-scanner version 22.6.3.
check logs;
sudo tail -f /var/log/gvm/notus-scanner.logCreating Systemd Service units for GVM services
When run, the installer creates GVM daemon service unit, /lib/systemd/system/gvmd.service.
Let us modify this service unit file;
sudo cp /lib/systemd/system/gvmd.service{,.bak}sudo tee /lib/systemd/system/gvmd.service << 'EOL'
[Unit]
Description=Greenbone Vulnerability Manager daemon (gvmd)
After=network.target networking.service postgresql.service ospd-openvas.service
Wants=postgresql.service ospd-openvas.service
Documentation=man:gvmd(8)
ConditionKernelCommandLine=!recovery
[Service]
Type=exec
User=gvm
Group=gvm
PIDFile=/run/gvmd/gvmd.pid
RuntimeDirectory=gvmd
RuntimeDirectoryMode=2775
ExecStart=/usr/local/sbin/gvmd --foreground \
--osp-vt-update=/run/ospd/ospd-openvas.sock \
--listen-group=gvm
Restart=always
TimeoutStopSec=10
[Install]
WantedBy=multi-user.target
EOL
Reload system unit configs and start the services;
sudo systemctl daemon-reload
sudo systemctl enable --now gvmd
Checking the status;
systemctl status gvmd● gvmd.service - Greenbone Vulnerability Manager daemon (gvmd)
Loaded: loaded (/usr/lib/systemd/system/gvmd.service; enabled; preset: enabled)
Active: active (running) since Fri 2024-05-10 19:35:30 UTC; 6s ago
Docs: man:gvmd(8)
Main PID: 49737 (gvmd)
Tasks: 6 (limit: 9444)
Memory: 101.9M (peak: 102.4M)
CPU: 4.813s
CGroup: /system.slice/gvmd.service
├─49737 "gvmd: Waiting for in" --foreground --osp-vt-update=/run/ospd/ospd-openvas.sock --listen-group=gvm
├─49758 gpg-agent --homedir /var/lib/gvm/gvmd/gnupg --use-standard-socket --daemon
├─49767 "gvmd: Reloading NVTs" --foreground --osp-vt-update=/run/ospd/ospd-openvas.sock --listen-group=gvm
├─49768 "gvmd: Syncing SCAP: " --foreground --osp-vt-update=/run/ospd/ospd-openvas.sock --listen-group=gvm
├─49769 "gvmd: OSP: Updating " --foreground --osp-vt-update=/run/ospd/ospd-openvas.sock --listen-group=gvm
└─49770 "gvmd: Syncing CERT" "" .--foreground --osp-vt-update=/run/ospd/ospd-openvas.sock --listen-group=gvm
May 10 19:35:30 gvm systemd[1]: Starting gvmd.service - Greenbone Vulnerability Manager daemon (gvmd)...
May 10 19:35:30 gvm systemd[1]: Started gvmd.service - Greenbone Vulnerability Manager daemon (gvmd).
Check the logs;
sudo tail -f /var/log/gvm/gvmd.logCreating Systemd Service units for GSA services
When run, the installer creates GSA daemon service unit, /lib/systemd/system/gsad.service.
Let us modify this service unit file;
sudo cp /lib/systemd/system/gsad.service{,.bak}sudo tee /lib/systemd/system/gsad.service << 'EOL'
[Unit]
Description=Greenbone Security Assistant daemon (gsad)
Documentation=man:gsad(8) https://www.greenbone.net
After=network.target gvmd.service
Wants=gvmd.service
[Service]
Type=exec
User=gvm
Group=gvm
RuntimeDirectory=gsad
RuntimeDirectoryMode=2775
PIDFile=/run/gsad/gsad.pid
ExecStart=/usr/bin/sudo /usr/local/sbin/gsad -k /var/lib/gvm/private/CA/clientkey.pem -c /var/lib/gvm/CA/clientcert.pem
Restart=always
TimeoutStopSec=10
[Install]
WantedBy=multi-user.target
Alias=greenbone-security-assistant.service
EOL
Generate GVM Certificates
Next, run the command below to generate certificates gvmd.
Server certificates are used for authentication while client certificates are primarily used for authorization. More on man gvm-manage-certs.
sudo -Hiu gvm gvm-manage-certs -aSample output;
Generated private key in /tmp/tmp.s5Z0RMcLv1/cakey.pem.
Generated self signed certificate in /tmp/tmp.s5Z0RMcLv1/cacert.pem.
Installed private key to /var/lib/gvm/private/CA/cakey.pem.
Installed certificate to /var/lib/gvm/CA/cacert.pem.
Generated private key in /tmp/tmp.s5Z0RMcLv1/serverkey.pem.
Generated certificate request in /tmp/tmp.s5Z0RMcLv1/serverrequest.pem.
Signed certificate request in /tmp/tmp.s5Z0RMcLv1/serverrequest.pem with CA certificate in /var/lib/gvm/CA/cacert.pem to generate certificate in /tmp/tmp.s5Z0RMcLv1/servercert.pem
Installed private key to /var/lib/gvm/private/CA/serverkey.pem.
Installed certificate to /var/lib/gvm/CA/servercert.pem.
Generated private key in /tmp/tmp.s5Z0RMcLv1/clientkey.pem.
Generated certificate request in /tmp/tmp.s5Z0RMcLv1/clientrequest.pem.
Signed certificate request in /tmp/tmp.s5Z0RMcLv1/clientrequest.pem with CA certificate in /var/lib/gvm/CA/cacert.pem to generate certificate in /tmp/tmp.s5Z0RMcLv1/clientcert.pem
Installed private key to /var/lib/gvm/private/CA/clientkey.pem.
Installed certificate to /var/lib/gvm/CA/clientcert.pem.
Removing temporary directory /tmp/tmp.s5Z0RMcLv1.
Enable GVM user to run gsad with sudo rights;
echo "gvm ALL = NOPASSWD: $(which gsad)" | sudo tee -a /etc/sudoers.d/gvmReload system unit configs and start the services. Ensure no service is using the web service ports 80/443.
sudo systemctl daemon-reload
sudo systemctl enable --now gsad
Checking the status;
systemctl status gsadCheck the logs;
sudo tail /var/log/gvm/gsad.logCreate GVM Scanner
We will use the default scanner here.
sudo -Hiu gvm /usr/local/sbin/gvmd --get-scanners08b69003-5fc2-4037-a479-93b440211c73 OpenVAS /run/ospd/ospd-openvas.sock 0 OpenVAS Default
6acd0832-df90-11e4-b9d5-28d24461215b CVE 0 CVE
If you set your scanner to use non-standard scanner host path rather than /run/ospd/ospd-openvas.sock, you can create and register your scanner;
sudo -Hiu gvm /usr/local/sbin/gvmd \
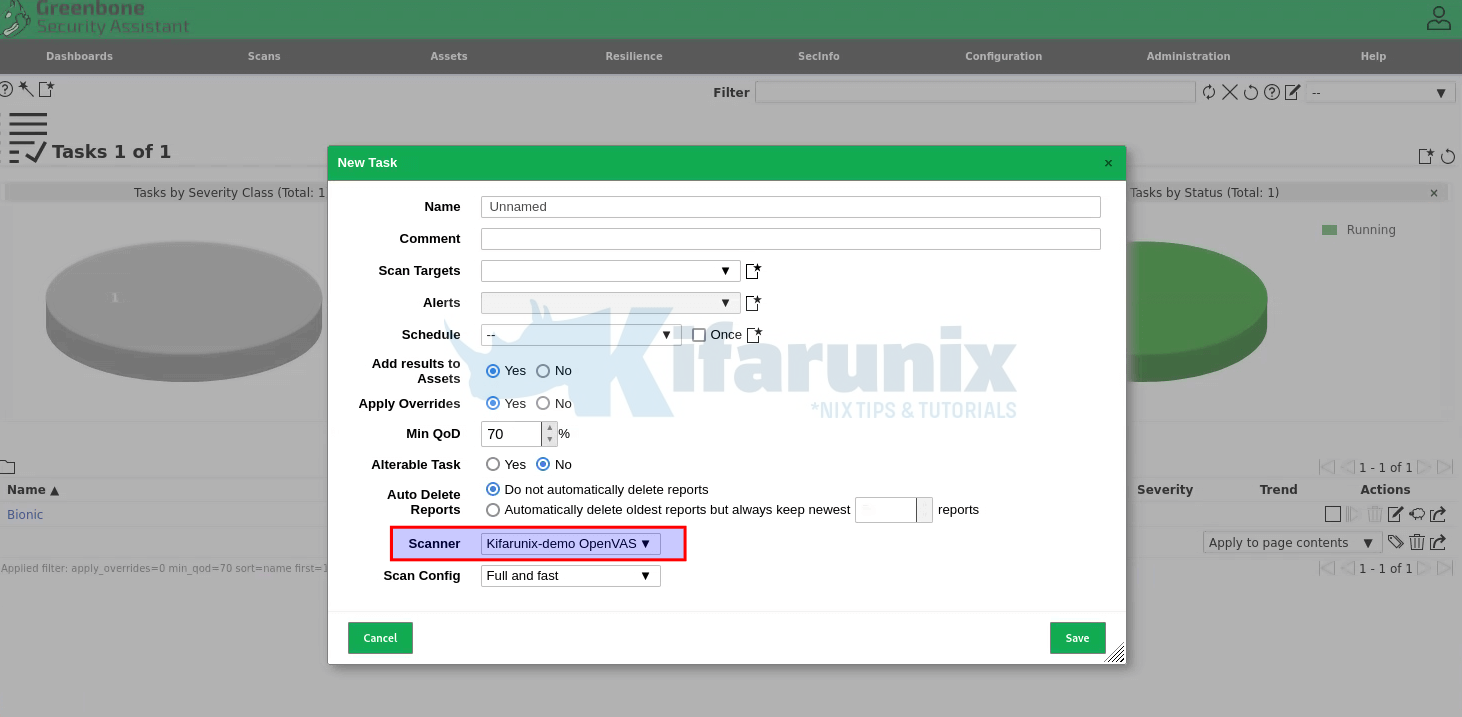
	--create-scanner="Kifarunix-demo OpenVAS Scanner" \
	--scanner-type="OpenVAS" \
	--scanner-host=/run/ospd/ospd-openvas.sock
Scanner created.Next, you need to verify your scanner. For this, you first need to get the scanner identifier;
sudo -Hiu gvm /usr/local/sbin/gvmd --get-scanners08b69003-5fc2-4037-a479-93b440211c73 OpenVAS /run/ospd/ospd-openvas.sock 0 OpenVAS Default 6acd0832-df90-11e4-b9d5-28d24461215b CVE 0 CVE 3017834c-835b-41d9-8377-d8fb4d855aac OpenVAS /run/ospd/ospd-openvas.sock 9390 Kifarunix-demo OpenVAS ScannerBased on the output above, our scanner UUID is,
3017834c-835b-41d9-8377-d8fb4d855aac.Verify the scanner;
creating own scannersudo -Hiu gvm /usr/local/sbin/gvmd --verify-scanner=3017834c-835b-41d9-8377-d8fb4d855aac
Create GVM Admin User
Create GVM administrative user by running the command below;
sudo -Hiu gvm /usr/local/sbin/gvmd --create-user adminThis command generates a random password for the user. See sample output below;
User created with password '5d2d0b2d-2eb8-4853-8aa9-9bf70a802c9a'.If you want to create a user and at the same time create your own password;
sudo -Hiu gvm /usr/local/sbin/gvmd --create-user USERNAME --password=PASSWORDOtherwise, you can reset the password of an already existing user;
sudo -Hiu gvm /usr/local/sbin/gvmd --user=<USERNAME> --new-password=<PASSWORD>An administrator user can later create further users or administrators via clients like the Greenbone Security Assistant (GSA).
Set the Feed Import Owner
According to gvmd/INSTALL.md, certain resources that were previously part of the gvmd source code are now shipped via the feed. An example is the config “Full and Fast”.
gvmd will only create these resources if a “Feed Import Owner” is configured:
sudo -Hiu gvm /usr/local/sbin/gvmd --modify-setting 78eceaec-3385-11ea-b237-28d24461215b --value <uuid_of_user>Thus, get the UUIDs of all created users;
sudo -Hiu gvm /usr/local/sbin/gvmd --get-users --verboseSample output;
admin d91affe7-f772-412b-8d7b-7ade616543eeThen modify the gvmd settings with the admin user UUID.
sudo -Hiu gvm /usr/local/sbin/gvmd --modify-setting 78eceaec-3385-11ea-b237-28d24461215b --value d91affe7-f772-412b-8d7b-7ade616543eeYou can even use a single command;
sudo -Hiu gvm /usr/local/sbin/gvmd \
--modify-setting 78eceaec-3385-11ea-b237-28d24461215b \
--value `sudo -Hiu gvm /usr/local/sbin/gvmd --get-users --verbose | grep admin | awk '{print $2}'`
Accessing GVM Web Interface
Greenbone Security Assistant (GSA) WebUI daemon opens port 443 and listens on all interfaces.
sudo ss -altnp | grep 443LISTEN 0 1024 *:443 *:* users:(("gsad",pid=50368,fd=11))If firewall is running, open this port to allow external access.
sudo ufw allow 443/tcpYou can now access GSA via the url https:<serverIP-OR-hostname>.
Accept the self-signed SSL warning and proceed.
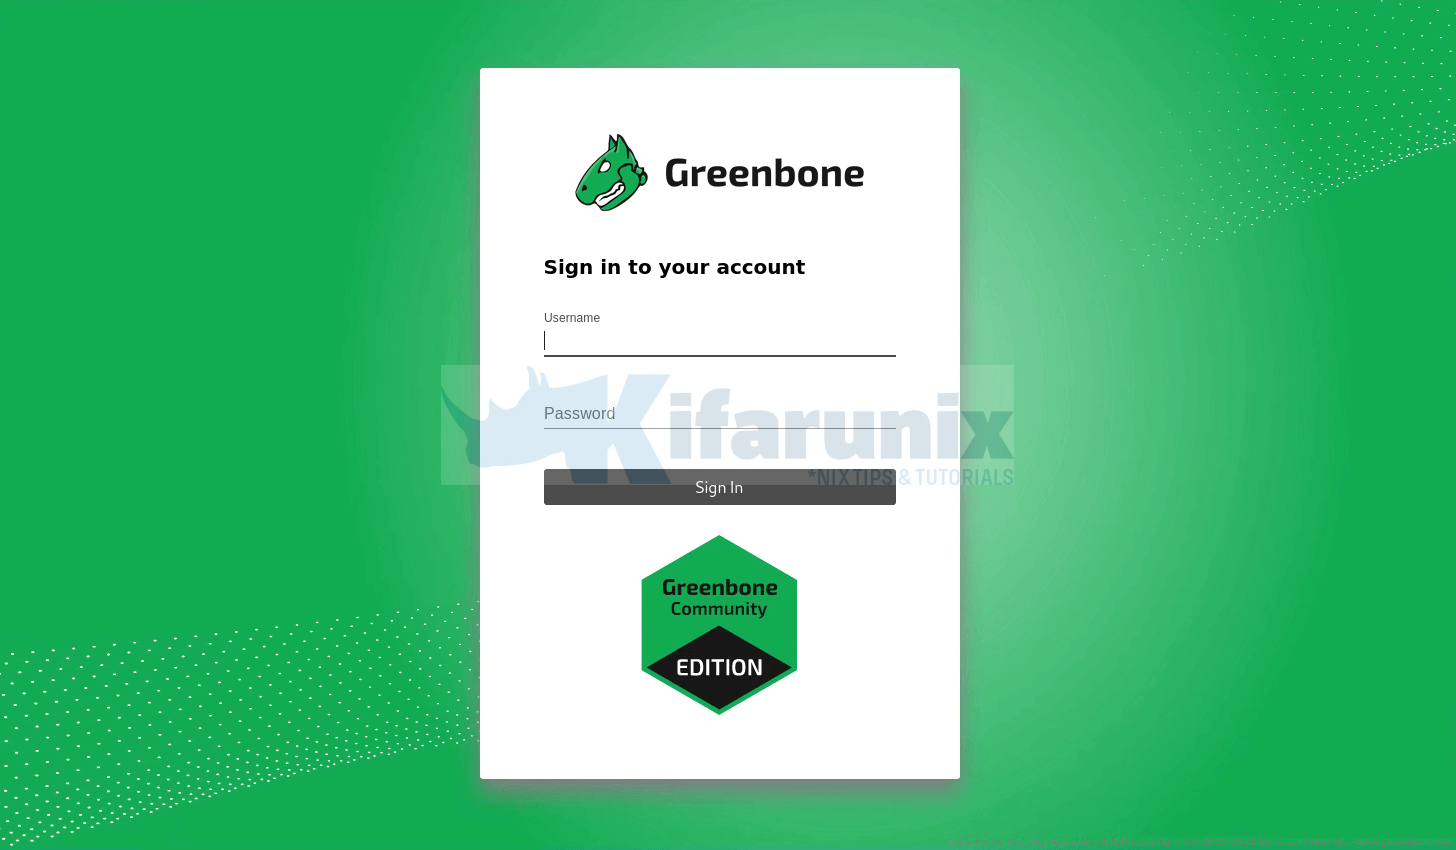
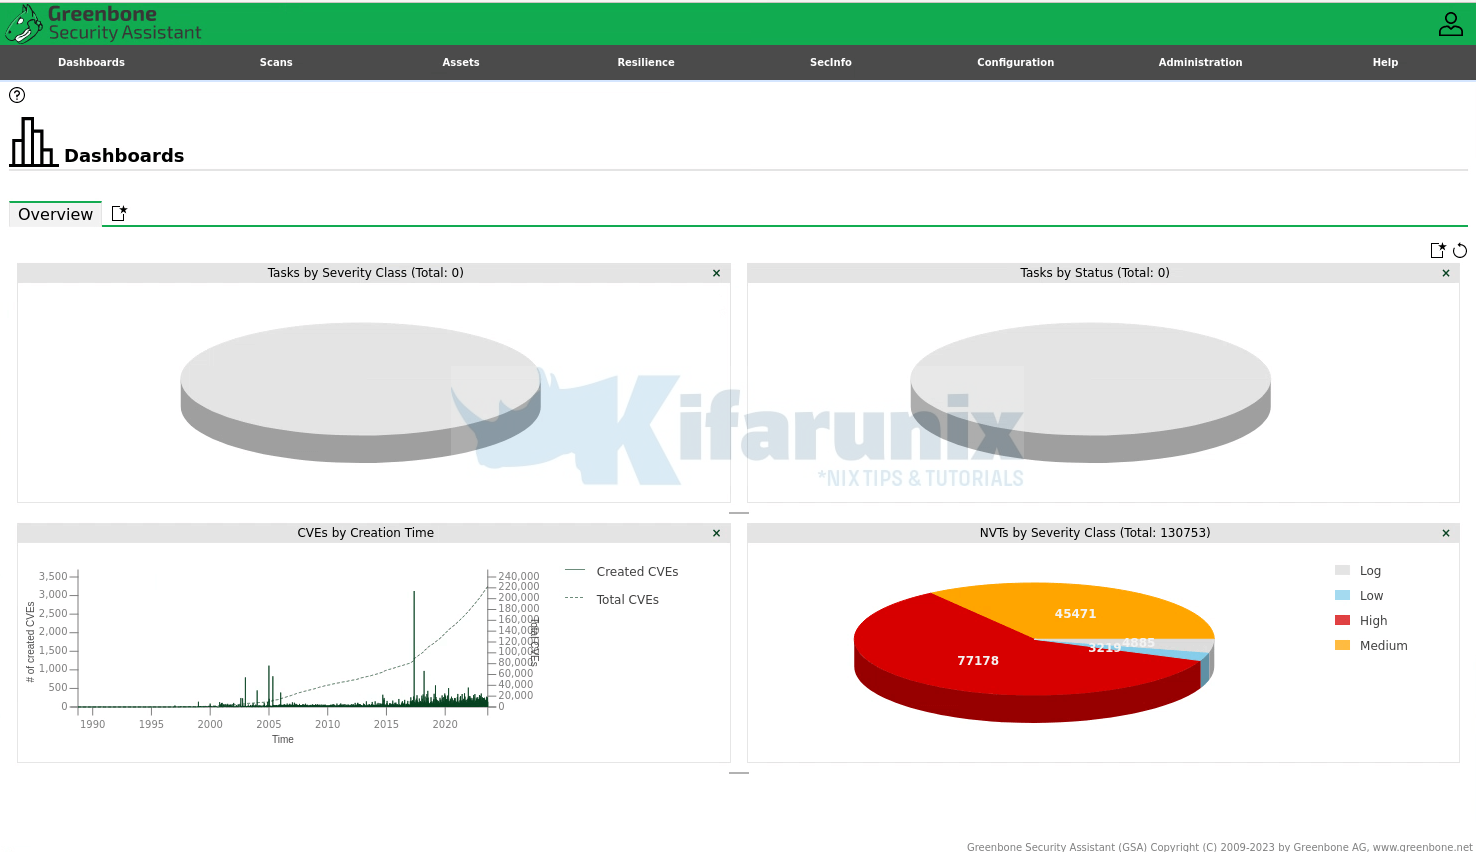
Login using the admin user credentials created above.
Dashboard
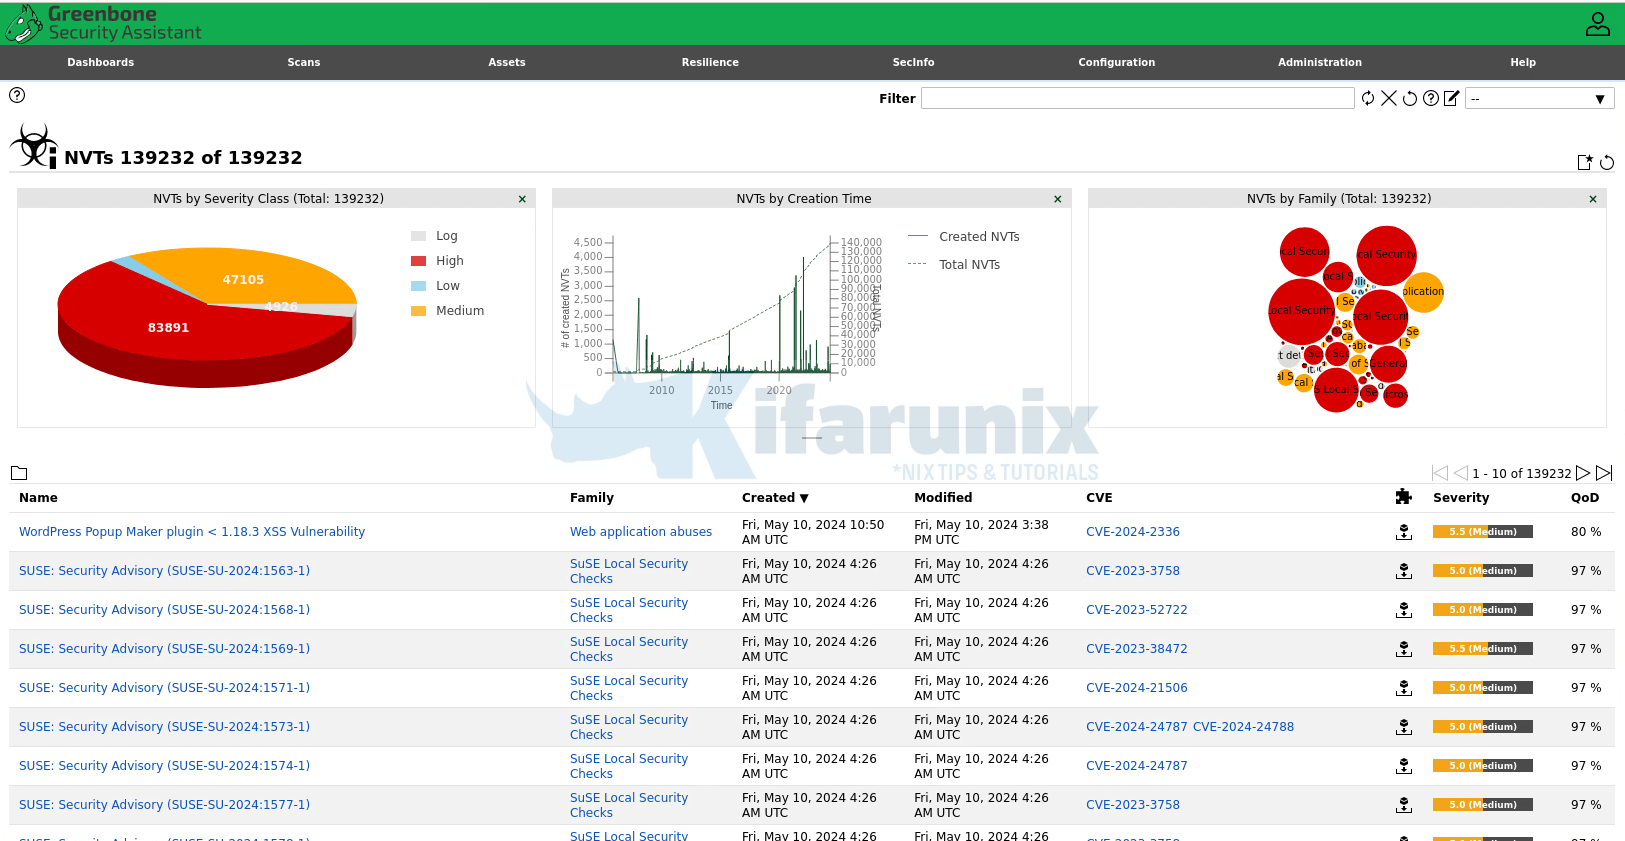
Feed Status

SecInfo
And that is it on how to install GVM on Ubuntu 24.04.
And hey, don’t forget to choose your default scanner in case you created one, when scanning your hosts;
You can now start scanning your assets.
Sample results;
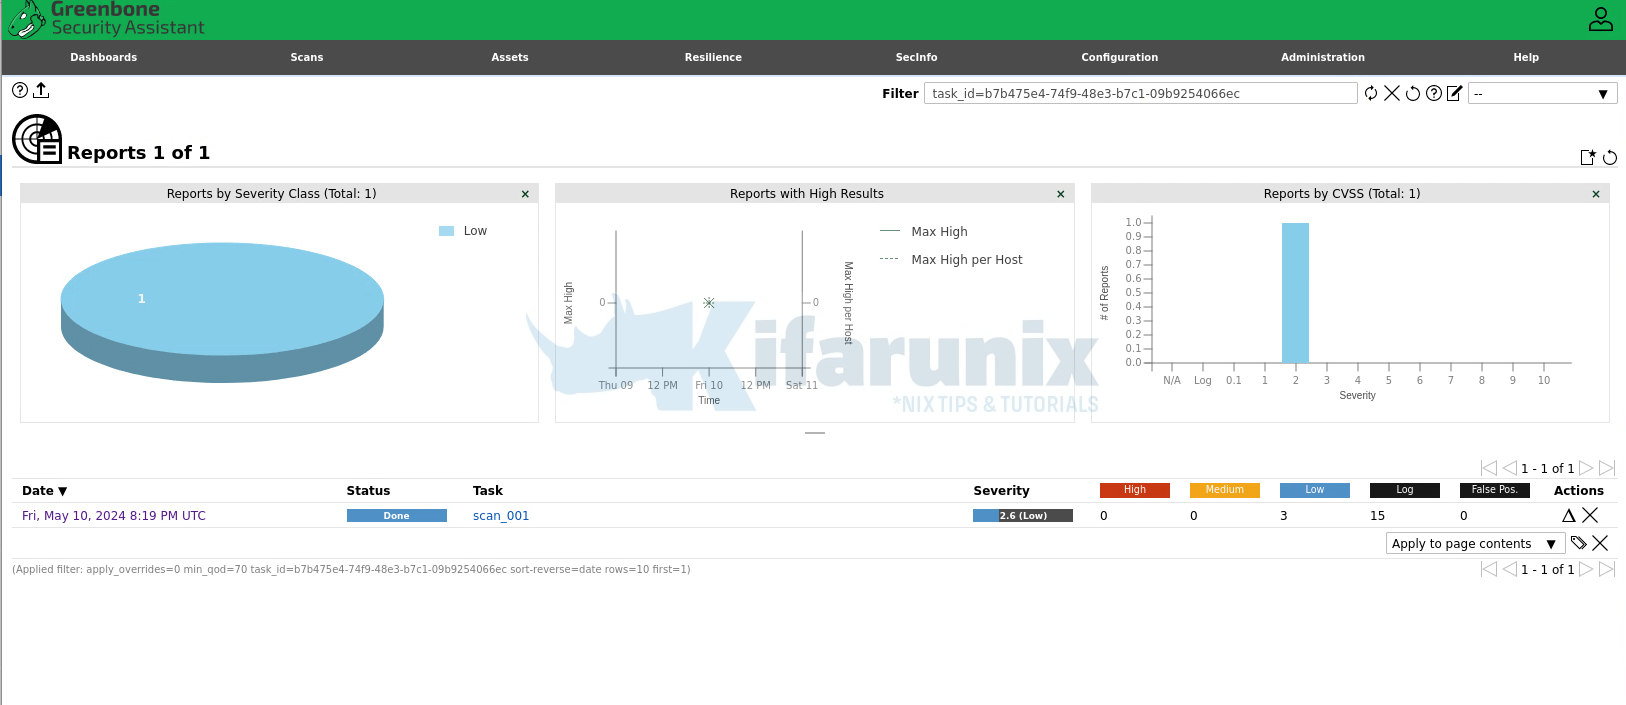
And that is all. You are now running GVM scanner on Ubuntu 24.04!

