Hello there. In this guide, we will be learning about how to install and setup OpenVAS 9 Vulnerability Scanner on Ubuntu 18.04.
This post is dated. Check how to current versions install GVM;
Install Greenbone Vulnerability Manager
OpenVAS is the world’s most advanced Open Source vulnerability scanner and manager. It is a software framework of several services and tools offering a comprehensive and powerful vulnerability scanning and vulnerability management solution. It executes the actual Network Vulnerability Tests (NVTs) which are served via the OpenVAS NVT Feed or via a commercial feed service.
Before we dive into installing and setting up OpenVAS on Ubuntu 18.04, let us first have an overview of the basic functionality and the various components that make up OpenVAS.
Architecture Overview
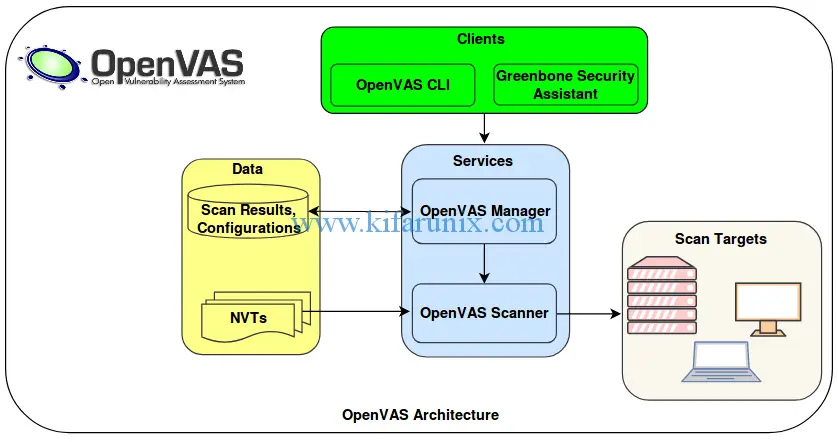
The illustration below shows the logical architecture of the OpenVAS framework:

The description of major components of OpenVAS is briefly outlined below.
- Greenbone Security Assistant (GSA) which provides a web-based user interface for the administration and management of OpenVAS scans, reports…
- OpenVAS CLI which provides the command line interface for the administration OpenVAS for instance you can perform scanning, manage reports.
- Greenbone Desktop Security which provides a graphical user interface desktop application for the complete management of OpenVAS.
- OpenVAS Manager which is the main artery of the OpenVAS. It receives various tasks/instructions from the administrator through the client components, WEB/GUI/CLI, and uses these instructions to control the OpenVAS Scanner which does the actual vulnerability assessment. It also controls a SQL database where all configuration and scan result data is centrally stored. Finally, it also handles user management including access control with groups and roles.
- OpenVAS Scanner is the component that performs actual vulnerability assessment against specified targets.
- OpenVAS Administration is another component that allows admins to create users and assign various privileges as well and manage the NVTs Feed updates.
- Scan Targets are the endpoints which are being assessed of any vulnerabilities.
Without much theory, let us dive into installing and setting up OpenVAS on Ubuntu 18.04. But wait, you might also be interested in checking our previous articles on Nessus, Nikto, WPScan, Lynis, RKHunter, ClamAV, Free Sophos AntiVirus by following the links below;
- How to Install and Configure Nessus Scanner on Ubuntu 18.04/CentOS 7
- How to Install and Use WPScan WordPress Vulnerability Scanner Ubuntu 18.04
- How to Install and Use Nikto Web Scanner on Ubuntu 18.04
- How to Install and Use ClamAV Antivirus on Ubuntu 18.04
- How to Perform System Security Auditing with Lynis on Ubuntu 18.04
- How to Install RKHunter (RootKit Hunter) On Ubuntu 18.04
- How to Install Sophos AntiVirus on Ubuntu 18.04
Install and Setup OpenVAS 9 Vulnerability Scanner on Ubuntu
Before you can proceed with installation and setup of OpenVAS 9 on Ubuntu 18.04, you have to create OpenVAS PPA repository using the add-apt-repository command as shown below. When you run the above command, a summary of how to go about installation and set up is given. To add the ppa repo, press ENTER.
add-apt-repository ppa:mrazavi/openvasAfter adding the ppa repo, update your system and install the required packages; sqlite3 which provides SQL DB for OpenVAS manager, openvas9 package fot openvas 9.
apt update -y
apt upgrade -y
apt install sqlite3 openvas9 -y
Want to use PostgreSQL database with OpenVAS 9 instead of the default SQLite? See the link below on how to configure OpenVAS 9 to use PostgreSQL.
Install OpenVAS 9 with PostgreSQL in Ubuntu 18.04
During installation, you may be prompted to update the redis conf file to enable redis unix socket. Enable the socket and proceed with installation.
Configuring openvas9-scanner
----------------------------

Openvas scanner require redis database to store data. It will connect to the database with a unix socket
at /var/run/redis/redis.sock.


If you agree, the installation process will enable redis unix socket at this address automatically, by
updating /etc/redis/redis.conf.

Otherwise, you have to manually update your /etc/redis/redis.conf.

Do you want to enable redis unix socket in /etc/redis/redis.conf? [yes/no] yes
In order to obtain PDF reports with nice fonts for every scanning, some packages need to be installed.
apt install texlive-latex-extra --no-install-recommends -y
apt install texlive-fonts-recommended --no-install-recommends -y
To run OpenVAS NASL scripts against a target, or troubleshoot and check NASL scripts for errors, you need the openvas-nasl utility which is provided by the libopenvas9-dev package. To install libopenvas9-dev, run the following command.
apt install libopenvas9-devAfter that, update the network vulnerability tests database by syncing it with feeds using the the following commands:
greenbone-nvt-sync
greenbone-scapdata-sync
greenbone-certdata-sync
Once the update is done, restart the OpenVAS scanner, manager and security assistant.
systemctl restart openvas-scanner
systemctl restart openvas-manager
systemctl restart openvas-gsa
You can also enable the services to run on system reboot.
systemctl enable openvas-scanner
systemctl enable openvas-manager
systemctl enable openvas-gsa
Run the following command to confirm that the openvas processes are running.
ps aux | grep openvasroot 18390 0.0 0.3 146072 3500 ? Ss 10:59 0:02 openvassd: Waiting for incoming connections
root 18418 0.0 0.0 93312 536 ? Ss 10:59 0:00 gpg-agent --homedir /var/lib/openvas/openvasmd/gnupg --use-standard-socket --daemon
root 18521 0.0 0.6 202844 6172 ? SL 10:59 0:00 openvasmdNow, Before we can run any tests, we need to rebuild the NVTs cache so that the feeds we synced above are loaded to the OpenVAS manager.
openvasmd --rebuild --progress --verbose
Rebuilding NVT cache... done.
There are some additional tools that can be installed for instance openvas-check-setup tool for checking the state of OpenVAS installation. It can also show other requirements for OpenVAS functionality.
To install openvas-check-setup, download it to your PATH, make it executable.
wget --no-check-certificate https://svn.wald.intevation.org/svn/openvas/branches/tools-attic/openvas-check-setup -P /usr/local/bin/
chmod +x /usr/local/bin/openvas-check-setup
Now, run the command to verify your installation.
openvas-check-setup --v9openvas-check-setup 2.3.7
Test completeness and readiness of OpenVAS-9
Please report us any non-detected problems and
help us to improve this check routine:
http://lists.wald.intevation.org/mailman/listinfo/openvas-discuss
Send us the log-file (/tmp/openvas-check-setup.log) to help analyze the problem.
Use the parameter --server to skip checks for client tools
like GSD and OpenVAS-CLI.
Step 1: Checking OpenVAS Scanner ...
...
Step 10: Checking presence of optional tools ...
OK: pdflatex found.
OK: PDF generation successful. The PDF report format is likely to work.
OK: ssh-keygen found, LSC credential generation for GNU/Linux targets is likely to work.
WARNING: Could not find rpm binary, LSC credential package generation for RPM and DEB based targets will not work.
SUGGEST: Install rpm.
WARNING: Could not find makensis binary, LSC credential package generation for Microsoft Windows targets will not work.
SUGGEST: Install nsis.
It seems like your OpenVAS-9 installation is OK.Oh well, it seems like everything is okay.
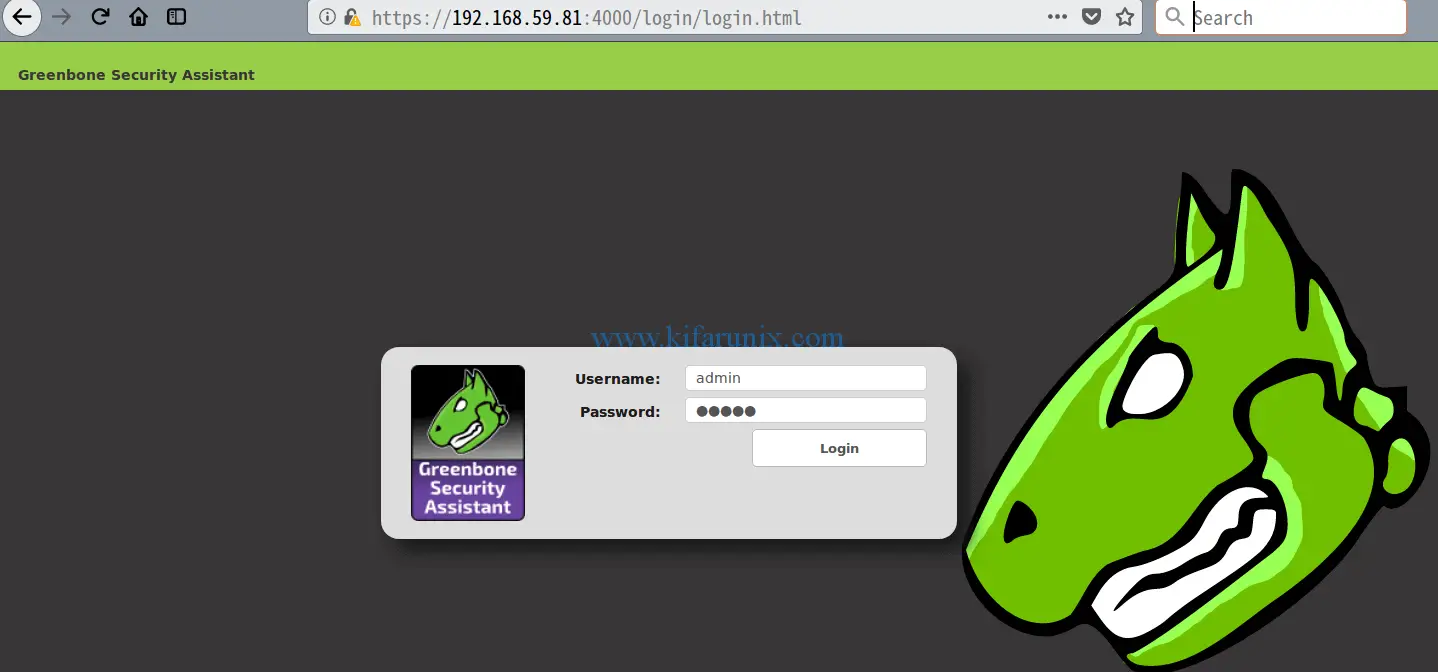
Now we can proceed to access our OpenVAS via web browser. Remember the default port number of the web interface is 4000. So, to access the web interface, go to https://IP_address_of_server:4000. The default login credentials are: “admin” as username and password.

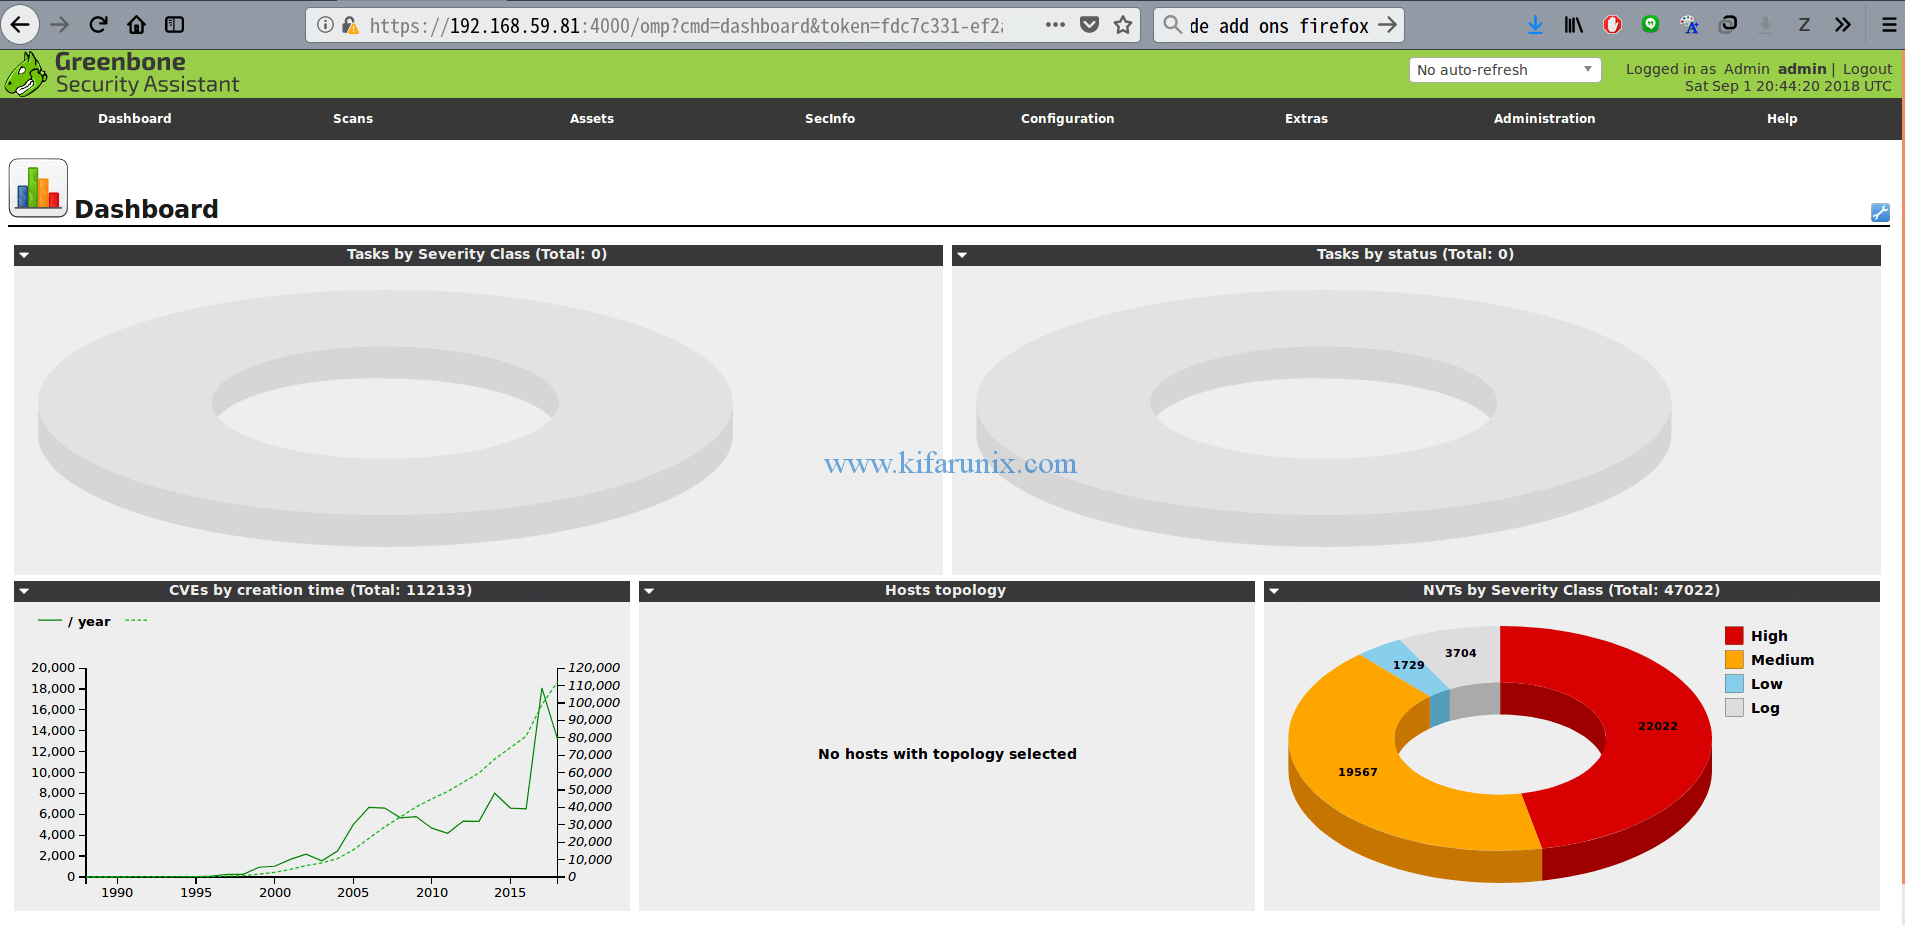
When you login, the default dashboard for OpenVAS looks like as shown below;

You have successfully set up a fully functional OpenVAS Scanner on Ubuntu 18.04 and you should now be able to run vulnerability scans against your hosts.
See how to add and scan a target for vulnerabilities by following the link below.
How to Add and Scan a Target for Vulnerabilities on OpenVAS Scanner
Thank you for reading. Enjoy.


Hello,
i did all step by step.
openvas-check tells me there no user and it has to be created.
FIX: create a user by running ‘openvasmd –create-user= –role=Admin && openvasmd –user= –new-password=’
BUT!, when i do this i get another error:
(openvasmd:10037): base plcy-WARNING **: 21:35:18.328: error opening ‘/etc/openvas/pwpolicy.conf’: No such file or directory
md manage:WARNING:10037:2019-01-09 21h35.18 utc: new password for ‘admin’ rejected: Password policy checking failed (internal error)
Failed to create user: Password policy checking failed (internal error)
where can i find an example pwpolicy.conf ???
kind regards
m@rko
Hello! I follow the guide. I am getting this errro rebuilding nvt cache… failed when a run
openvasmd –rebuild –progress –verbose
the following lines didn’t worked. It was saying that the services where masked.
I had to do systemctl unmask openvas-xxxxxxx.
systemctl restart openvas-scanner
systemctl restart openvas-manager
systemctl restart openvas-gsa
Then i had to do the lines above (restart)
But even if i did this, this line was not giving me anyting good beside openvasmd. (Openvassd was not showing up) ps aux | grep openvas
Just rebooted the OS, checked again, and voilà.
Then further problems: openvas-check-setup. Doesn’t exist anymore. Not maintained, crappy, didn,t give any +value so they have stopped developping it.
Last step after that was to open the browser page on port 4000. Done and got “The request contained an unknown or invalid host header. If you are trying to access GSA via its hostname or a proxy, make sure GSA is set up to allow it.” Logging on 127.0.0.1:4000 worked…
Hi Christian, not sure why you got the services masked. but am glad you fixed the issue.
great job and the greatest sites for linux no rookies. Please …..why don’t you write down a configuration with openvas+postgresql migration ?(I’ve tried other guide by unsuccessfully.)…
best regards
Paul
Thank you Paul.
I will gladly look into this request. Please be free to check back anytime soon.
Cheers
Hello,
Followed the installation steps working perfect, but after two days my scanner stop working and getting below error, kindly guide for solution.
503 service temporary down
i am getting same error though my installation is complete.
Hi. Sorry am unable to reproduce this error. However, what do you get in your openvas logs? Might be sth related to expired TLS certificates.
Hi! Did you find the solution for that? I am having the same issue…
root@Apop:/usr/share/_MANUAL_BUILDS_/Xonotic-git-votable# systemctl restart openvas-gsa
Failed to restart openvas-gsa.service: Unit openvas-gsa.service not found.
Hi.
By any chance you get any error when restarting the service?
Yes, it turns out it was actually a problem because redis-server didn’t properly install. This, in turn, was caused by a connection timeout during configuration because I had IPV6 disabled on my system.
hi anybody here has this error
Err:13 http://ppa.launchpad.net/tycho-s/ppa/ubuntu bionic Release
404 Not Found [IP: 91.189.95.83 80]
Reading package lists… Done
E: The repository ‘http://ppa.launchpad.net/tycho-s/ppa/ubuntu bionic Release’ does not have a Release file.
N: Updating from such a repository can’t be done securely, and is therefore disabled by default.
N: See apt-secure(8) manpage for repository creation and user configuration details.