In this tutorial, you will learn how to create and upload custom Linux image into OpenStack. An image is a single file that contains a virtual disk that contains a bootable operating system. It is possible to create your own custom Linux images and upload them to OpenStack for your own use.
Table of Contents
Create/Upload Custom Linux Image into OpenStack
By default, when you install OpenStack, it will have a single test image called CirrOS.
You can confirm the same from the OpenStack horizon;
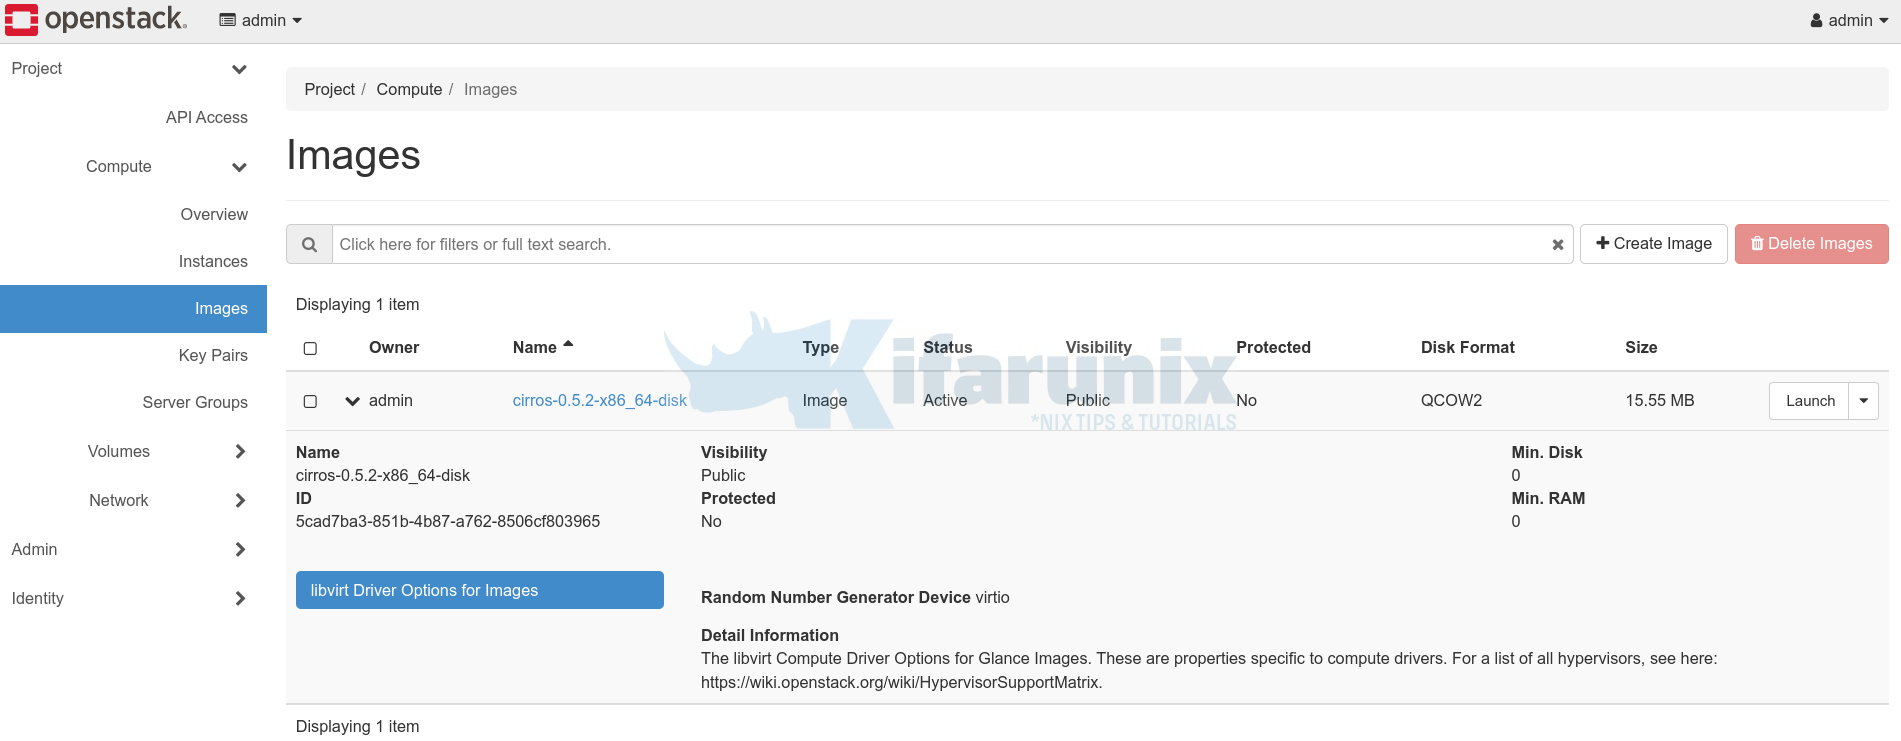
Or, just check available images using openstack command line tool.
source admin-openrc.shopenstack image listSample output;
+--------------------------------------+--------------------------+--------+
| ID                                   | Name                     | Status |
+--------------------------------------+--------------------------+--------+
| 5cad7ba3-851b-4b87-a762-8506cf803965 | cirros-0.5.2-x86_64-disk | active |
+--------------------------------------+--------------------------+--------+
So, in most cases, you might want to create and upload your own custom Linux image into OpenStack.
You can use the images that have already been created or simply create your own custom image and upload it to openstack.
How to Create Your own Custom Linux Image for OpenStack
To create your own custom Linux image for OpenStack;
Download the installation ISO file
Download the installation ISO file for the specific Linux distro you want to use on OpenStack. For example, we will use Ubuntu 22.04 headless server image as an example in this guide.
Install virtualization tool on your host system such as KVM
You need to have virtualization tool such as KVM/VirtualBox etc installed on your host system or somewhere else that enables you to create your custom Linux image.
See example Install KVM on Oracle Linux.
Install the Linux vm on the virtualization tool such as KVM
Once you have virtualization tool and ISO file ready, you need to install the VM and customize it in preparation to upload to OpenStack.
In this guide, we are using KVM as our virtualization platform.
- Thus, launch the virtual machine manager and create and install new Linux vm as follows;
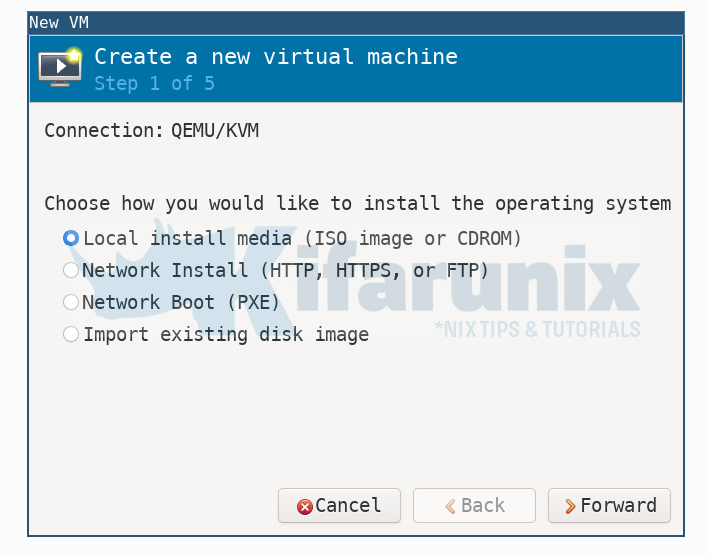
- Choose the ISO installation file and select OS type as Generic if not automatically detected.
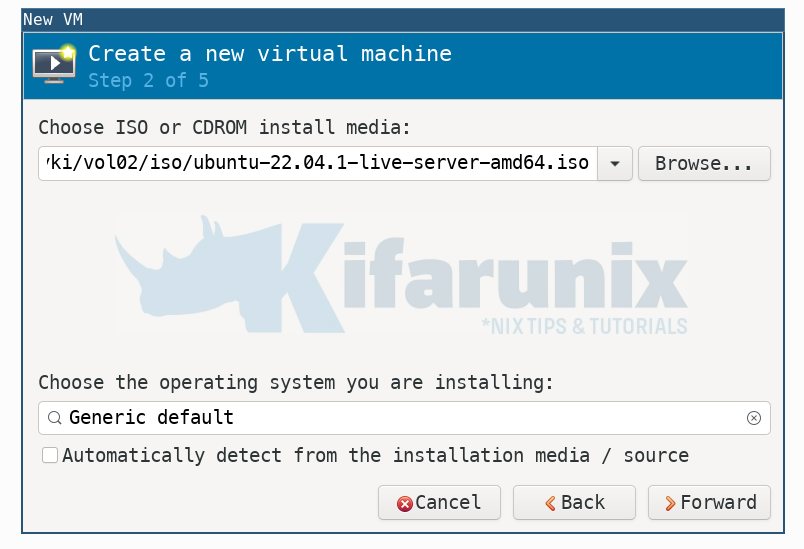
- Choose memory and CPU settings;
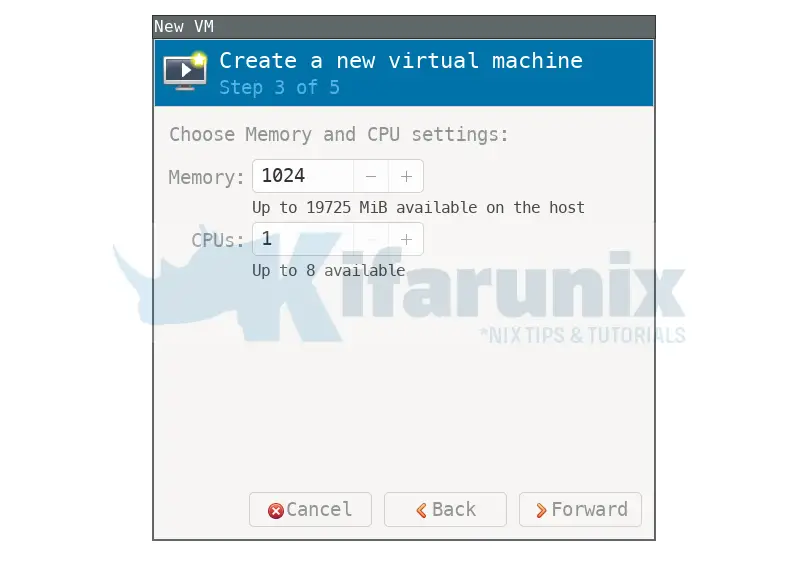
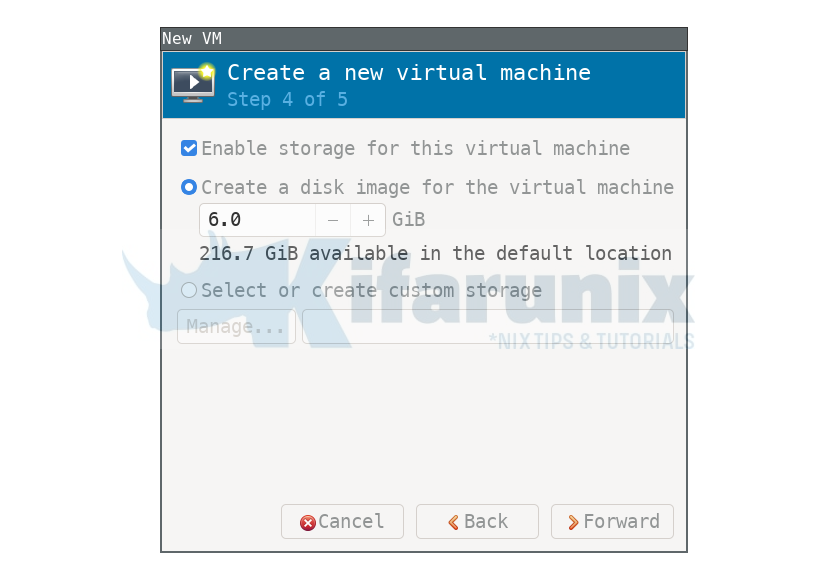
- Create a disk image for the virtual machine;
- Set the name of the VM and click “Customize Configuration before install“
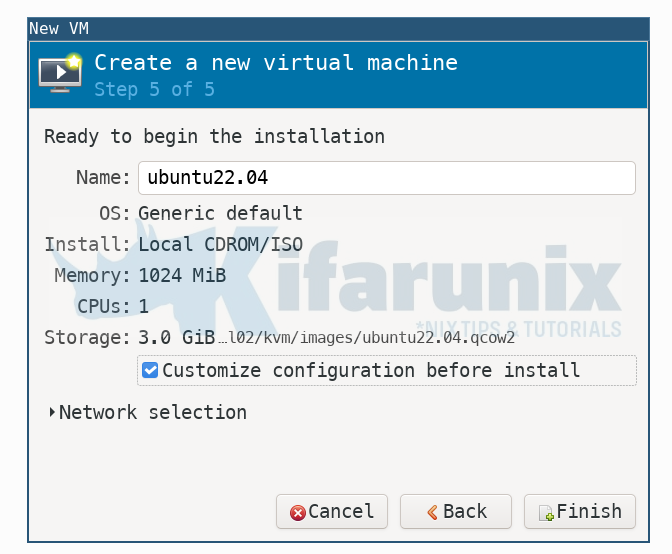
- Click Finish.
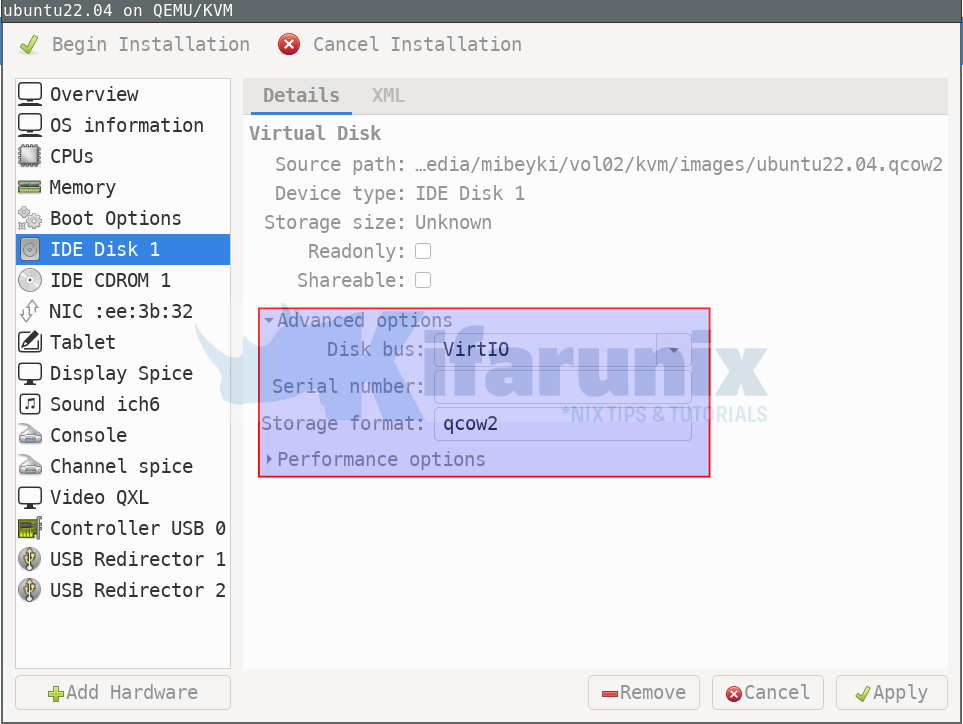
- Change the disk bus type from IDE to VirtIO and apply the changes.
- Change network interface device model to VirtIO as well;
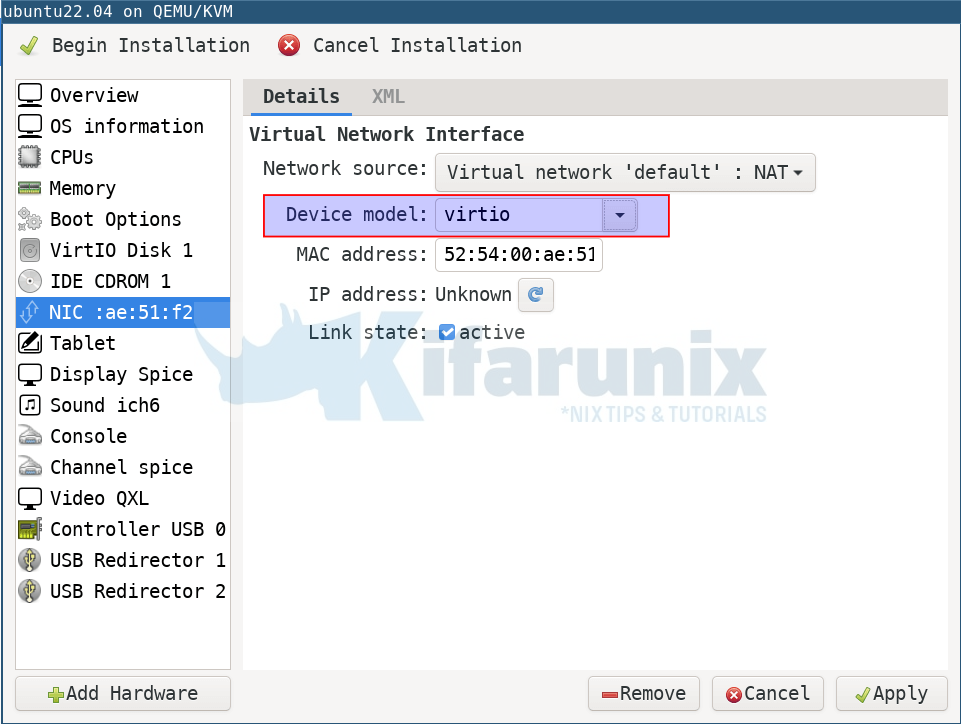
- Apply the changes and click Begin the installation.
- Proceed with the VM installation as usual…
- Under storage configuration, you can use entire disk and set it as lvm group.
- create usernames and install SSH
- and proceed with vm setup on KVM.
Install Cloud-init Package on the Virtual Machine
Cloud-init is the industry standard multi-distribution method for cross-platform cloud instance initialization. It enables you to resize root partition on boot automatically, access instance using ssh public key, update vm hostname to match the name given and process user data and other metadata on the vm.
Once the vm boots, login and install cloud-init package;
sudo apt install cloud-init/etc/cloud/cloud.cfg is the cloud-init configuration file and this is how it looks by default;
cat /etc/cloud/cloud.cfg# The top level settings are used as module
# and system configuration.
# A set of users which may be applied and/or used by various modules
# when a 'default' entry is found it will reference the 'default_user'
# from the distro configuration specified below
users:
- default
# If this is set, 'root' will not be able to ssh in and they
# will get a message to login instead as the default $user
disable_root: true
# This will cause the set+update hostname module to not operate (if true)
preserve_hostname: false
# If you use datasource_list array, keep array items in a single line.
# If you use multi line array, ds-identify script won't read array items.
# Example datasource config
# datasource:
# Ec2:
# metadata_urls: [ 'blah.com' ]
# timeout: 5 # (defaults to 50 seconds)
# max_wait: 10 # (defaults to 120 seconds)
# The modules that run in the 'init' stage
cloud_init_modules:
- migrator
- seed_random
- bootcmd
- write-files
- growpart
- resizefs
- disk_setup
- mounts
- set_hostname
- update_hostname
- update_etc_hosts
- ca-certs
- rsyslog
- users-groups
- ssh
# The modules that run in the 'config' stage
cloud_config_modules:
- snap
- ssh-import-id
- keyboard
- locale
- set-passwords
- grub-dpkg
- apt-pipelining
- apt-configure
- ubuntu-advantage
- ntp
- timezone
- disable-ec2-metadata
- runcmd
- byobu
# The modules that run in the 'final' stage
cloud_final_modules:
- package-update-upgrade-install
- fan
- landscape
- lxd
- ubuntu-drivers
- write-files-deferred
- puppet
- chef
- mcollective
- salt-minion
- reset_rmc
- refresh_rmc_and_interface
- rightscale_userdata
- scripts-vendor
- scripts-per-once
- scripts-per-boot
- scripts-per-instance
- scripts-user
- ssh-authkey-fingerprints
- keys-to-console
- install-hotplug
- phone-home
- final-message
- power-state-change
# System and/or distro specific settings
# (not accessible to handlers/transforms)
system_info:
# This will affect which distro class gets used
distro: ubuntu
# Default user name + that default users groups (if added/used)
default_user:
name: ubuntu
lock_passwd: True
gecos: Ubuntu
groups: [adm, audio, cdrom, dialout, dip, floppy, lxd, netdev, plugdev, sudo, video]
sudo: ["ALL=(ALL) NOPASSWD:ALL"]
shell: /bin/bash
network:
renderers: ['netplan', 'eni', 'sysconfig']
# Automatically discover the best ntp_client
ntp_client: auto
# Other config here will be given to the distro class and/or path classes
paths:
cloud_dir: /var/lib/cloud/
templates_dir: /etc/cloud/templates/
package_mirrors:
- arches: [i386, amd64]
failsafe:
primary: http://archive.ubuntu.com/ubuntu
security: http://security.ubuntu.com/ubuntu
search:
primary:
- http://%(ec2_region)s.ec2.archive.ubuntu.com/ubuntu/
- http://%(availability_zone)s.clouds.archive.ubuntu.com/ubuntu/
- http://%(region)s.clouds.archive.ubuntu.com/ubuntu/
security: []
- arches: [arm64, armel, armhf]
failsafe:
primary: http://ports.ubuntu.com/ubuntu-ports
security: http://ports.ubuntu.com/ubuntu-ports
search:
primary:
- http://%(ec2_region)s.ec2.ports.ubuntu.com/ubuntu-ports/
- http://%(availability_zone)s.clouds.ports.ubuntu.com/ubuntu-ports/
- http://%(region)s.clouds.ports.ubuntu.com/ubuntu-ports/
security: []
- arches: [default]
failsafe:
primary: http://ports.ubuntu.com/ubuntu-ports
security: http://ports.ubuntu.com/ubuntu-ports
ssh_svcname: ssh
In most cases, the default settings works fine.
If you want to update hosts file to use the name of the vm, add the line manage_etc_hosts: true to cloud.cfg file.
Create Custom Linux Image into OpenStack
Copy the Image to OpenStack
Shutdown the virtual machine from the virt-manager or from command line.
On the host running KVM, you can find the image details;
qemu-img info /media/kifarunix/vol02/kvm/images/ubuntu22.04.qcow2image: /media/kifarunix/vol02/kvm/images/ubuntu22.04.qcow2
file format: qcow2
virtual size: 6 GiB (6442450944 bytes)
disk size: 3.73 GiB
cluster_size: 65536
Format specific information:
compat: 1.1
lazy refcounts: true
refcount bits: 16
corrupt: false
Copy its image to OpenStack node;
rsync -avP path/vm-name.qcow2 username@openstack:You can now either create OpenStack Image from Horizon or create it on command line.
Create Custom Linux Image on OpenStack Horizon
- Login to horizon as administrator;
- Select the project, e.g admin project and navigate to Project > Compute > Images > +Create Image or Admin > Compute > Images > +Create Image.
- Under Image details;
- Image Name
- Image Description
- Image Source > Choose the image from your host or kvm hosts as long as you can access the image.
- Enter the image format e.g QCOW2 (Use the qemu-img info command to confirm, refer above)
- Define image requirements, we only set minimum disk and RAM here.
- Choose your appropriate image visibility. We leave it as public.
- Protected: No
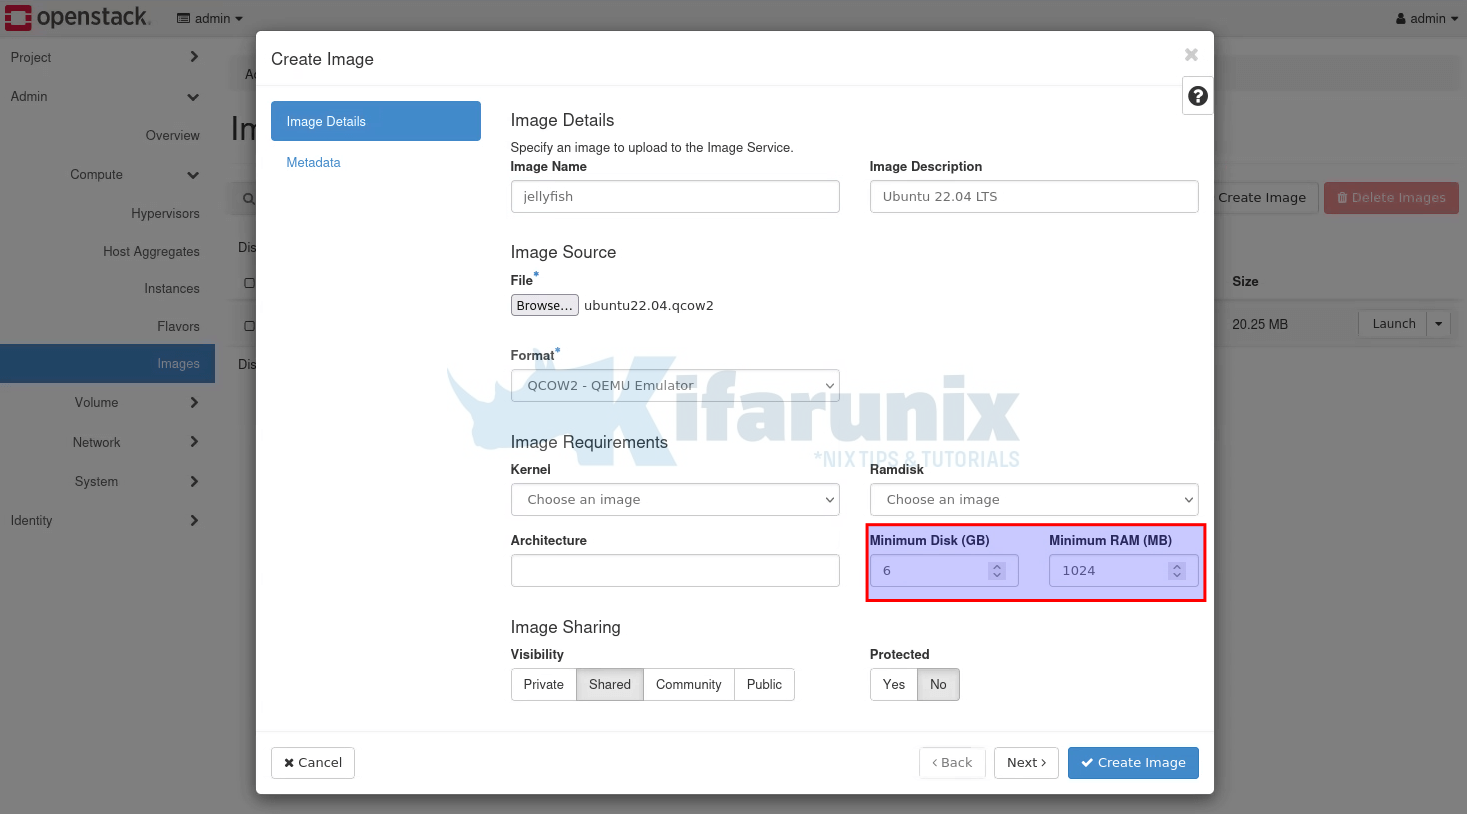
- Under Metadata, we left the defaults.
- Click Create Image.
After a short while, the image should now be created and available under images;

Create Custom Linux Image on OpenStack CLI
Shutdown the virtual machine and copy its image to OpenStack node;
rsync -avP path/vm-name.qcow2 username@openstack:If you are CLI centric, you can create custom Linux image on OpenStack CLI using openstack image create or glance image-create commands;
openstack image create -husage: openstack image create [-h] [-f {json,shell,table,value,yaml}] [-c COLUMN] [--noindent] [--prefix PREFIX] [--max-width <integer>] [--fit-width] [--print-empty]
[--id <id>] [--container-format <container-format>] [--disk-format <disk-format>] [--min-disk <disk-gb>] [--min-ram <ram-mb>]
[--file <file> | --volume <volume>] [--force] [--progress] [--sign-key-path <sign-key-path>] [--sign-cert-id <sign-cert-id>]
[--protected | --unprotected] [--public | --private | --community | --shared] [--property <key=value>] [--tag <tag>] [--project <project>]
[--import] [--project-domain <project-domain>]
<image-name>
Example;
openstack image create \
	--container-format bare \
	--disk-format qcow2 \
	--file ./ubuntu22.04.qcow2 \
	--progress \
	--public \
	--project admin \
	jellyfish
Sample output;
[=============================>] 100%
+------------------+-----------------------------------------------------------------------------------------------------------------------------------------------+
| Field            | Value                                                                                                                                         |
+------------------+-----------------------------------------------------------------------------------------------------------------------------------------------+
| container_format | bare                                                                                                                                          |
| created_at       | 2022-10-11T21:17:13Z                                                                                                                          |
| disk_format      | qcow2                                                                                                                                         |
| file             | /v2/images/ba33ea97-710d-4c14-9283-18f27de74e56/file                                                                                          |
| id               | ba33ea97-710d-4c14-9283-18f27de74e56                                                                                                          |
| min_disk         | 0                                                                                                                                             |
| min_ram          | 0                                                                                                                                             |
| name             | jellyfish                                                                                                                                     |
| owner            | a95d364c2b564742b1d3e7da4c8e294e                                                                                                              |
| properties       | os_hidden='False', owner_specified.openstack.md5='', owner_specified.openstack.object='images/jellyfish', owner_specified.openstack.sha256='' |
| protected        | False                                                                                                                                         |
| schema           | /v2/schemas/image                                                                                                                             |
| status           | queued                                                                                                                                        |
| tags             |                                                                                                                                               |
| updated_at       | 2022-10-11T21:17:13Z                                                                                                                          |
| visibility       | public                                                                                                                                        |
+------------------+-----------------------------------------------------------------------------------------------------------------------------------------------+
To use glance image-create;
glance image-create -husage: glance [--version] [-d] [-v] [--get-schema] [-f] [--os-image-url OS_IMAGE_URL] [--os-image-api-version OS_IMAGE_API_VERSION] [--profile HMAC_KEY]
[--os-region-name OS_REGION_NAME] [--os-auth-token OS_AUTH_TOKEN] [--os-service-type OS_SERVICE_TYPE] [--os-endpoint-type OS_ENDPOINT_TYPE] [--insecure]
[--os-cacert <ca-certificate>] [--os-cert <certificate>] [--os-key <key>] [--timeout <seconds>] [--collect-timing] [--os-auth-type <name>]
[--os-auth-url OS_AUTH_URL] [--os-system-scope OS_SYSTEM_SCOPE] [--os-domain-id OS_DOMAIN_ID] [--os-domain-name OS_DOMAIN_NAME]
[--os-project-id OS_PROJECT_ID] [--os-project-name OS_PROJECT_NAME] [--os-project-domain-id OS_PROJECT_DOMAIN_ID]
[--os-project-domain-name OS_PROJECT_DOMAIN_NAME] [--os-trust-id OS_TRUST_ID] [--os-default-domain-id OS_DEFAULT_DOMAIN_ID]
[--os-default-domain-name OS_DEFAULT_DOMAIN_NAME] [--os-user-id OS_USER_ID] [--os-username OS_USERNAME] [--os-user-domain-id OS_USER_DOMAIN_ID]
[--os-user-domain-name OS_USER_DOMAIN_NAME] [--os-password OS_PASSWORD]
<subcommand> ...
Once the creation is done, you can list available images;
openstack image list+--------------------------------------+--------------------------+--------+
| ID | Name | Status |
+--------------------------------------+--------------------------+--------+
| 5cad7ba3-851b-4b87-a762-8506cf803965 | cirros-0.5.2-x86_64-disk | active |
| ba33ea97-710d-4c14-9283-18f27de74e56 | jellyfish | active |
+--------------------------------------+--------------------------+--------+
And that is it.
You should now be able to use the custom image to launch an instance.
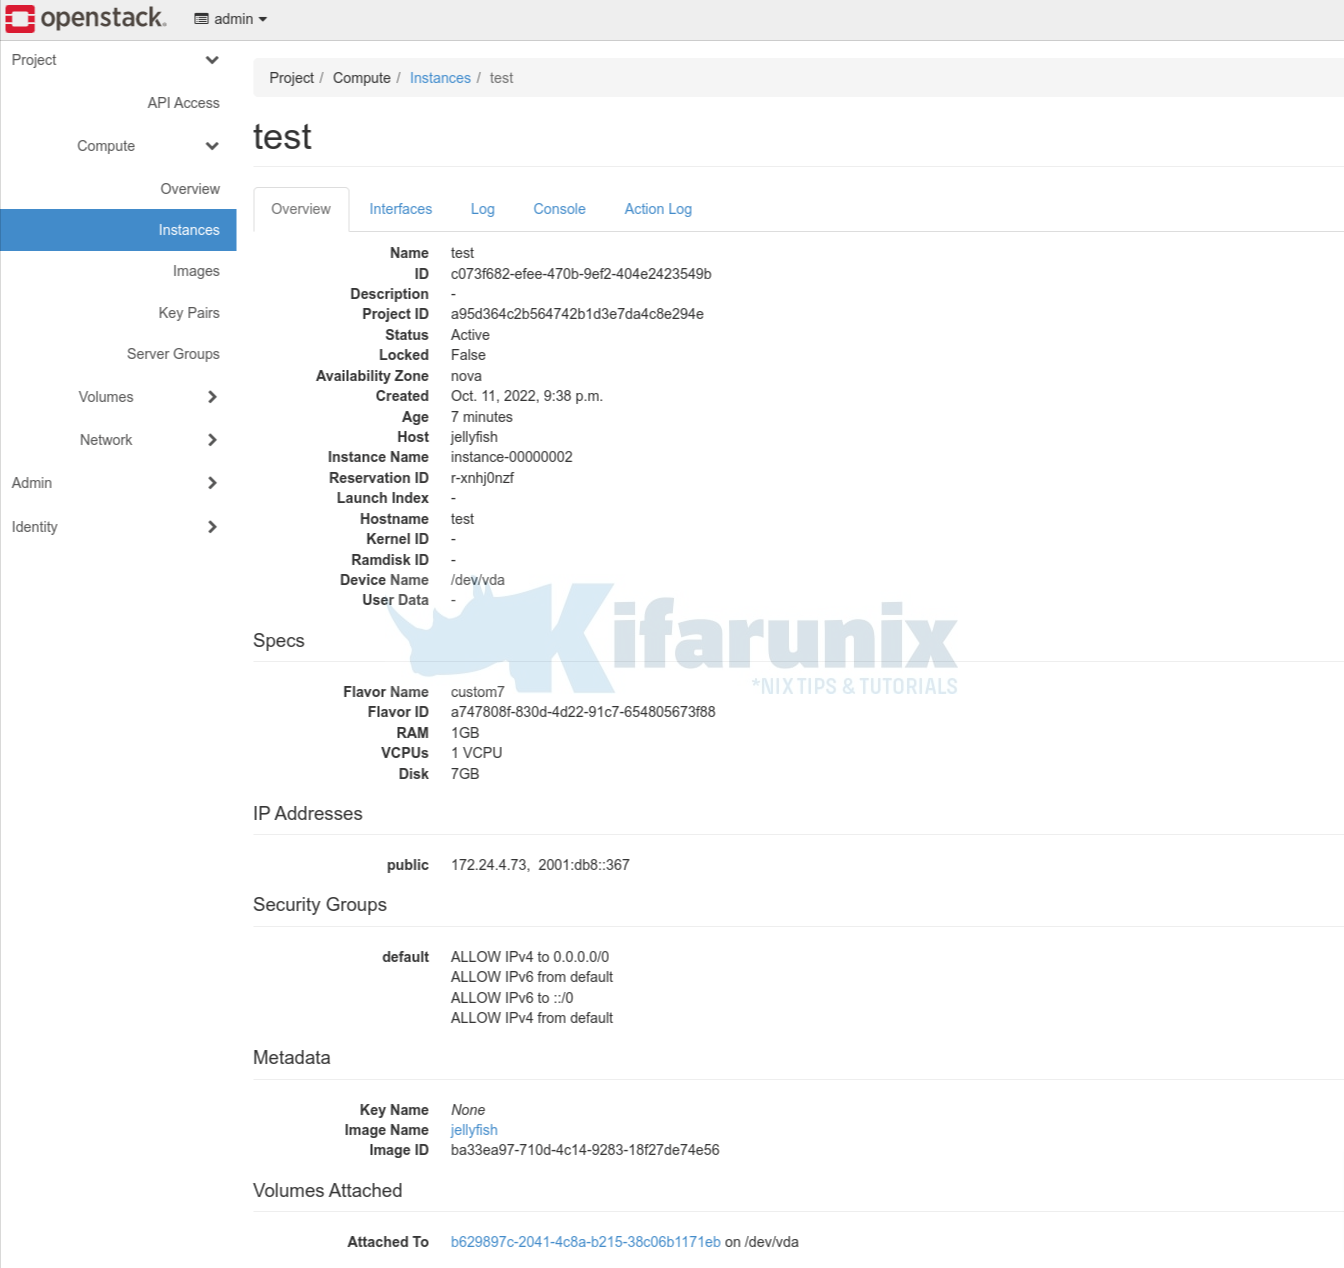
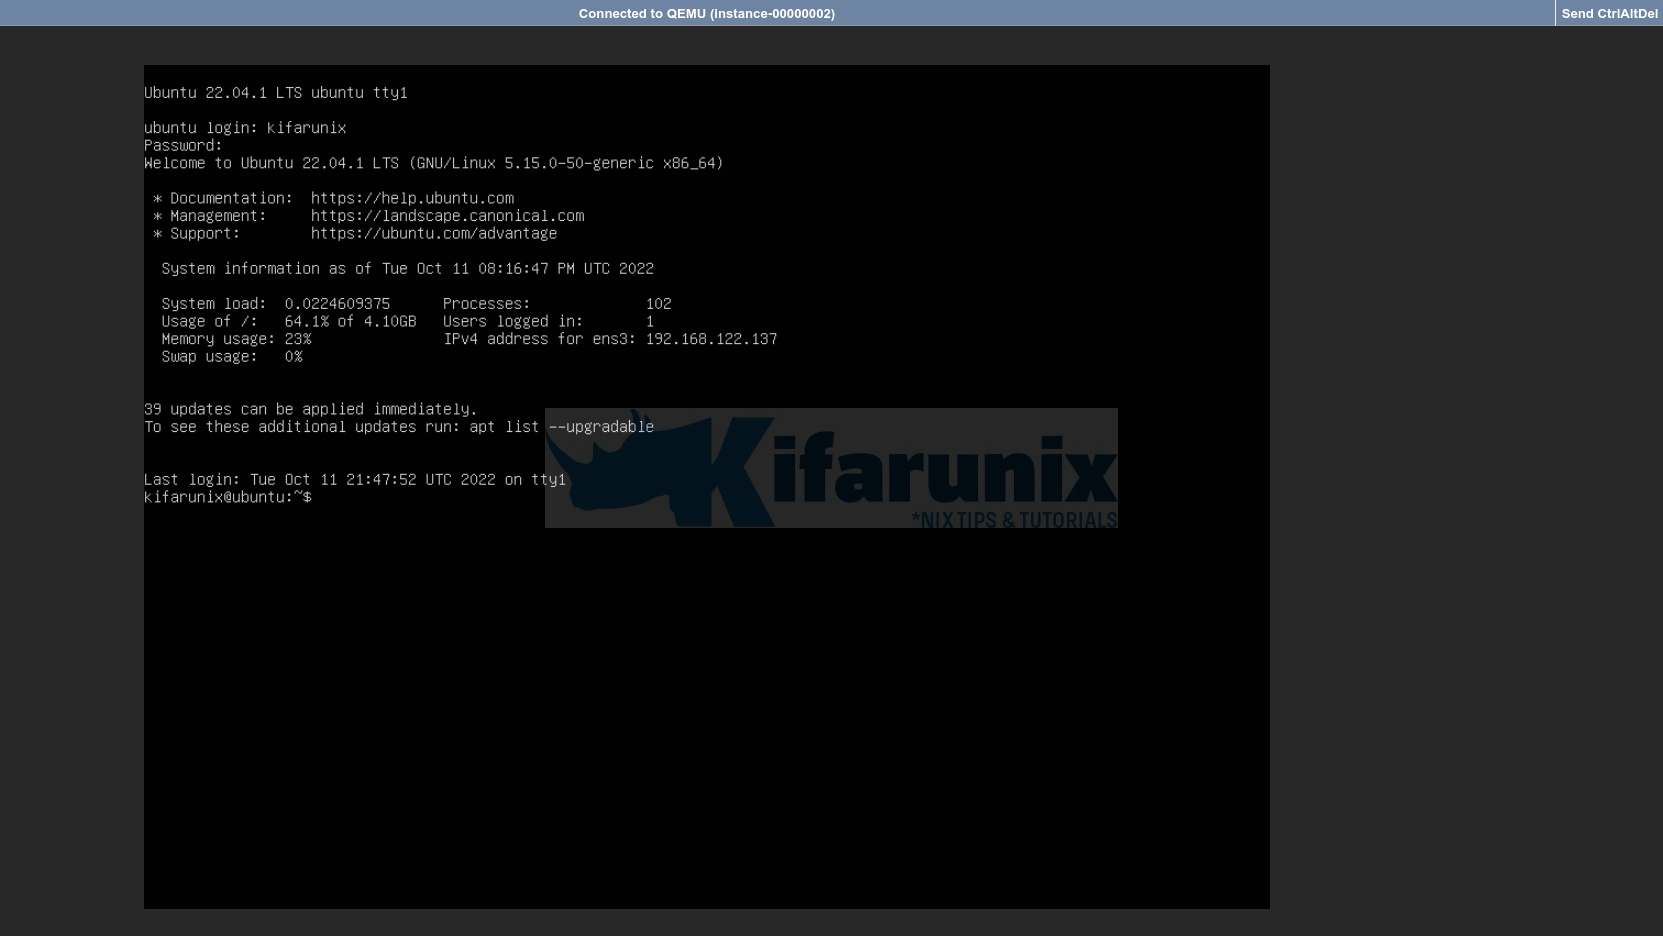
Note, the flavor assigned to the instance must be slightly bigger than the virtual size of the image.
If you want to delete the image, just do it from the horizon or simply use the command line;
openstack image delete <ID>That marks the end of our tutorial on creating and uploading custom Linux image into OpenStack.
Other Tutorials
Deploy OpenStack using DevStack on Ubuntu 22.04/Ubuntu 20.04


HI
I congratulate you very good tutorial, but I have the following problem when I want to upload an image from horizon.
from cli upload correctly
TypeError: Cannot read properties of undefined (reading ‘data’)