

新装的ubuntu22.04 (在interserver购买的vps) ,下面步骤直接操作:
apt update
apt install nginx
查看防火墙的可配置文件的选项,便于后面的规则添加:
# ufw app list
Available applications:
  Nginx Full
  Nginx HTTP
  Nginx HTTPS
  OpenSSH
和防火墙的现在的运行状态:
#  ufw status
Status: inactive
inactive表示防火墙并没有启用,把它开启,先开启ssh,别把自己关到外面,再配置web服务器,还没有签证书,只开80端口就可以:
# ufw allow 'OpenSSH'
# ufw allow 'Nginx HTTP'
# ufw enable
Command may disrupt existing ssh connections. Proceed with operation (y|n)? y
Firewall is active and enabled on system startup
# ufw status
Status: active

To                         Action      From
--                         ------      ----
Nginx HTTP                 ALLOW       Anywhere
OpenSSH                    ALLOW       Anywhere
Nginx HTTP (v6)            ALLOW       Anywhere (v6)
OpenSSH (v6)               ALLOW       Anywhere (v6)
这样,防火墙开启了,并且有了2条规则,80和22
查看自己的ip:curl -4 icanhazip.com ,此时可以通过ip访问nginx
下面安装mysql:
apt -y install mysql-server
运行 mysql_secure_installation 安全配置,安全最重要!!!
# mysql_secure_installation

Securing the MySQL server deployment.

Connecting to MySQL using a blank password.

VALIDATE PASSWORD COMPONENT can be used to test passwords
and improve security. It checks the strength of password
and allows the users to set only those passwords which are
secure enough. Would you like to setup VALIDATE PASSWORD component?

Press y|Y for Yes, any other key for No: y

There are three levels of password validation policy:

LOW    Length >= 8
MEDIUM Length >= 8, numeric, mixed case, and special characters
STRONG Length >= 8, numeric, mixed case, special characters and dictionary                  file

Please enter 0 = LOW, 1 = MEDIUM and 2 = STRONG: 1

Skipping password set for root as authentication with auth_socket is used by default.
If you would like to use password authentication instead, this can be done with the "ALTER_USER" command.
See https://dev.mysql.com/doc/refman/8.0/en/alter-user.html#alter-user-password-management for more information.

By default, a MySQL installation has an anonymous user,
allowing anyone to log into MySQL without having to have
a user account created for them. This is intended only for
testing, and to make the installation go a bit smoother.
You should remove them before moving into a production
environment.

Remove anonymous users? (Press y|Y for Yes, any other key for No) : y
Success.


Normally, root should only be allowed to connect from
'localhost'. This ensures that someone cannot guess at
the root password from the network.

Disallow root login remotely? (Press y|Y for Yes, any other key for No) : y
Success.

By default, MySQL comes with a database named 'test' that
anyone can access. This is also intended only for testing,
and should be removed before moving into a production
environment.


Remove test database and access to it? (Press y|Y for Yes, any other key for No) : y
 - Dropping test database...
Success.

 - Removing privileges on test database...
Success.

Reloading the privilege tables will ensure that all changes
made so far will take effect immediately.

Reload privilege tables now? (Press y|Y for Yes, any other key for No) : y
Success.

All done!
直接就可以进入mysql:
# mysql
Welcome to the MySQL monitor.  Commands end with ; or \g.
Your MySQL connection id is 10
Server version: 8.0.39-0ubuntu0.22.04.1 (Ubuntu)

Copyright (c) 2000, 2024, Oracle and/or its affiliates.

Oracle is a registered trademark of Oracle Corporation and/or its
affiliates. Other names may be trademarks of their respective
owners.

Type 'help;' or '\h' for help. Type '\c' to clear the current input statement.

mysql> show databases;
+--------------------+
| Database           |
+--------------------+
| information_schema |
| mysql              |
| performance_schema |
| sys                |
+--------------------+
4 rows in set (0.00 sec)
下面安装php:
apt -y install php8.1-fpm php-mysql
先看看nginx的启动用户是哪个:
# ps -ef|grep nginx
root       73712       1  0 15:15 ?        00:00:00 nginx: master process /usr/sbin/nginx -g daemon on; master_process on;
www-data   73715   73712  0 15:15 ?        00:00:00 nginx: worker process
www-data   73716   73712  0 15:15 ?        00:00:00 nginx: worker process
root       89054   70977  0 15:37 pts/1    00:00:00 grep --color=auto nginx
下面配置nginx的php解析,就使用用户www-data
mkdir -p /var/www/us.moneyslow.com
chown -R www-data:www-data /var/www/us.moneyslow.com
我们只用/etc/nginx/conf.d下的配置文件,其他地方的都删掉:
# rm -rf /etc/nginx/sites-enabled/
# rm -rf /etc/nginx/sites-available/
vi /etc/nginx/conf.d/us.moneyslow.conf
# vi /etc/nginx/conf.d/us.moneyslow.conf
server {
    listen 80;
    server_name us.moneyslow.com;
    root /var/www/us.moneyslow.com;

    index index.html index.htm index.php;

    location / {
        try_files $uri $uri/ =404;
    }

    location ~ \.php$ {
        include snippets/fastcgi-php.conf;
        fastcgi_pass unix:/var/run/php/php8.1-fpm.sock;
     }

    location ~ /\.ht {
        deny all;
    }

}
测试配置文件,并重启nginx:
# nginx -t
nginx: the configuration file /etc/nginx/nginx.conf syntax is ok
nginx: configuration file /etc/nginx/nginx.conf test is successful
# systemctl reload nginx
在/var/www/us.moneyslow.com目录下创建一个php的测试文件:index.php
<?php
phpinfo();
可以访问到php页面:

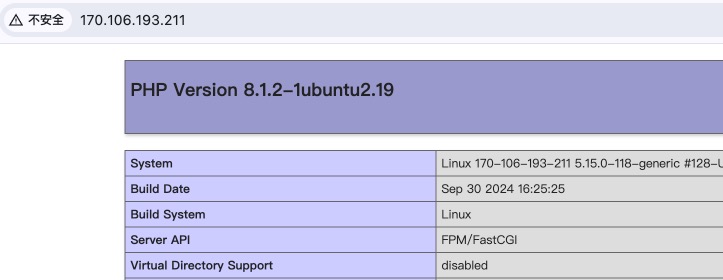
这样基本就ok了,更详细的测试数据库的文档可以参考:
如果进一步安装wordpress,可以参考:
https://www.digitalocean.com/community/tutorials/how-to-install-wordpress-with-lemp-on-ubuntu-22-04